


ロード用のカーボンホイールのメンテナンスをしていましたが 一連の整備が完了したので
ロードレーサーに取り付けます

時間を掛けてメンテナンスをしていましたカーボンホイールです リムは hongfu ハブは bitex
24穴で 4本組 タンジェント イタリアンで組まれています 人がお使いでしたが これをロードに
取り付けます

ロードレーサーはすでにメンテナンススタンドに
乗せています


自転車の方向を逆にしました この方が写真が明るく写ると
思います
特に道具は用意していません もし問題が有るとすれば
ブレーキ関係でしょうか


チェーンレストを使っていますが それを外しました

ホイールを入れます


ホイールがブレーキゴムに当ります これは有る程度
予想していました
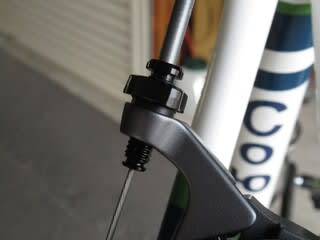

アジャストボルトをここから一杯下げても解決しないでしょう
ブレーキワイヤーを外しましょう

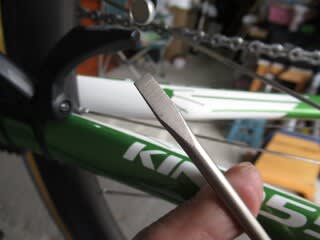
ワイヤーのクランプボルトには 5mm のアーレンキーを
使います

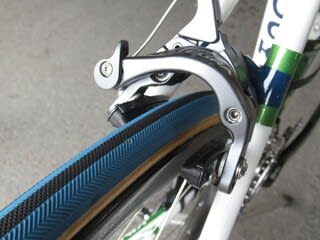
ブレーキを開放し ホイールを奥まで入れました

ホイールが入ったので 次の作業に掛かります


ブレーキ関係の調整は後にして 変速機の作動確認を行います


トップ側とロー側のプーリー位置の微調整 ワイヤーの張り調整を
やりました これは実際に走ってみてもう一度やる必要は有るでしょう
この自転車結構シビアです

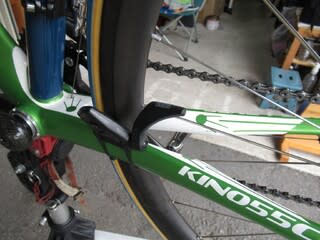
スピードセンサーのマグネットを取り付けます


重量の有るバルブの反対側が良いでしょう
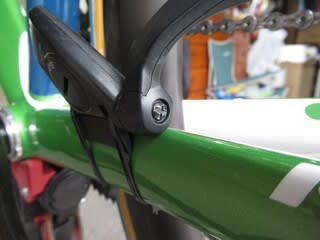
センサーの位置調整 プラスネジに似た物が使われていますが
この浅いプラスに合うドライバーが有りません マイナスを
使う方が確実です

もう少しマグネットに寄せたいですが 構造上この辺が
無難です 感知はしています 今日はここまでにします

今迄使っていた リム ARAYA ADX-1 に合せて調整して有りますから 巾の広い今回のリムが
そのまま使えるとも思っていませんでした 次回はブレーキシューをカーボン用に交換して
やります またお付き合い下さい
ロードレーサーに取り付けます
時間を掛けてメンテナンスをしていましたカーボンホイールです リムは hongfu ハブは bitex
24穴で 4本組 タンジェント イタリアンで組まれています 人がお使いでしたが これをロードに
取り付けます
ロードレーサーはすでにメンテナンススタンドに
乗せています
自転車の方向を逆にしました この方が写真が明るく写ると
思います
特に道具は用意していません もし問題が有るとすれば
ブレーキ関係でしょうか
チェーンレストを使っていますが それを外しました
ホイールを入れます
ホイールがブレーキゴムに当ります これは有る程度
予想していました
アジャストボルトをここから一杯下げても解決しないでしょう
ブレーキワイヤーを外しましょう
ワイヤーのクランプボルトには 5mm のアーレンキーを
使います
ブレーキを開放し ホイールを奥まで入れました
ホイールが入ったので 次の作業に掛かります
ブレーキ関係の調整は後にして 変速機の作動確認を行います
トップ側とロー側のプーリー位置の微調整 ワイヤーの張り調整を
やりました これは実際に走ってみてもう一度やる必要は有るでしょう
この自転車結構シビアです
スピードセンサーのマグネットを取り付けます
重量の有るバルブの反対側が良いでしょう
センサーの位置調整 プラスネジに似た物が使われていますが
この浅いプラスに合うドライバーが有りません マイナスを
使う方が確実です
もう少しマグネットに寄せたいですが 構造上この辺が
無難です 感知はしています 今日はここまでにします
今迄使っていた リム ARAYA ADX-1 に合せて調整して有りますから 巾の広い今回のリムが
そのまま使えるとも思っていませんでした 次回はブレーキシューをカーボン用に交換して
やります またお付き合い下さい


※コメント投稿者のブログIDはブログ作成者のみに通知されます