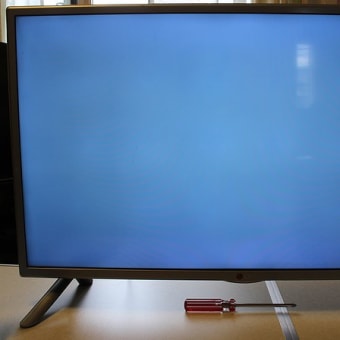
The backlight strip that we had arranged to replace the cloudy backlight lens at the last backlight check has arrived. Let's replace the backlight.
↓届いたバックライトストリップ。

↑Backlight strip received.
AとBが有るが、どちらも同じもので穴はA/B両対応で空いてる。
There are two types, A and B, but both are the same and have holes for both A and B.
早速バックライト迄ばらす。ばらし方は、下にある過去のブログリンク参照。
We will immediately disassemble it to the backlight. For how to disassemble the backlight, please refer to the past blog links below.
↓バックライトが外せるところまで分解。

↑Disassemble to the point where the backlight can be removed.
↓コネクタは矢印の方向から摘まんで、上側(写真手前側)に持ち上げて外す。

↑Remove the connector by picking it up from the direction of the arrow and lifting it upward (toward the front in the photo).
実は、他の人の動画等を見ても、コネクタの外し方が判らず、摘まんで、リード線側(写真左側)へ引っ張ったが外れず。
Actually, I couldn't figure out how to remove the connector even after watching other people's videos, etc. I picked it up and pulled it toward the lead wire side (left side in the photo), but it didn't come off.
結局、ストリップを剥がしてから、コネクタの下側の隙間にカッターの刃を入れて持ち上げて外す事が出来た。
After peeling off the strips, I was able to remove the connector by inserting the cutter blade into the gap on the underside of the connector and lifting it up.
↓ストリップをヘラで外す。

↑Remove the strips with a spatula.
↓裏から見たコネクタの構造。摘まむと下の爪がロックから外れる構造だった。

↑Structure of the connector seen from the back. The bottom pawl is released from the lock when it is picked up.
↓LEDバックライトストリップを交換した所。

↑The LED backlight strip has been replaced.
ここで一旦点灯試験をしてみるが、なんと点灯しない!初期不良か?!
I tried a lighting test once here, but to my surprise, it does not light up! Is it an early failure?
古いストリップで点くかと1番下のストリップのコネクタを差替えると無事に点灯。
I replaced the connector on the bottom strip to see if the old strip would light up, and it did.
↓新しいのに戻して、色々と触ってみると、コネクタ部分に触ると点灯した。

↑I put it back in the new one and touched it in various ways, and it lit up when I touched the connector part.
↓コネクタ部分を良く見ると新旧で、中のピンの長さが違う。(上が旧、下が新)

↑When I looked closely at the connector part, I found that the length of the pins inside the old one and the new one are different (the top is the old one, the bottom is the new one).
どうやら外す時にリード方向に引っ張ったりしたので少しコンタクトもずれていた様で、リードをコネクタ側に押し込んでやると、問題なさそうだ。
It seems that the contacts were also slightly misaligned because of pulling in the direction of the leads when removing the connector, and after pushing the leads toward the connector, it looks fine.
↓散光板は接着剤の汚れが付いたままだが、取り敢えず組み上げる事にする。

↑The diffuser plate is still covered with glue stains, but I decided to assemble it anyway.
↓一通り組み上げて動作試験。無事に光の点は無くなった。

↑I assembled it and tested the operation. No more light spots.
ただ、散光板の接着剤の汚れによるムラは、テレビを見てる分にはあまり気に成らないが、ここにあると認識した後だと、その箇所がやっぱり気に成る感じだ。
However, the unevenness caused by the stain of the glue on the diffuser plate does not bother me so much when I am watching TV, but after I recognized that it was here, I was still bothered by the spot.
何とか散光板の接着剤汚れも対処しなければ、、、、
I have to deal with the glue stains on the diffuser somehow. 、、、、
2024.04.11 (5/15 UP)
① LG 32型TV 修理 ① LG 32型TV 修理 32LB5810 バックライトレンズ取付失敗編
② LG 32型TV 修理 32LB5810 失敗原因確認編
③ LG 32型TV 修理 32LB5810 バックライト交換編
④ LG 32型TV 修理 32LB5810 リモコン修理編
⑤ LG 32型TV 修理 32LB5810 散光板修正編
⑥LG 32型TV 2台目修理 32LB57YM
① LG 32inch TV repair 32LB5810 Backlight lens installation failure
② LG 32inch TV repair 32LB5810 Confirm of cause of failure
③ LG 32inch TV repair 32LB5810 Backlight replacement
④ LG 32inch TV repair 32LB5810 Remote control repair
⑤ LG 32inch TV repair 32LB5810 Diffuser plate repair
⑥LG 32inch TV repair 32LB57YM


