前回、牛乳パックやオレンジジュースの紙パックを利用して、
紙すきの試作をしてみましたが
今回使用したのはクリーム色の『ペーパーフォルダー』です。
ペーパーフォルダーの場合、牛乳パックに付いている様な防水シートがなく、
紙質も柔らかい為、作業の手間が省けます。
紙を細かくしたものを水に一晩漬けてたっぷりの水を入れ、ミキサーで撹拌します。
Last time, I tried paper making using egg cartons and orange juice cartons.
This time, I tried using crème-colored manila folders instead.
Manila folders are easier to work with because they don’t have a waterproof sheet like milk cartons do and they are made from softer paper than that used to make milk cartons.
Tear the paper into little pieces and then soak the paper in water overnight.
Pour the soaked paper into a blender, add plenty of water, and then churn in the blender.

今回使用した紙すき用ネットはMさんお手製で、網戸の廃材です。
The net used for paper making this time was hand-made by M-san using discarded screen door mesh.

薄ーく、一定量の紙をすくうのには少し練習が必要ですね。。。
軽く指で押さえて水を切ります。
Scooping up very thin, uniform layers of paper takes practice…
Using your fingers, gently press on the paper scooped up by the net to squeeze out the water.

ネットから剥がして生地に挟み、よく水切りをします。
上からタオルで押さえて、更にアイロンをかけて乾かします。
Peel the paper away from the net, slip the paper inside some cloth, and then dry well.
Place a towel on the paper, use the towel to press down on the paper, and then use an iron to further dry the paper.

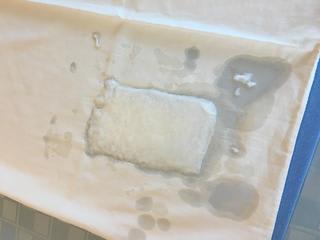
しっかりと水が切れて、プレスした状態。
This is what the paper looks like after it has been completely dried and pressed.

ざるに入れて、戸外にしばらく置いておきました。
I placed the paper in a strainer then left it out in the open air for a little while.

ほぼ乾いています!
It is nearly dry!

今後は他の紙を使ったり、水の量を調整したりしながら
より良い紙作りに挑戦して行きますね。
その前にもう少ししっかりした紙すきネットを作らなくっちゃ!!?
Next, let’s try using different paper and adjusting the amount of water used to make even better paper.
Before that, maybe I need to make a paper making net that is just a little stronger ?!?
by tomoko


