gooブログはじめました!

写真付きで日記や趣味を書くならgooブログ

Porsche Coding using PIWIS Development Mode

2020-06-17 17:04:14 | 日記
Obd2tool.com here provides some coding procedures using Porsche PIWIS Tester.

To code you need to be in development (E) mode, which is unfortunately in German. I’ve made a start at doing some translations courtesy of Google Translate below.

How to Enable OEM Porsche Tester III Developer Mode?

If you play around in simulation mode, the car it uses is a 991 coupe. Whilst not exactly the same as the 981, it’s very close. It’s a good start at poking around the software to see where things are without having to be connected to the car.

Some general phrases

Codierung Anpassungen
Coding adaptations

Keine Eintrage gesetzt
No value set

Codierwert or kodierwert
Coding value

Wert
Value

Verbaut
Installed

Geandert
Changed

aktiv
Active

Inaktiv
Inactive

Einheit
Unit

Geandert
Changed

Schreiben
Save

Ja
Yes

Nein
No

MCR = Machine-readable Coding Rules

Manuelle Codierung ohne MCR Regeln (Entwicklung)
Manual coding without MCR rules (development)

Manuelle Codierung von Bin?rdaten (Entwicklung)
Manual coding of binary data (development)

Manuelle Codierung mit MCR Regeln
Manual coding with MCR rules

Automatische codierung
Automatic coding

Rucksetzen auf werkeinstellungen
Reset to factory settings

geben sie bitte fahrzeugdaten ein
Please enter vehicle data

werte andern und mit speichern
change values and save with

weiter zum nachsten screenmit
continue to the next screen with

coderung lauft
coding is running

codierung von steuerger?ten
coding of control units

Control Module names

waehlebel
Gear selector lever

kombiinstrument
instrument cluster

kombilenkstockschaltermodul
steering wheel module

stoppuhr
stopwatch

audio verst?rker
audio amplifier

bedien und klimaeinheit
operation and climate

parkbremse
park brake

reifendruckkontrolle
tyre pressure control

d?mpfersteuerung
damper control

servolenkung
power steering

verdeck synchronisation
convertible top

BCM vorne
Front Body Control Module

BCM hinten
Rear Body Control Module

scheinwerfer links
Left headlight

scheinwerfer rechts
Right headlight

spurwechselassistent
lane change assistant

sitz fahre
driver seat

sitz beifahrer
passenger seat

tuer vorne links
left front door

tuer vorne rechts
right front door

soundaktuator innen
inside sound actuator

DME coding translations

Manual coding without MCR

Bestelltyp
ordered type

getriebetyp
transmission type

innenausstattung
interior decoration

kodierung kodierbyte
coding coding byte

tempomat
cruise control

start/stopp aktiv
start stop active

allradantrieb
all wheel drive

abgasklappen
exhaust flap

getriebedrehzahlsensor
transmission speed sensor

kraftstoff brasilien
fuel brazil??

Gerauschtypisierung Asien
Noise typing Asia

Tankleckdiagnose Feinstleck
Tank leak diagnosis

Kraftstoffmarkt
Fuel market

Kodierung gultig
Coding valid

Landercode
Country code

Nummern
Numbers

Ruckrufaktion
Product recall

Seriennummer Wegfahrsperre
Serial number immobilizer

Tester Produktionsmodul
Tester production module

Verbauvorschrift
Building regulations

Wagen und Verdeckfarbe
Car and top color

Wartungsdienste
Maintenance services

Manual coding with MCR

Landercode
Country code

Modelljahr
Model year

Produktschlussel
Product key

Bordcomputer
On board computer

Anzeigendonfiguration
Show configuration

schlussel
Key

fahrzustand
driving state

Last Mode coding DIY

This is a Porsche PIWIS DIY to recode the car so that it keeps the last driving modes set. I used this primarily to ensure that start/stop initialises OFF each time I start the car rather than me having to push the button each time I start the car.

I don’t know what other modes it keeps for the next time your start the car. It seems to keep the last PASM and seat heating settings, but not SPORT or SPORT PLUS.

Note: Development mode is in German. English translations are after each step to show what you are doing.

I can’t take credit for the procedure. I won’t name who it was, but they know who they are, and thanks for the help.

If you are worried about doing this for the first time on your car, it’s the same in simulation mode, so have a practice here first. Being simulation mode, it won’t let you save it.

To make the coding changes, do the following.

Change the PIWIS mode to E (development)

Open the diagnostics for the car type, then make the following selections.

1. BKE (bedien und klimaeinheit)
operation and climate

2. Codierung Anpassungen
Coding adaptations

3. Manuelle Codierung ohne MCR Regeln (Entwicklung)
Manual coding without MCR rules (development)

4. Select both kodierwert:kodierwert default fahrzustand and kodierwert:kodierwert default fahrzustand last mode
codeword default driving state

5. In Wert (value) dropdown
Change …fahrzustand to “last mode”
Change …fahrzustand last mode to “ja”

6. Click schreiben (save) at bottom.

Coding complete. Exit and change the settings back to V (aftersales) mode if desired.

How to use VXDIAG Subaru SSM3 to Perform Force Sensor Calibration

2020-06-17 17:04:14 | 日記
Why require a Force Sensor Calibration?

After EPB actuator assembly installation is complete (address DTC C0251), the Force Sensor Calibration Mode must be performed with the Subaru Select Monitor following the procedure.

Caution:
Subaru Select Monitor (SSM-III) is required for the Force Sensor Calibration Mode.
Make sure to perform this procedure with the vehicle parked in a horizontal place and to use wheel chocks.

Note:
When the following work is performed, use this function to perform calibration of force sensor in the parking brake actuator.
-Removing the parking brake assembly
-Replacing the electronic parking brake control module
-Adjusting the shoe clearance

After replacing the electronic parking brake control module, if the calibration of the force sensor has not yet been performed, the brake warning light will blink and “Force Sensor Line (abnormal) DTC will be detected.
1). Park the vehicle in a horizontal place using wheel chocks.
2). Connect the VXDIAG Subaru SSM3 scanner
3). On Main Menu display, select Each System Check
4). On System Selection Menu display, select Brake Control System
5). Click the OK button after Parking Brake System is displayed
6). On Maintenance Operation Mode display, select Force Sensor Calibration Mode
7). The confirmation screen of vehicle parking condition and wheel chocks usage is displayed. Confirm the parking condition and wheel chocks,. and click the YES button;
8). A message indicating the calibration mode in progress is displayed on the screen, and the Force Sensor Calibration Mode begins.
9). The message “Force sensor calibration done”
Turn ignition switch OFF is displayed on the screen.
Turn OFF ignition to end the calibration mode.

The Best Toyota Mileage Tool in 2020

2020-06-02 16:51:21 | 日記

Do you know where has top quality Odometer Correction Tool toyota at lowest prices and best services?


There is a wide range of odometer correction products available online on the platform of OBD2TOOL, from Diagnostic Tools, Vehicle Tools, Automobiles & Motorcycles of different brands. Browse through our category-defining {resultNum} odometer correction tool toyota products in a simple, secure, and faster way.


Folllowing is the best toyota mileage tool in 2020


1. OBDSTAR X300 DP PLUS PAD2 A/B/C Configuration Immobilizer+Special Function +Mileage Correction Supports ECU Programming & Toyota Smart Key


2. OBDSTAR ODO MASTER Odometer Correction Tool With Special Functions More Car Models than X300M


Odo Master is a new Android based 5” tablet, specialized for cluster calibration and oil service reset. The device inherits the latest technology from OBDSTAR with various advantages of easy-to-use, wide model coverage, fast operation and durable features which can meet the actual needs of different users such as automobile repair plants and fast repair shops.


3. Digimaster 3 Digimaster III Original Odometer Correction Master Update Online


Digimaster 3 Odometer correction: Vehicle including cars from European, American, Japanese and Korea :Alfa Cadillac Daihatsu Aston Martin Chrysler Honda Audi Ford Hyundai Bentley GM ISUZU BMW Lincoln KIA Benz Lexus Citroen Mazda FIAT Mitsubishi Ferrari Nissan Jaguar Proton Lamborghini SSangYong Lancia Subaru Lotus SUZUKI Man Toyota Opel peugeot Porsche Renault Rover Saab Skoda Volvo Volkswagen Wiesmann Truck Forkman Maserati Other vehicle Motorcycle Truck


4. Best quality Digiprog 3 V4.94 Digiprog III Full Version Mileage Correction Tool Multi Language


Highlights of Best Digiprog III Digiprog3 Odometer Programmer


1.Latest Version: V4.94 2.This is newest version Digiprog3 with most competitive price. 3.With ST01 ST04 Adapter in the Package 4.Supported Languages: Deutsch, English, Espanol, French, Portuguese, Italiano, Turkish, Nederlands 5.Worldwide leader in digital speedo programming and correction software. 6.Quality standards are second to none.


http://forobd2tool.com/wp-content/download/DigiProg%20III/44147-v494-digiprog-iii-added-car-list.pdf


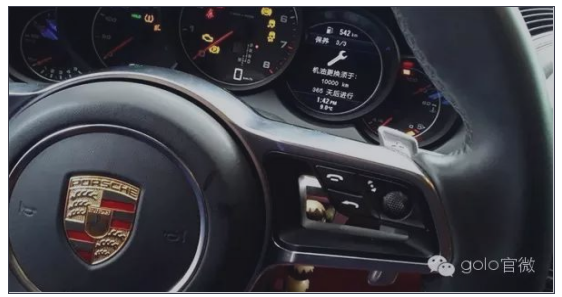
2015 Porsche Cayenne A221 maintenance light zero operation with Launch X431 PRO

2020-06-02 16:39:18 | 日記

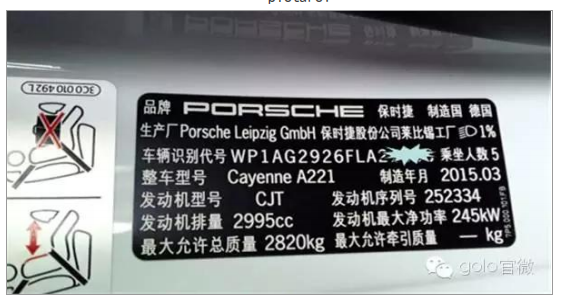
Measured model: Porsche Cayenne A221,2015 models,VIN=WP1AG2926FLA******


Tool:Launch X431 V/LAUNCH X431 V+ PRO3


Steps


  1. Turn on the ignition;

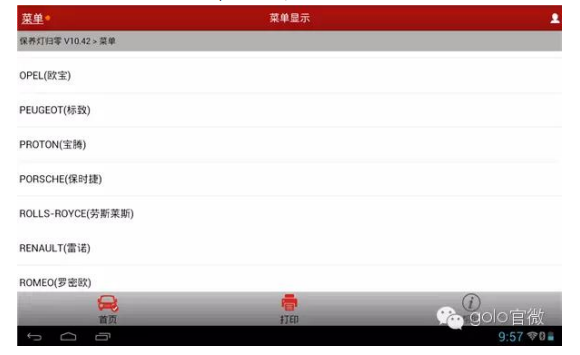
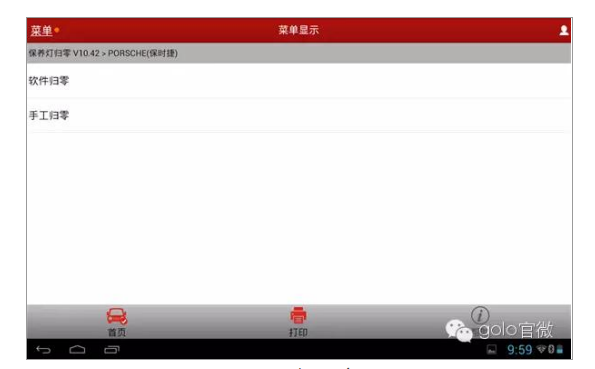
  2. Select “Maintenance light to zero” version V10.42;

  3. Select “PORSCHE”,as shown;


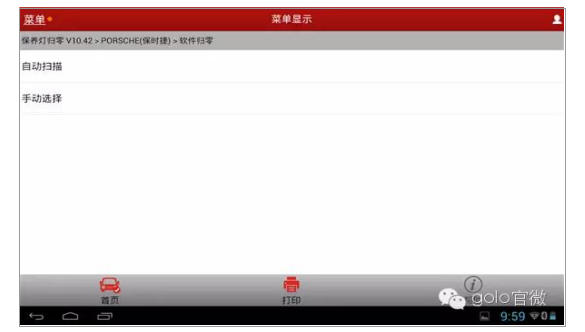
  1. Select “software zero”,asshown;


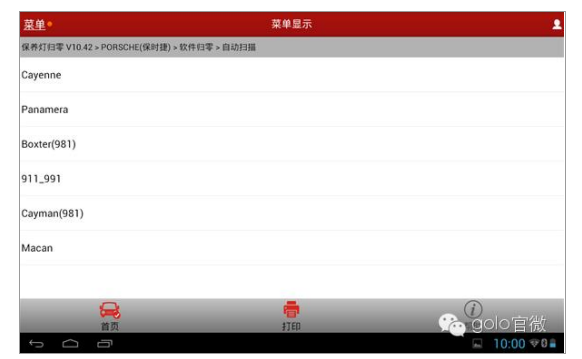
  1. Select “Auto Scan”, as shown


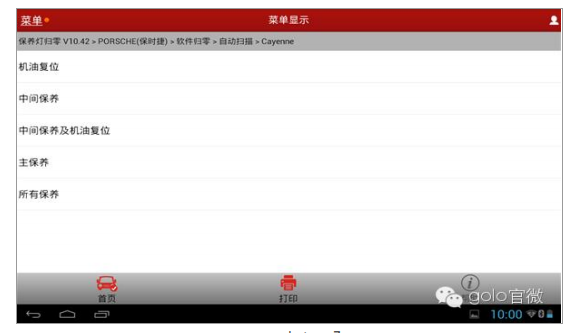
  1. Select “Cayenne” menu, as shown


  1. Select the oil reset, as shown


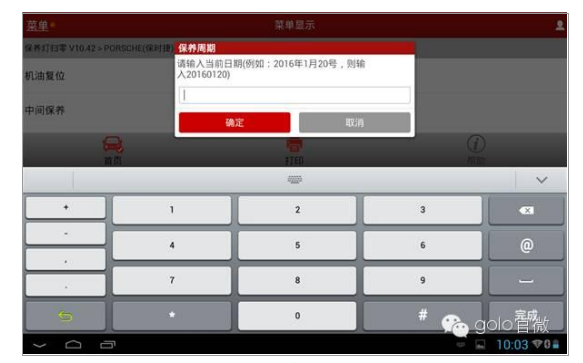
  1. Ask to enter the current date, as shown


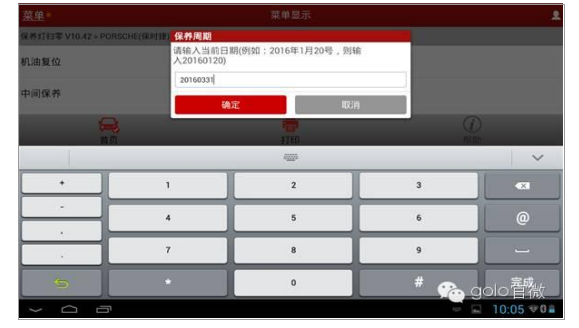
  1. Enter the current maintenance date as required, for example, 20160331, as shown


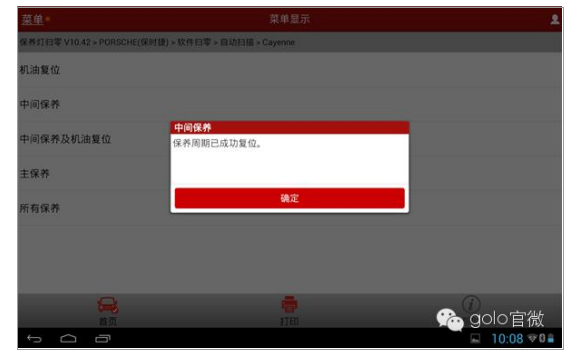
  1. Click OK, prompt “maintenance cycle has been successfully reset”, vehicle maintenance tips disappear.


  1. Close the key, exit the software, maintenance light zero operation steps


to complete.