gooブログはじめました!

写真付きで日記や趣味を書くならgooブログ

How to Enable Chevrolet Impala Afterblow with GM Tech2

2020-10-15 16:26:36 | 日記


Problem:


I am getting a funky smell when I turn the AC on in my 2007 Chevrolet
Impala. I figure the cabin air filter has gotten something bad in it.
Just wondering where to get them and how complicated they are to swap
out.  Does enabling the Afterblow require a GM Tech2 scanner or can it be done with a hand-held? (Actron CP9580 is what I have).


Solution:


Requires a Tech2. You need to able to access and modify the BCM
parameters. Even HPTuners can’t do any of that. Tech II is the only
device I know of that can do it.
However, a dealership should enable it for you for free under the
bumper-to-bumper warranty.  Just tell them you have a “dirty sock” smell
at time when turning on the A/C and they should do it.


This is assuming that the 9th gens have the required hardware “built
in” – not all cars do – some require a “kit” for the added parts needed…
I would assume the 9th gens do, but not 100% sure.


This is a known issue (seems to be more and more common on newer
vehicles) and there is even a TSB that covers it. The TSB addresses the
problem by cleaning the A/C system with some sort of deodorizer (smell
is caused by mold) and then enabling an “afterblow” option, which will
run the interior HVAC fans for a few minutes about 45 minutes after you
park the car (as an attempt to “dry out” condensation from the A/C
system.
I’ve had the TSB done to my 2012 Impala, including enabling the afterblow option.


Regarding the “Afterblow option”, when enabled, here is how they
enable it and the circumstances under which it will operate (TSB
#99-01-39-004C):


Use the following procedure in order to enable the afterblow mode:


Connect the gm tech 2 scan tool.


Turn ON the ignition, with the engine OFF.


Select HVAC Module.


Select HVAC Systems Automatic.


Select Special Functions.


Select HVAC.


Select Afterblow Option.


Select ENTER to enable the afterblow.


When done, use the soft key to save changes.


When afterblow has been enabled by the scan tool the blower motor
will operate between medium and high speed for 4 minutes after the
engine has been turned off.


The following conditions must be met for the HVAC module to operate the afterblow:


The outside air temperature must be at least 21°C (70°F).


The A/C compressor must operate for more than 2 minutes.


The engine must be turned off for at least 45 minutes.


The system voltage must be at least 12 volts.


Hope it helps.


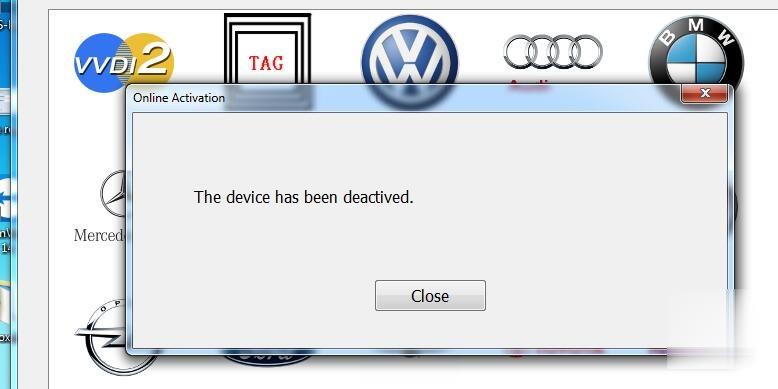
Fly SVCI 2018 error “The device has been deactivated”

2020-10-15 16:26:36 | 日記


Obd2tool.com chief engineer offer the solution to Fly SVCI 2018 error “The device has been deactivated” after the software is installed.


Fly Svci 2018 The Device Has Been Deactivated


Fly-SVCI-2018-error-“The-device-has-been-deactivated”-1 (2)


Step 1. Exit or uninstall all anti-virus application, then free download the following software to reset.


https://mega.nz/folder/RfYhBKCS#c0TifR9kvHk0Neg6LdIFkQ


Step 2. Open “Setting” file to replace the machine serial number and then save it.


Fly-SVCI-2018-error-“The-device-has-been-deactivated”-2 (2)


Step 3. Run ” KeyRecovery_Online”, please follow the instruction to operate.


Good luck!


How to installing Diagnostic Kit EDL v3 software

2020-10-07 12:38:19 | 日記

This chapter provides instructions for installing the John Deere Electronic Data Link v3
(EDL3) drivers and utilities, connecting the EDL3 to a vehicle,
connecting to a wireless network, and testing the connection. It also
provides information on using the EDL3 Explorer utility.


Step 1: Install the EDL3 drivers


Note:If you have previously installed John Deere Service ADVISOR™
software, the EDL3 drivers are already installed on your laptop or PC.
If this is the case, skip this section and proceed to Step 2.


If you are planning to use the EDL3 without Service ADVISOR™
software, or if you need to update the EDL3 drivers that came with
Service ADVISOR™, you will need to install drivers supplied separately


Note:EDL3 drivers may be supplied via download, disk, or USB flash drive.


Remember, you must have Administrator security rights and be logged
in as “Admin” to successfully complete the installation process outlined
in this manual.


To install the drivers on your laptop or PC:
1. Do one of the following:
—Either download the drivers to your hard disk (following instructions supplied separately).or
—Insert either the disk or the USB flash drive containing the drivers into your PC or laptop.
2. Locate and run the following file: EDL3_setup.exe


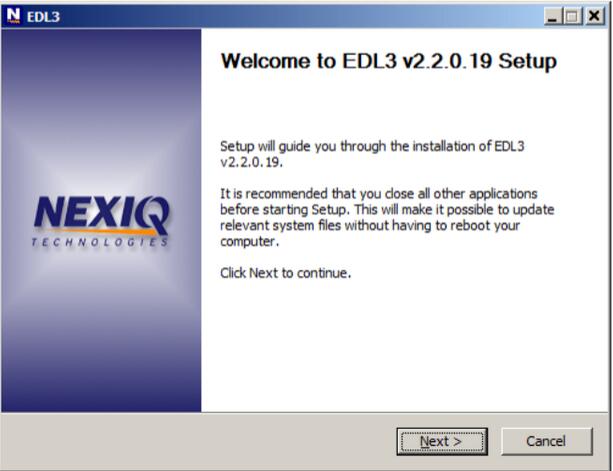
The Welcome to EDL3 Setup screen is displayed


How-to-installing-Diagnostic-Kit-EDL-v3-software-1


3. Carefully read the information displayed on the screen, and follow the recommendations.
4. Click Next


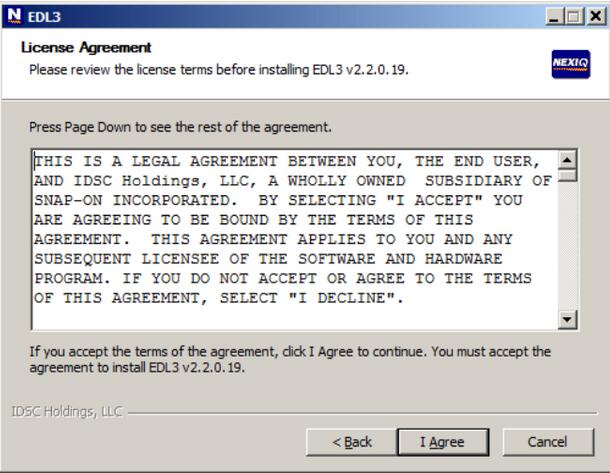
The License Agreement screen is displayed.


How-to-installing-Diagnostic-Kit-EDL-v3-software-2


5. Read all the information on this screen, then click I Agree


Note:If you do not agree to the terms, click Cancel. A message is displayed prompting you to confirm quitting Heavy truck scanner EDL3 Setup. Click Yes to quit.


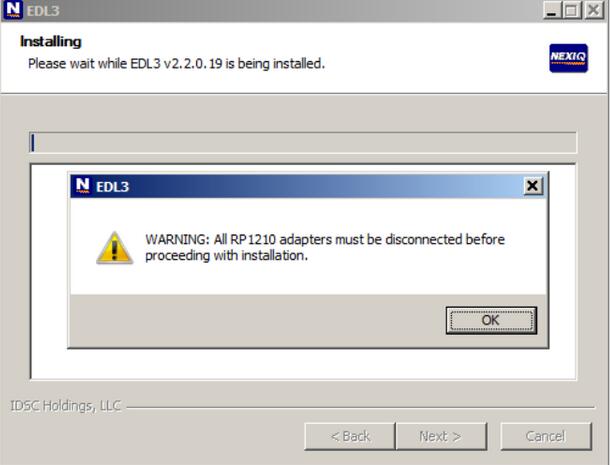
The following warning message is displayed.


How-to-installing-Diagnostic-Kit-EDL-v3-software-3


6. Carefully read the warning message, and disconnect all RP1210
adapters to  which your laptop or PC might be connected prior to
proceeding with the installation.
7. Once you have complied with the requirements of the warning message, click OK


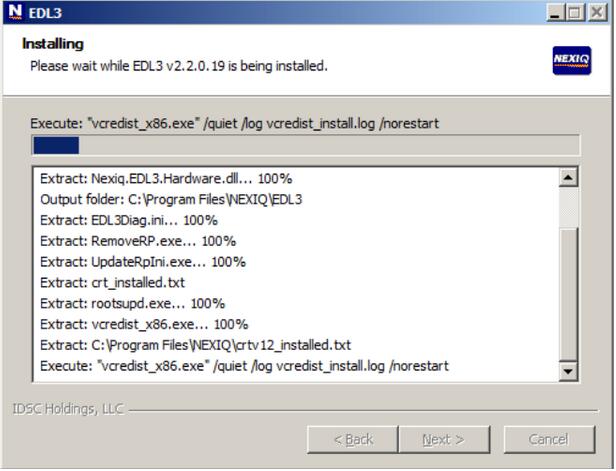
The installation begins and the following screen is displayed.


How-to-installing-Diagnostic-Kit-EDL-v3-software-4


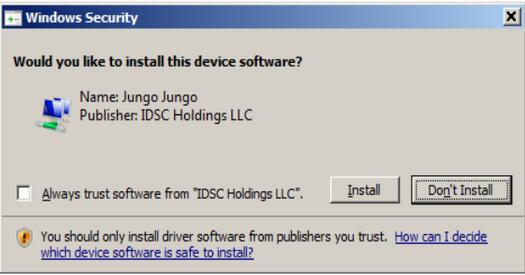
If you are running Windows® 7 or Windows® 8, the following Windows Security dialog may be displayed.


Note:You may want to place a check mark in the Always trust software
from “Jungo LTD” check box. If you leave it unchecked, this dialog may
be displayed more than once


How-to-installing-Diagnostic-Kit-EDL-v3-software-5


Note:You may want to place a check mark in the Always trust software
from “Jungo LTD” check box. If you leave it unchecked, this dialog may
be dis-played more than once.


8. Click Install to continue.
9. Wait briefly while the installation continues


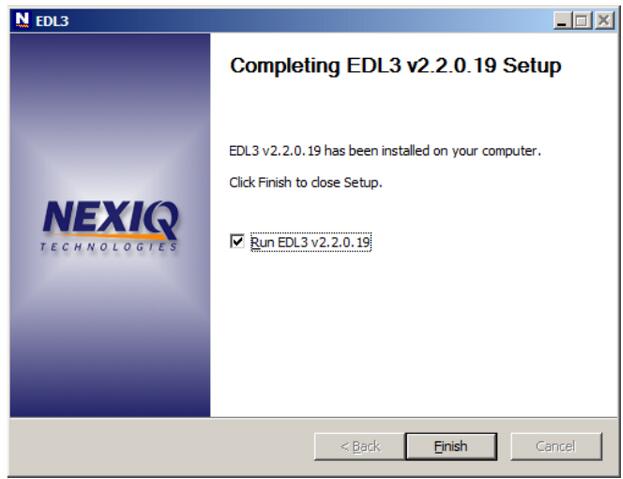
The following completion screen is displayed


How-to-installing-Diagnostic-Kit-EDL-v3-software-6


10. Click Finish


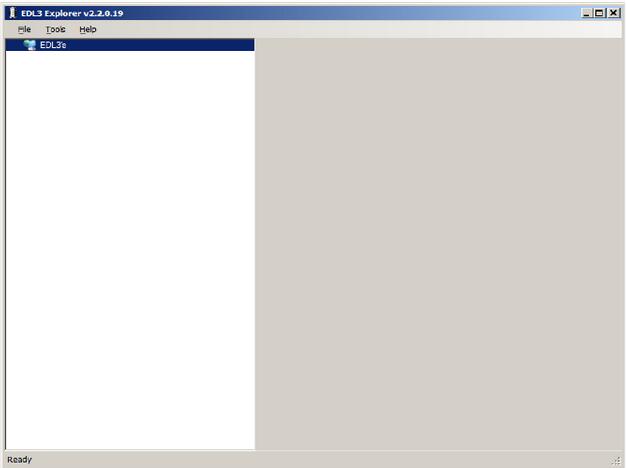
The EDL3 Explorer utility opens


How-to-installing-Diagnostic-Kit-EDL-v3-software-7
Note:For information on using the EDL3 Explorer, see Using the EDL3 Explorer Utility on page 43 of this manual.


11. Move on to Step 2: Connect the Heavy Duty Truck diagnostic Scanner EDL3 to a Vehicle, next in this manual


John Deere Diagnostic Kit EDL (Electronic Data Link V3)(Replaces EDL v2) Diagnostic Adapter

2020-10-07 12:38:19 | 日記


This is  genuine John Deere Service Advisor EDL v3 Kit(replaces
EDL v2). The product comes in a plastic case. The edl kit also includes
the V3 Wireless Adapter, W1 Connector Cable DS10150 and the USB cable.
There is not diagnostic software included with this item. If you need
it, it can be purchased optionally. The links for the appropriate
products located below.


Multifunctional John Deere dealer diagnostic tool is designed to
serve the construction, agricultural and forestry equipment, as well as
various engine technology produced by John Deere.


John Deere EDL v2 version has been replaced by JD EDL v3 kit. New EDL v3 kit doesn’t work with Service Advisor 4.2 version.


John Deere EDL v2/v3 drivers are built-in with Service Advisor
application. Please do not try to install the driver by with yourself,
using the setup files from any not reliable sources may lead to unstable
work of your windows OS.


Important Notice.  In some cases, after Service Advisor Setup the EDL
drivers may be installed not correctly (the yellow exclamation mark
near driver name) or even missing. The main reason is your anti-virus
application or windows system settings. For this purpose, JD officially
released the hotfix that allows reinstalling only the EDL driver. Please
contact us for more information.


The communication unit s a part of the John Deere Service Advisor system


Functions and technical capabilities of John Deere diagnostic adapter:


– Troubleshooting;
– Setup and Calibration ECU;
– Interactive tests;
– Computer programming;
– Diagnostic Code Reader, and much more.


This scanner is compatible only with specialized software JD Service Advisor 5.2.461 or higher.


This product includes:
– Storage Box (Part # SA5025)
– USB Cable (Part # SA5026)
– DS10150 (Part # DS10150)
– EDL v3 Wireless Adapter (Part # SA5022)


The Heavy Duty Scanner EDL (Electronic Data Link) v3 diagnostic adapter kit works in cooperation with the dealer software JD Service Advisor™.
With Service Advisor™ you can view service manuals, use DTAC (Dealer
Technical Assistance Center) data, make diagnostics, readings, tests and
calibrations, re-program controllers.


The most up-to-date versions of the software(The Service Advisor
software is not included in the EDL kit; you need to purchase it
separately):


JD Service ADVISOR 5.2 [2020] AG (Agriculture and Turf division),
JD Service ADVISOR 5.2 [2020] CF (Construction and Forestry division).


For notebooks running Windows 7/8.1, we can provide the previous version of the John Deere Service Advisor software (4.2)
John Deere no longer supports the Service Advisor v4.2. The last DATA update has been released in June 2016.
But due to lower system requirements (smaller amount of RAM and HDD
space), old Service Advisor may be useful, as it supports all the JD
models with up to 2016 release year and works great.


John Deere Service Advisor 4.2.006 – Construction & Forestry With History DVD 5/2016    no longer supported by EDL v3 kit
John Deere Service Advisor V 4.2.005 AG Agricultural Machinery 05/2016 With History DVDs no longer supported by EDL v3 kit


Optional products(we will gladly offer you the best price in case of bulk order):


JD Service ADVISOR 5.2 [2020] AG (Agriculture and Turf division)
JD Service ADVISOR 5.2 [2020] CF (Construction and Forestry division)
John Deere Service Advisor 4.2.006 – Construction & Forestry With History DVD 5/2016 no longer supported by EDL v3 kit
John Deere Service Advisor V 4.2.005 AG Agricultural Machinery 05/2016 With History DVDs no longer supported by EDL v3 kit
W1 Connector Cable for John Deere
W2 Connector Cable for John Deere
W3 Connector Cable for John Deere
W5 Connector Cable for John Deere
W6 Connector Cable for John Deere EDL v2
W7 Connector Cable for John Deere EDL v2
W9 Connector Cable for John Deere EDL v2
W12 Connector Cable for John Deere
W13 Connector Cable for John Deere
SA1002 Interface Cable for John Deere