Cell Phone spare parts online - ETrade Supply

https://www.etradesupply.com/

How to Solve iPhone XS Screen Unresponsive Problem

2020-03-12 16:26:08 | iPhone

There are reasons your iPhone Xs screen not responding. It can be the pressure of the incompatible case or screen protector, or the malicious software or Apps affection, or some other reasons. Here we share with your 3 useful ways to troubleshoot the problems of iPhone screen unresponsiveness. We suggest you check your iPhone before take the right solution to fix it.


1. Hard restart the iPhone

When your iPhone screen is power off and cannot turn it on. Hard restart the phone could be a quick way to troubleshoot this issue. Press on the volume up and down button one by one quickly, the press and hold the side button until you see the Apple logo on the screen. Release all the buttons and wait because your phone is rebooting. You may repeat the procedure if the Apple logo did not appear on the screen, on the other hand, your need to make sure enough battery power loaded in your phone. Same steps you may refer to our article of 4 Ways to Restart the iPhone Device .

2. Charge the phone to power the battery

When your iPhone battery power is lower than 5%, the phone will switch to lower power mode automatically. This happens when you left your phone in the drawer and do not use it for a long time. The iPhone Xs battery power is running out which causes the screen does not respond. You need to charge the phone to power the battery 30 minutes, and then check the phone if it is normal on charging. Turn on the phone to check the screen functions if it is ok.

3. Restore your iPhone to Mac or PC on iTunes

Your iPhone could be affected by some malicious software or Apps installation. You need to erase the original data and restore the system. Take the steps here:

>>USB connect your iPhone to Mac or computer to recognize it to iTunes

>> Find your iPhone on iTunes, click and view your iPhone data

>> Find the Summary tab from the left side panel

>> Tap on Summary and find “Check Update” and “Restore iPhone”
Before you take steps to restore your iPhone, you need to backup your important data. On the same screen, you may find the backups section and click on it to backup files at the same time.

All in conclusion, the 3 solutions above are useful for iPhone screen not response issues. We suggest you try the steps above before you go to the mobile phone repair shop. Besides, you may check your iPhone Xs touch screen in the repair center if the solutions above are not working. You may also visit our online shop for iPhone Xs LCD screen and digitizer replacement if you have interested. Any questions about iPhone repair or iPhone parts, please contact us on email. We are glad for help.

3 Steps on How to Replace iPhone 11 Pro Speaker

2020-03-06 12:42:46 | iPhone

The iPhone 11 Pro speaker is a replaceable part of the device. If there are problems with the speaker, you may have it replaced in the repair shop. On the other hand, you may also fix it yourself at home if you are familiar with iPhone 11 Pro teardown and reassembly. Here we would like to show you how to replace this part in three steps as follow.


1. Teardown iPhone 11 Pro display screen

First of all, we need to get a new speaker and the repair tools ready. Power off the device and loosen the two pentalobe screws on the bottom. Hot air gun blowing on the edge of the screen for easy separation. Use a suction cup and hard plastic plectrum to separate the iPhone 11 display screen. Pry and flip the display aside, loosen the two Y-type screws and remove the small metal panel as well, then the six Y-type screws and the penal. We need to disconnect the display screen flex cables and the battery cable so that we could separate the display screen from the phone. After that, we would move to the next step.

2. Replace iPhone 11 Pro Speaker

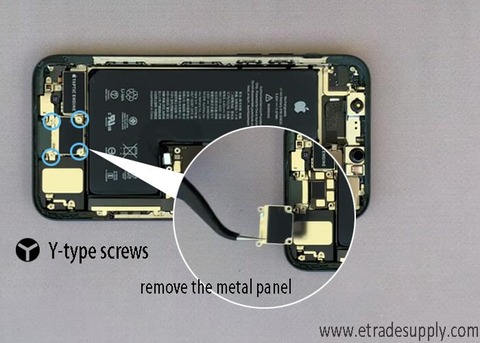
The speaker is on the bottom part of the iPhone. Firstly, we need to loosen the four Y-type screws and remove the metal panel. Disconnect the speaker flex cables and another battery cable. Loosen the three screws for fixing the speaker, for two Phillips screws and one Sandoff screw. Use hot air gun to blow the speaker on 80 ℃ for easy removable, then we can take down the speaker with tweezers. Install the new speaker in the phone and adjust it to the right position. Tighten the three screws back. Connect the flex cables and cover the pane back. Tighten the four screws for fixing the penal. 

3. Reassemble iPhone 11 Pro display screen

After the new speaker’s installation is completed, here we need to reassemble the iPhone. First, we need to test the new speaker’s function. Connect the display screen flex cables and the battery cable. Turn on the phone and open the applications to test the speaker. If all the functions are normal, turn off the phone and disconnect the flex cables again. We need to paste the frame adhesive tape on the phone, then we shall connect the flex cables. Place the metal panels and tighten the Y-type screws back for fixing the flex cables. Lastly, we may reassemble the display screen, make sure no gap left on the frame and each corner. 


The whole procedure may be a little complicated, we suggest you go to the repair shop if you are not familiar with iPhone repair. Besides, we offer all replacement parts for iPhone 11 models for sale. Just visit our shop on www.etradesupply.com or email to us if you have interests in our iPhone 11 Pro parts. You may leave your comments if have questions about our iPhone 11 repair process above.


How to Replace iPhone XS Taptic Engine & Loudspeaker?

2019-12-25 17:00:34 | iPhone
The taptic engine and loudspeaker are the exchangeable parts of iPhone XS's. Here we would like to demonstrate you how to replace the iPhone XS taptic engine & loudspeaker, and we hope this could be a tutorial guide for you if you are trying to fix your iPhone XS at home. Let's get the new replacement parts and repair tools ready, and get started.  


1. Tear down iPhone XS and take off the display screen

  1.1 Power off the phone, take out the iPhone XS SIM card tray and loosen the two pentalobe screws on the bottom

  1.2 Use hot air gun blowing the edge on the display, in 80℃ for about 2 minutes

  1.3 Use the suction cup to make a gap between the display and the frame, then insert the ultra-thin plastic sheet to slice around the gap to separate the display screen from the phone

 1.4 Pry and flip over the display screen carefully, loosen the four Y-type screws and a Phillips screw, remove the metal bracket with tweezers

 1.5 Disconnect the battery flex cable first, then the touch flex cable and the display flex cable. Remove the display screen away after it is entirely disconnected


2. Replace the iPhone XS taptic engine and loudspeaker

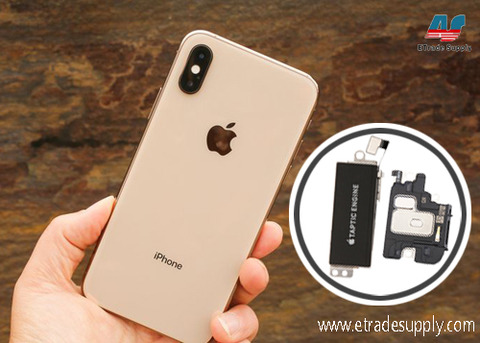
  2.1 Loosen the seven Phillips screws and the Y-type screw, then remove the small metal brackets which are for fixing the taptic engine modules carefully with tweezers 

  2.2 Disconnect the iPhone XS loudspeaker flex cable and then use spudger and tweezers to pry up and remove the loudspeaker. The taptic engine is connected under the loudspeaker, just be careful and don’t bring it up

  2.3 Take down the taptic engine after the loudspeaker is removed

  2.4 Place the new replacement iPhone XS taptic engine in the phone and connect the flex cable

  2.5 Install the new loudspeaker into the phone and connect the flex cable

  2.6 Place the small metal brackets back and fix them with the eight screws


3. Reinstall the iPhone XS display screen

 3.1 Connect the flex cables back, includes the display flex cable, the touch flex cable and the battery flex cable for the last

 3.2 Turn on the phone and test the function of the new replaced elements. Test the screen 3D touch to check the vibration response. Go to Settings >> Sounds & Haptics. Play ringtone and adjust the volume to see if the loudspeaker is normal

 3.3 Disconnect the flex cables as the orders in Step 1.5 and remove the display screen, clear out the frame adhesive glue

 3.4 Attach a new iPhone XS frame adhesive back to the phone

 3.5 Connect and reinstall the display screen back, place the metal cover for fixing it with the five screws. 
 
 
Remember, your iPhone XS would be not 100% waterproof after repaired. Be patient and careful if you are the first time to repair your iPhone. Any questions will be answered as long as you leave your comments below, or you can email us if you have any questions about the iPhone XS replacement parts in the process above.


This is Why Face ID failed after iPhone X Display Screen Replacement

2019-11-21 16:51:22 | iPhone

The iPhone X series’ face ID system is a complex component. That’s why the face ID issue bothers a lot on daily using. Sometimes it failed on recognition and we don’t know why, especially when we have our iPhone X fixed or the display screen replaced with the LCD screen digitizer. Here we are trying to analysis this problem and bring our suggestion as well on the iPhone X face ID.


1. The iPhone X face ID working Theory

The iPhone X face ID component consists of three main parts: the iPhone X infrared front camera, the flood illuminator, and the dot projector. Together with the face ID component on the module, there are proximity sensors, ambient light sensors, the front camera, the ear speaker and the microphone. When you hold your iPhone and activate the face ID for recognition, the flood illuminator is on and detects if the object is a human face. Then it will send the detected face image to CPU. The dot projector will project over three million dots on your face, catching the reflection from your face and sent to the EEPROM for detection. If the face image accord with the original data, then the CPU will get the command and unlock your iPhone. Mostly, this process is very quick.


2. Reasons why face ID failed after display screen replacement

There are usually two reasons your face ID failed for recognition after the display screen is replaced. For one reason, the cable or the FPC might be damaged during the process of display screen replacement. Some mistakes in the procedure may cost the damage to the face ID system, for example, the battery flex cable should be first disconnected after the original display is separated, and the last to connect after the new display screen is installed. During the screen replacement, don’t touch the dot projector because the static electricity from your body might cause damage to the face ID. Besides, don’t break the flexes, just be careful. Another reason is dust or filth on the glass cover of the dot projector may cause the face ID failed on recognition. Keeping it clean with no dust.


3. Tips on solving face ID failed recognition issue

For the first solution, you should close all opened or suspended Apps and then rest the face ID. Besides, you can manage face ID attention options and settings. There are two Face ID options you can turn on or off as you would prefer. These are the Require Attention for Face ID and Attention Aware Features. For the last solution, reset all settings, and make sure your operating system is updated to the latest version.


As a final conclusion, you should be careful about your iPhone X repair, especially for display screen replacement. Mistakes in the repair process may cause permanent damage to the face ID. Besides, you can check the iPhone X replacement parts in our stores, such as our iPhone OLED display screen and digitizer assembly replacement here. You can also contact us if you have an interest in our new coming iPhone 11 replacement parts. Any questions will be answered in 24 hours if you have emailed us. 


How to Replace iPhone 11 battery

2019-10-30 15:40:40 | iPhone

Tools required:

Screwdrivers: pentalobe, Y-type

Suction cup

Hard plastic plectrum

Ultra-thin sheet

Spudger

Tweezers

Steel pry tool

Hot air gun


Step 1: Teardown iPhone 11 display screen

1.1   Power off the phone, loosen the two pentalobe screws on the bottom

1.2   Use hot air gun blowing the edge of the display screen to soften the frame adhesive glue for easy teardown, use the suction cup and hard plastic plectrum to separate the display screen, use an ultra-thin sheet to slice around for easy separation

 1.4 Gently pry up the screen after it is separate from the frame, use a stable object to hold the display. Just be careful don’t break the flexes

 1.5 Loosen the five Y-type screws on the metal bracket which is for fixing the screen flex cables, then remove the bracket with tweezers

 1.6 Disconnect the screen flex cables with spudger, then the display screen can be totally removed from the back frame


Step 2: Replace the iPhone 11 battery

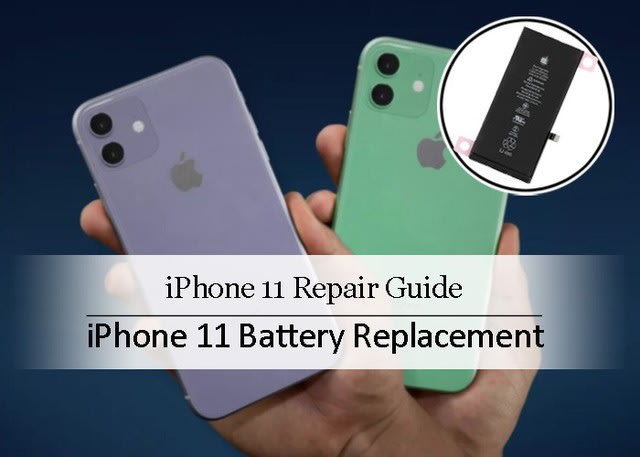
 2.1 Loosen the three Y-type screws on the small metal plate which is for fixing the battery flex cable, remove the metal plate with tweezers, and then disconnect the battery flex cable

 2.2 Carefully pull out the battery sticker with tweezers, just be careful because the stickers are easily broken

 2.3 Get the new battery ready, attach the new battery sticker on it

 2.4 Take out the original battery and replace it with the new battery, connect the battery flex cable

 2.5 Connect the display screen flex cables, turn on the phone and test the new battery’s condition, plug the USB charger to see if it is well for charging, then turn off the phone and disconnect the flex cables  


Step 3: Reinstall the display screen to iPhone 11

 3.1 Place back the metal plate and fasten the three Y-type screws for fixing the plate

 3.2 Clean up the black adhesive glue on the frame, and attach the new frame adhesive on it

 3.3 Connect the display screen flex cables back, and cover the metal bracket back, fasten the five Y-type screws for fixing the flex cables

 3.4 Install the display screen back, gently press around the edge and the four corners, make sure the gaps are tightly sealed

 3.5 Screw back the two pentalobe screws on the bottom, all process done


Parts for iPhone 11 battery replacement related:

For iPhone 11 battery replacement

For iPhone battery sticker replacement

For iPhone 11 Frame adhesive replacement

For iPhone 11 LCD screen and digitizer assembly replacement