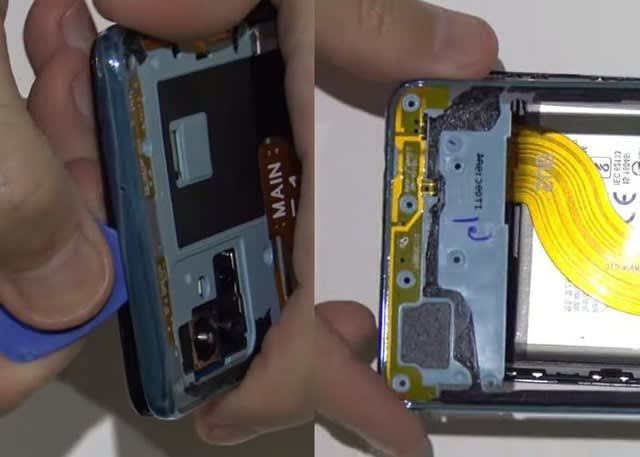
The Samsung Galaxy A51 parts mainly consist of a display screen, a middle frame, back panel, mainboard, and SUB board and the inner parts with flexes. Tearing down the phone requires our carefulness and patience during the process. Here we would like to demonstrate to you how to tear down and reassemble this Samsung model in steps, and also some notice during the process. Check this out.
1. Steps of Samsung Galaxy A51 teardown
Firstly, we need to turn off the phone and take out the SIM card tray. Use hot air gun to blow on the edge of the back panel for 2 or 3 minutes and then use a suction cup and an ultra-thin plastic sheet to slice and separate the back panel from the frame. After that, we can see the middle frame is fixing by 13 Phillips screws on the phone. Snap off the 13 screws, and remove the middle frame with plastic plectrum carefully. Disconnect the battery flex, and the SUB flex as well. Disconnect the antenna wire port, and then disconnect and remove the front-facing camera. Snap off the screw and remove the mainboard. After that, we can remove the fingerprint sensor and the charging port board. Lastly, remove the battery with steel pry tool careful, but remember to use battery adhesive sticker glue to melt the sticker before removing. Now the phone is completely torn down, let’s move to the next section about how to reassemble it.
2. Steps of Samsung Galaxy A51 reassembly
Just follow the teardown steps back, install the battery first. Don’t forget to past the adhesive sticker on the battery before installation. Place the Samsung A51 charging port board back and adjust the position. Connect the antenna wire port and the display flex cable. Install the fingerprint sensor and connect the flex, tighten the screws for fixing it. Install the mainboard back and fixing it with the screw. Connect the antenna wire port back to the board and install the front-facing camera. Connect the Samsung Galaxy A51 SUB flex and the battery flex cable back. Cover the middle frame, slightly press and make it tightly stick on the display, tighten the 13 screws for fixing the middle frame. Install the back penal, make sure it is in the right position. Slightly press the edge to make it tightly stick with the display.
3. Notice on Samsung A51 teardown procedure
There are things we have to notice during the teardown reassemble procedure. Firstly, the back panel and the middle frame is flexible but easy to be broken, we need to be careful and don’t twist it too much. Next, always remember to disconnect the battery cable in the first place before take down any internal parts, and connect it on the last after all the parts are installed in the reassembly. Furthermore, always remember the position of each inner part when reassemble the phone. Don’t miss any part or screw. The Samsung phone will not be 100% waterproof after teardown, you should be careful when using it after it is repaired.






※コメント投稿者のブログIDはブログ作成者のみに通知されます