Sometimes your iPhone XR’s would be damaged on the charging port after water damaged. You will need to replace it with a new one. Here we would like to show you how to replace an iPhone XR charging port in steps. Let’s check it out below:
Step 1: Teardown the phone
1.1 Take out the SIM card tray and snap off the two screws on the bottom
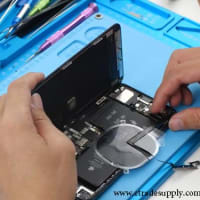
1.2 Separate the screen with ultra-thin plastic cards and a suction cup
1.3 Twist off the two Phillips screws eight Y-type screws
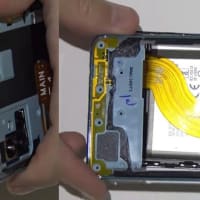
1.4 Take out the protection metal boards, disconnect the battery cable, the display flex cable, touch flex cable, ear speaker flex cable
Step 2: Remove the Loudspeaker and Taptic engine
2.1 Remove the black adhesive, twist off the 14 Philips screws and 5 cross screws
2.2 Take out the single cable, the SIM card holder
2.3 Snap off the two cross screws and take out the loudspeaker
2.4 Disconnect the Taptic engine and take it out
Step 3: Remove the motherboard
3.1 Disconnect the signal cable, charging port cable, wireless charger, dot projector, front camera, cellular antenna, IR camera, power button, rear camera
3.2 Take out the motherboard
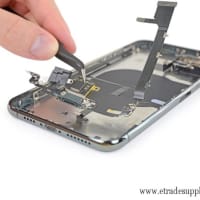
Step 4: Remove the charging port flex
4.1 Twist off the two Phillips screws and cross screws
4.2 Disconnect the flex and take out the charging port
Step 5: Install the new charging port flex
5.1 Place the new iPhone XR charging port flex and connect the flex cable
5.2 Screw back the two Phillips screws and cross screws
5.3 Install the motherboard back and connect the flex cables in step 3.1, except the battery flex
5.4 Install the SIM card holder, connect the flex cable and screw back the screws
5.5 Install the Taptic engine back
5.6 Install the single cable and 7 screws back
5.7 Install the charging port, connect the display screen flex cables and battery flex cable
Step 6: Check the charging port
6.1 Turn on the phone and plug the charger to see if it is normal charging
6.2 Test the screen of the touch response
6.3 Disconnect the display and battery, cover the screen adhesive
6.4 Install the display screen and connect the flex cables in step 1.4
6.5 Seal up the screen the phone, all process done
The whole process is a little complicated which requires our carefulness and patience. If you are not confident about yourself, we suggest you go to the repair shop. There are new iPhone XR replacement parts on sale in our store, you may take a visit if you are interested. Any questions about the steps above, you may leave your comments below. We will reply to you as soon as we see it.






※コメント投稿者のブログIDはブログ作成者のみに通知されます