
Sometimes the iPhone 11 Pro volume buttons are not working after crashed on the floor. Despite resetting the systematic data of Settings, the problem is still not fixed. Based on the situation we assume the problem may be the disconnection of volume button flex cables or damages of volume buttons. Here we will try to tear down the phone and try to replace the volume button flex cables. Let’s check this out:
1. Tear down the iPhone 11 Pro and check the disconnection of the flex
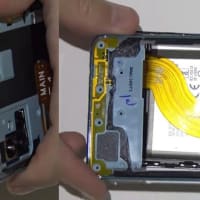
Firstly we need to get all the tools ready. The iPhone 11 Pro teardown process refers to the blog article of How to Replace iPhone 11 Pro Rear-facing Camera? When the display screen is separated, check the connection of the volume button flex cables. Pry up the cables and plug again to make sure it is tightly connected. Turn on the phone and check the volume buttons to see if it is OK. The volume up and down buttons are still not working. Take a new wireless coil with volume button flex cables for testing. Disconnect the volume button flex cable again. Connect the new wireless coil flex cable to the phone. Turn on the phone and test the volume button function. The new volume button flex control is normal. Now we are sure the problem is the damage of the volume button flex. We need to replace the volume buttons.
2. Tear off the interior parts and replace the volume button flex cable
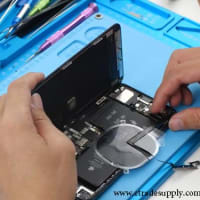
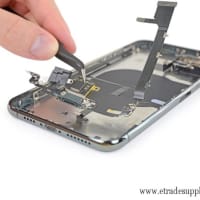
Since the volume button flex cables are combined with the wireless Turn off the phone and disconnect the battery cable. Disconnect the flex cables and remove the display screen. Loosen the screws and take off the interior parts, which include the mainboard, the rear-facing camera, the front-facing camera, and the battery. After that, we need to pry and remove the wireless charging coil and the volume flex cable. Loosen the volume button screws. Use hot air gun to blow and carefully pry out, tear it to remove the charging coil from the back panel with a steel pry tool. Clean out the black adhesive glue on the panel.
3. Install the new iPhone 11 Pro wireless charging coil with volume button flex and assemble the iPhone
Place the new wireless charging coil on to the phone, make sure it is in the right position as the original one. Gently press it to make sure it is tightly stick on the back panel. Tear off the adhesive tape from the coil. Tighten the volume button flex with the screws for fixing it. Install the battery back, but don’t forget to past the battery adhesive tape on it beforehand. Install the cameras back and so as the mainboard, tighten the screws back for fixing the mainboard. Connect the display screen back and the battery cable on the last. Place the metal plate and fixing it with the screws. Assemble the display screen, make sure it is no gap on the edge and each corner. The whole repair process is done.






※コメント投稿者のブログIDはブログ作成者のみに通知されます