最近、Youtubeでジャンク修理動画を良く見ている。その影響も有って、あちこちハードオフ巡りをしていた時に、見つけました!32インチテレビ、110円也!もちろんジャンク。
Recently, I have been watching a lot of junk repair videos on Youtube. This is one of the reasons why I found this 32-inch TV for ¥110 yen when I was visiting Hard-Off here and there! Of course, it was junk.
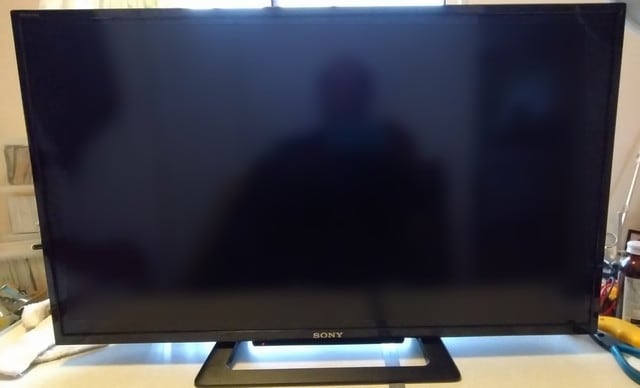
↓通電OK、動作不可の110円テレビ

↑Power ON OK, not working.
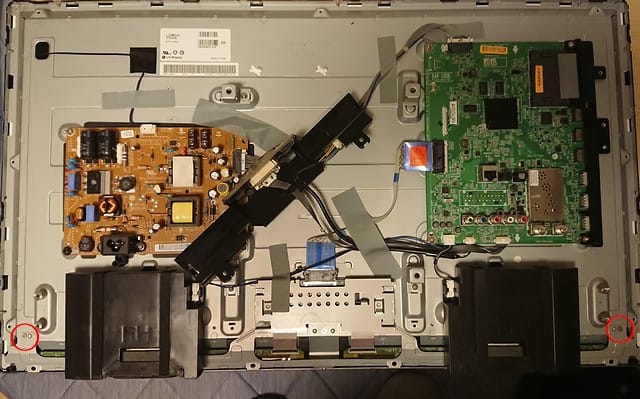
↓SONYのKJ-32W500C、有機ELの32インチ。2017年製だ。
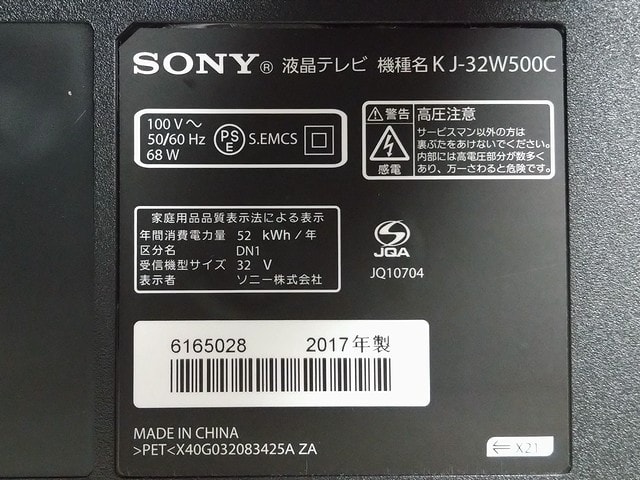
↑It's a SONY OLED 32", made in 2017.
↓当然?だが、リモコン、B-CASは無しの本体のみだ。
↑No remote control, no B-CAS, just the main unit.
↓でも横に電源、CH、VOL等のスイッチが付いてる。
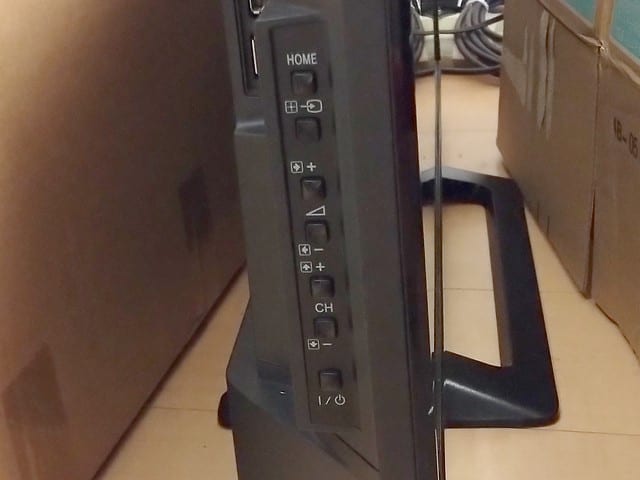
↑But it has power, CH, VOL, etc. switches on the side.
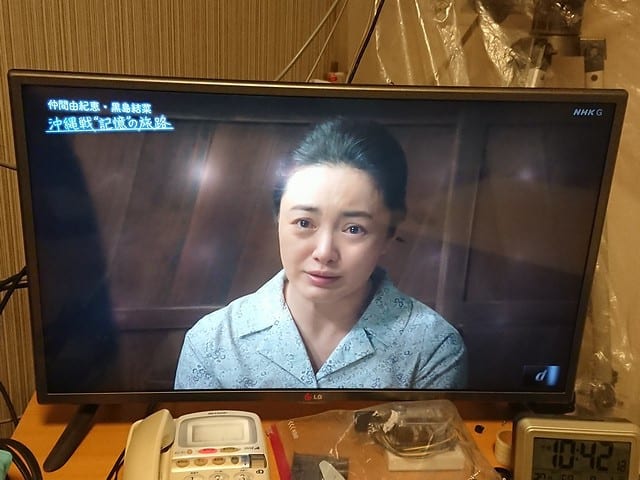
↓さっそく、自宅TVのB-CASカードとアンテナをつないでテスト。
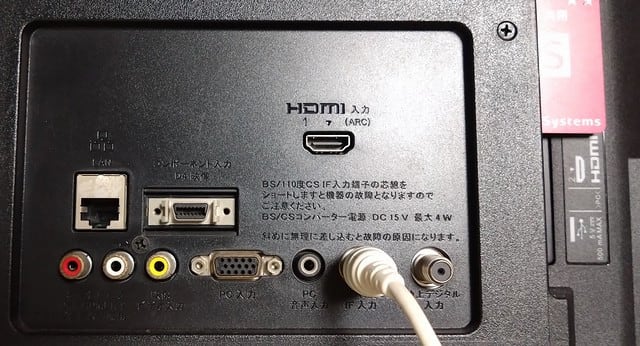
↑I inserted the B-CAS card, connected the antenna, and tested.
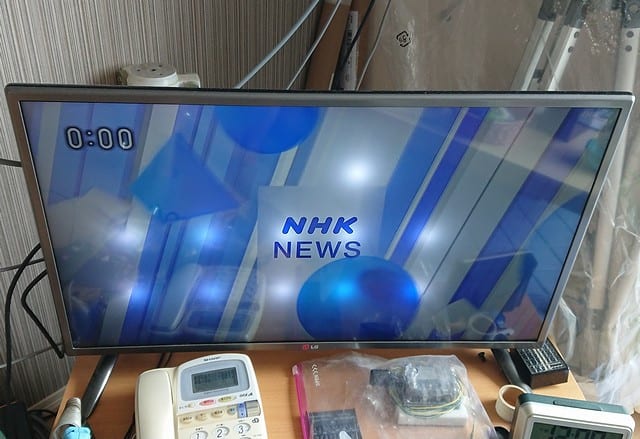
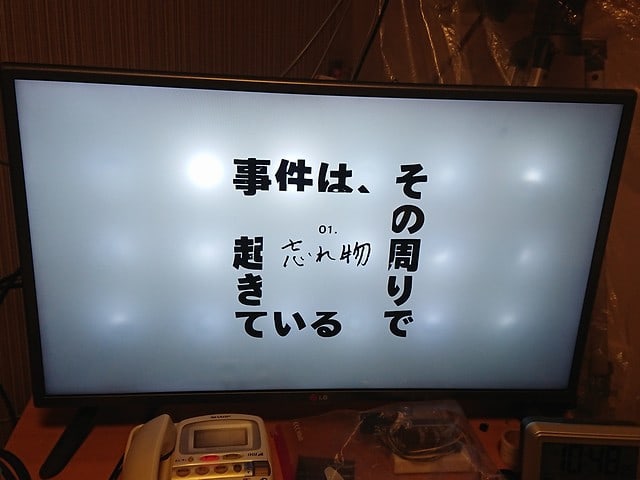
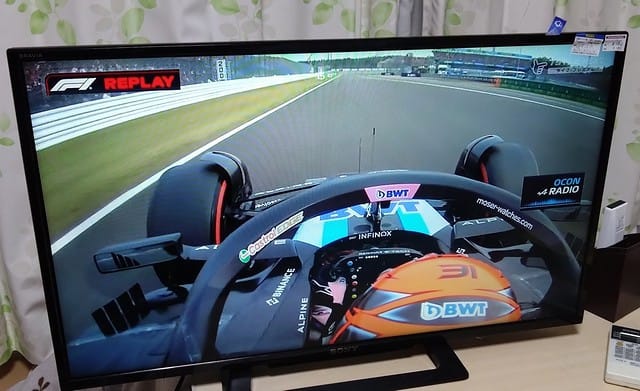
↓あれ、ちゃんと映るぞ?
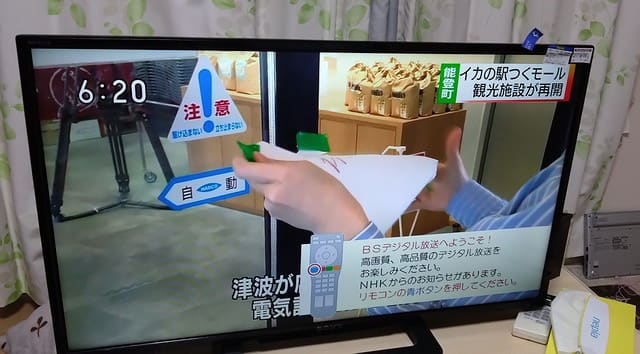
↑It works fine.
↓B-CAS依存だから、フジテレビネクストも問題なく写るんだな。
↑It's B-CAS dependent, so it can receive Fuji TV Next without any problem.
動作が不安定なのかなと思って、一晩点けて放置したが特に問題なさそう。
I left it on overnight to see if the operation was unstable, but there seemed to be no problem.
う~ん、せっかく修理を楽しもうと思っていたのに、これじゃジャンク詐欺だな、、、、
動くのは良いけど楽しみが一つ減った、、、、
Hmmm, I was going to enjoy junk repair, but this is a junk scam. 、、、、
It works, but it's one less thing to look forward to: 、、、、
2024.4.8 (4/29UP)
①ジャンク詐欺?110円テレビ SONY KJ-32W500C
②リモコン ゲット SONY KJ-32W500C
③なんと冠水ジャンク! SONY KJ-32W500C リモコン受光部修理
①Junk fraud? 110yen TV SONY KJ-32W500C
②Get remote controller for SONY KJ-32W500C
③What a water damaged junk! SONY KJ-32W500C Remote control receiver repair
Recently, I have been watching a lot of junk repair videos on Youtube. This is one of the reasons why I found this 32-inch TV for ¥110 yen when I was visiting Hard-Off here and there! Of course, it was junk.
↓通電OK、動作不可の110円テレビ
↑Power ON OK, not working.
↓SONYのKJ-32W500C、有機ELの32インチ。2017年製だ。
↑It's a SONY OLED 32", made in 2017.
↓当然?だが、リモコン、B-CASは無しの本体のみだ。
↑No remote control, no B-CAS, just the main unit.
↓でも横に電源、CH、VOL等のスイッチが付いてる。
↑But it has power, CH, VOL, etc. switches on the side.
↓さっそく、自宅TVのB-CASカードとアンテナをつないでテスト。
↑I inserted the B-CAS card, connected the antenna, and tested.
↓あれ、ちゃんと映るぞ?
↑It works fine.
↓B-CAS依存だから、フジテレビネクストも問題なく写るんだな。
↑It's B-CAS dependent, so it can receive Fuji TV Next without any problem.
動作が不安定なのかなと思って、一晩点けて放置したが特に問題なさそう。
I left it on overnight to see if the operation was unstable, but there seemed to be no problem.
う~ん、せっかく修理を楽しもうと思っていたのに、これじゃジャンク詐欺だな、、、、
動くのは良いけど楽しみが一つ減った、、、、
Hmmm, I was going to enjoy junk repair, but this is a junk scam. 、、、、
It works, but it's one less thing to look forward to: 、、、、
2024.4.8 (4/29UP)
①ジャンク詐欺?110円テレビ SONY KJ-32W500C
②リモコン ゲット SONY KJ-32W500C
③なんと冠水ジャンク! SONY KJ-32W500C リモコン受光部修理
①Junk fraud? 110yen TV SONY KJ-32W500C
②Get remote controller for SONY KJ-32W500C
③What a water damaged junk! SONY KJ-32W500C Remote control receiver repair