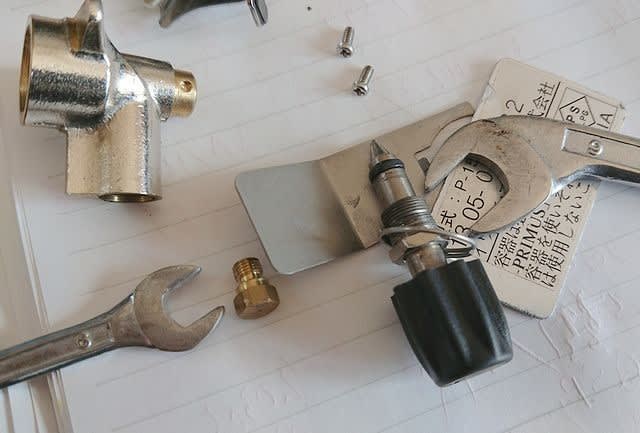
今年の2月に修理したプリムスP-153バーナーであるが、権現山に行った時に使ってなんだか火力が弱い様な気がした。前回の修理はばらして、ノズルを口で吹いただけだから、ちゃんと治ってないかもと思い、再修理をしてみた。 The Primus P-153 burner I repaired in February this year, but when I went to Mt. Gongen, I felt that the firepower was weak. The previous repair was just disassembling and blowing the nozzle with my mouth, so I thought it might not have healed properly, so I tried to repair it again.
↓前回同様、バーナーをばらす。
↑As before, take apart the burner.
↓今回は、ノズルの部分も分解した。
↑This time, the nozzle part was also disassembled.
ノズルのサイズは5.5mmくらいの感じだが、手持ちの6mmのスパナで分解。
The nozzle size is about 5.5mm, but can be disassembled with a 6mm wrench.
↓荷札に付いてる細い針金でノズルの穴を掃除する。
↑Clean the nozzle hole with the thin wire attached to the tag.
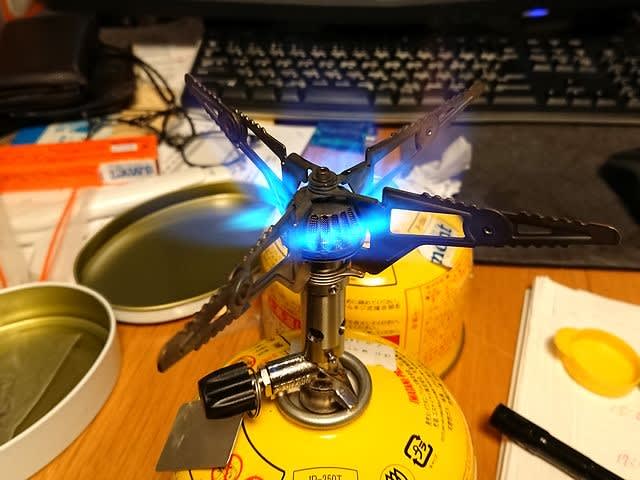
↓元通りに組み付けて、点火試験。火力の勢いが戻った。
↑Ignition test after reassembling. The firepower has returned.
This ATU malfunction occurred when I moved to Omatsuyama in October, but after that, even if I tried to see the symptoms, I could not identify the cause because the phenomenon appeared or not. However, it seems that the symptoms have stabilized even after coming back this time.
パワーが半分しか出てないと言う事は、2合成しているPA部の片方がNGなんだな。
If only half the power is coming out, there is a high possibility that one side of the combined PA section is NG.
Last time I used a spectrum analyzer at work place, but since it is troublesome to bring it to the office every time, I compare levels with TinySA and oscilloscope probes.
↓入力側は-27dBm位を示す。
↑The input side shows about -27dBm.
↓出力側は、-34dBm位を示した。
↑The output side showed about -34dBm.
と言いう事で、ドライバーが増幅していないのは明らかだ。
So it's clear that the driver isn't amplifying.
In order to conclude that the driver is defective, it would be better to measure the terminal voltage, etc., but since there was also the previous incident, I decided that there was almost no mistake, and further investigation was discontinued.
By the way, TinySA's Ref level is set to auto level select mode by default, so it was very difficult to compare levels because the position of the level scale changed arbitrarily. I fixed the Ref level and ATT from the menu and then measured.
あまりRefレベルが勝手に変わるスペアナって職場では見た事がないのでちょっと戸惑ってしまった。
I've never seen a spectrum analyzer that changes the Ref level on its own at work place, so I was a little confused.
ドライバーICは前回の修理の時に余分に買って有ったので早速交換する。
I bought an extra driver IC at the last repair, so I will replace it immediately.
↓まずは半田を沢山盛って、U20(SGA7489)を取り外す。
↑First, put a lot of solder and remove U20 (SGA7489).
↓取り外したU20(SGA7489)
↑Removed U20 (SGA7489)
↓手前のpinだけ予備半田をして置き、新しいSGA7489を載せて仮半田する。
↑Preliminarily solder only the near side pin, place a new SGA7489, and temporarily solder it.
↓その後残りの端子も合わせて放熱を兼ねて沢山半田を盛ってのはんだ付け。
↑Solder the remaining terminals together with a lot of solder as heat think.
これで、修理完了。元通りに組み上げる。
The repair is now complete. Reassemble as before.
↓ディスプレイ上とパワー計で確認すると無事に10W出る様になった。
↑Checked it on the display and with the power meter, it came to output 10W.
無事にATUも正常に動くようになった。
ATU is now working normally.
これで、いつ壊れるか心配しながら運用しなくても済みそうだ。
With this, I don't have to worry about when it will break.
After writing this blog, I noticed that the pictures after soldering the new driver were dirty. I took apart the ATU board again and cleaned the driver IC with thinner. That is the picture after the IC exchange above.
I reassembled it and put it away for a while, but when I turned it on again the next day, ERR was displayed in the initial diagnosis.
↓電源投入直後のERR表示「d=001 ERR ATC」が出る。
↑The ERR display " d=001 ERR ATC" appears after the power on.
あれあれ、なんで?
Why?
メニューからATUの設定を確認するがちゃんとATU MDはAUTOになってる。
Check the ATU setting from the menu, but ATU MD is set to AUTO.
取説を調べると「ERR ATC」はATUが付いてない時に出るらしい。(メニューでATU MDがnot inst以外の時)
According to the manual, "ERR ATC" appears when ATU is not attached. (When ATU MD is other than not inst in the menu)
8ピンコネクタ正しく刺さってる?ATUを組みなおしてみろ!と書かれている。
Is the 8-pin connector inserted correctly? Reassemble ATU! it is written like this.
一旦外してATUを組みなおすが、状況は変わらない。
I removed it once and reassembled the ATU, but the situation did not change.
コネクタは刺さっていると思うが、基板の下なので直接は見えない。
I think the connector is sticking, but it's under the board so I can't see it directly.
However, if you move the board up and down a little bit, you will feel a sliding resistance as if it is sticking in. If you lift it too much, it will come off and disappear.
3回位抜き差ししてみても一向にERRは消えない。
ERR does not disappear at all even if I try to insert and remove it about 3 times.
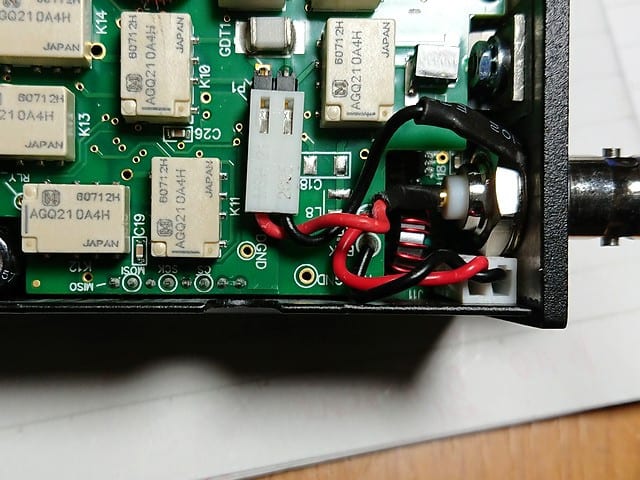
I didn't understand why, and when I looked closely at the TRX board below, I noticed that the connector position was a little far from the edge of the board compared to the connector on the ATU board.
↓基盤のエッジから少し離れて黒い8ピンコネクタが有る。
↑There is a black 8-pin connector a little away from the edge of the board.
ATU基板上の8ピンコネクタは基板の一番端に付いてる。
The 8-pin connector on the ATU board is attached to the very edge of the board.
Did you intend to insert it into the connector, but the pin was shifted to the outside of the connector (the side of the chases) and just rubbed the side of the lower connector?
今度は組み立て時に、意識して少し内側にコネクタを差し込むつもりでATU基板を取り付けた。
This time, when assembling, I consciously installed the ATU board with the intention of inserting the connector a little inside.
起動するとERR表示は出なくなった。やった、これか!!
When I power on it, the ERR display disappeared. Yay, this is it! !
↓ATU基板を良く見ると筐体から少し離れているのが判る。
↑If you look closely at the ATU board, you can see that it is a little far from the housing.
そうか、正しく挿してるつもりが、外側に外れてたのね。
I thought I was inserting it correctly, but it came off the outside.
と言う事で、起動時のERRも消えて、無事にATUも動くようになった。
The ERR at startup disappeared, and ATU also started to work correctly.
I replaced the IC only on one side that was broken this time, but the other side is similarly stressed... Well, should I fix it when it breaks again.
Sending it to the manufacturer takes time, but it's easy if I fix it myself.
However, I started using the KX2 in August 2020, the last trouble was in March 2021, this time in October 2022, the first time eight months, the second time a year and a half, and the same place is broken. Even though I bought it second-hand, I feel like it would break easily.
でも、KX2が壊れた話はSOTA関連の周りの人では1人しか聞いた事がない。
But I haven't heard much from SOTA people about the KX2 being broken.
これは私の使い方が、LWをATUで強引に使っている事に起因しているのかも。
This may be due to my use of forceful use of plain LW in ATU.
The power is automatically reduced during TUNE, but the final input/output impedance fluctuation due to the reflected wave is still large. Is it a story that the disturbance of the input impedance of the final worsens the VSWR to the driver, and the reflected power causes the driver side, which is weak in resistance, to die first?
他の人は、DP、VCH、EFにしろ、ある程度VSWRは合わせてるもんなぁ、、、
Other SOTA peaples, whether it's DP, VCH, or EF, they matched the VSWR...
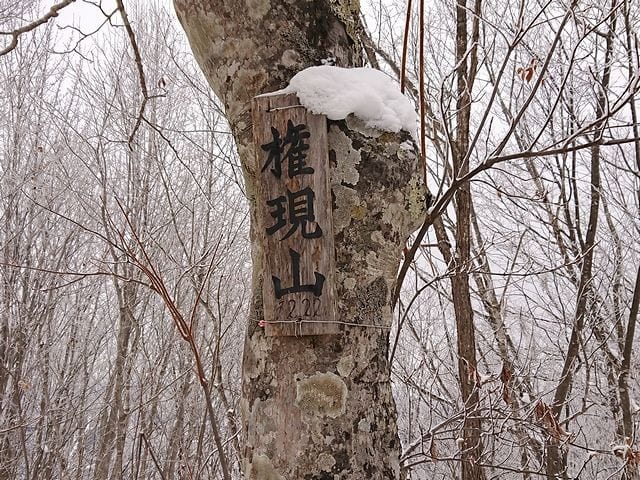
12月17日の土曜日に、大町市の権現山1,223mJA/NN-164へSOTA運用に出かけた。ここの所、北アルプスに近い所は雪が多いけど、無事に行けるだろうか?
On Saturday, December 17th, I went to Gongenyama 1,223m JA/NN-164 in Omachi City for SOTA activation. There is a lot of snow here near the Northern Alps, but will we be able to go there safely?
There was a lot of snow on the approach road to the mountain trail, but it was fresh snow and not so deep, so I was able to drive up to the open space near the mountain trail safely.
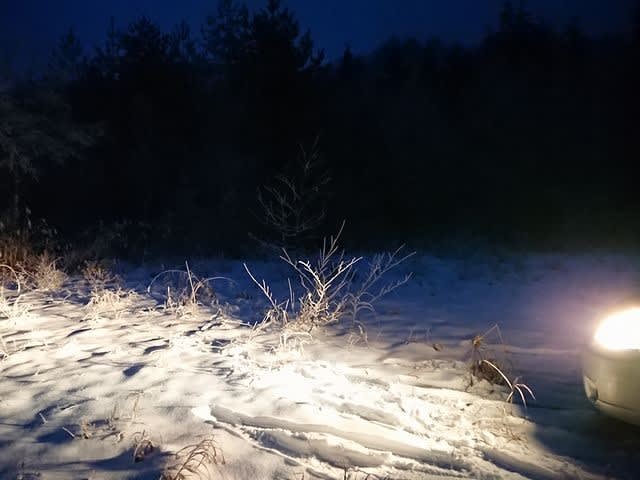
↓登山口近くの広場に車を停める。まだ暗い。
↑Park my car in the open space near the trailhead. Still dark.
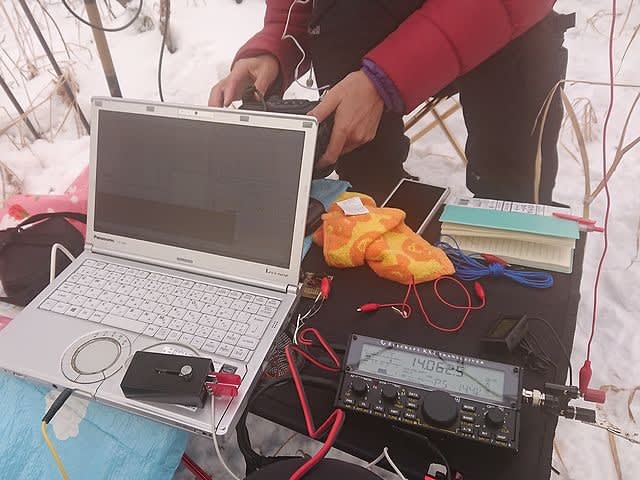
I decided to withdraw and go down the mountain without eating lunch and XYL's 7/CW because the radio was not working well and it was cold without the sun.
↓下山開始。
↑Start descent.
↓無事に車まで帰着。
↑Return to the car.
今日は無線機の調子は悪いは、寒いはでなかなか厳しい運用でした。
The radio was not working well today, and it was quite a tough operation in the cold weather.
本日の結果 Today's result
14MHz/CW 5-QSO W=1 BV=1 S2S=1(JA) include
21MHz/CW 5-QSO ZL=1 BV=1 include
7MHz/CW 26-QSO
7MHz/SSB 1-QSO S2S=1(JA)
144MHz/CW 1-QSO S2S=1(JA)
合計 Total 38-QSO
本日もお相手頂いたor追いかけて頂いた各局様有難うございました。
TNX for all stations who QSO with me or searching for me!
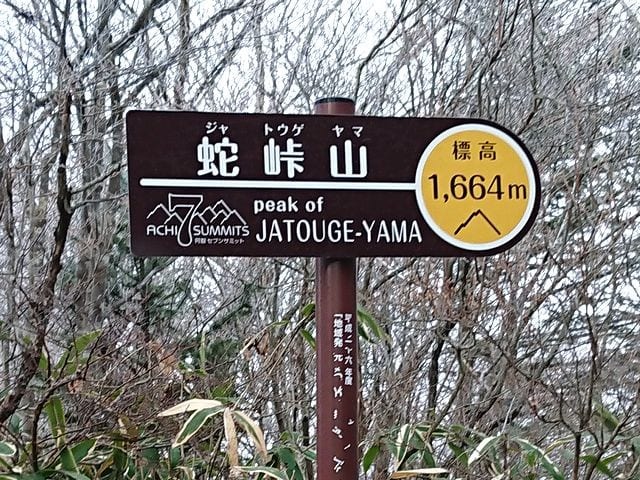
12月3日の土曜日に阿智村/阿南町の蛇峠山にSOTA運用に出かけた。今日は家内は会山行なので一人で出撃だ。
On Saturday, December 3rd, I went to Jatogeyama between Achi village and Anan town for SOTA activation. My wife is on a mountaineering trip today, so I went alone.
↓馬の背先のDocomoゲート脇から登る。
↑Climb from the side of the Docomo gate on the "Back of the horse".
↓霜柱が長く伸びている。
↑Frost columns are growing long.
↓登り始めて直ぐに倒木。長物(ANTと竿)を持ってるのでくぐるのは大変。
↑Fallen tree soon after starting to climb. It's hard to pass through because I have a long object (ANT and pole).
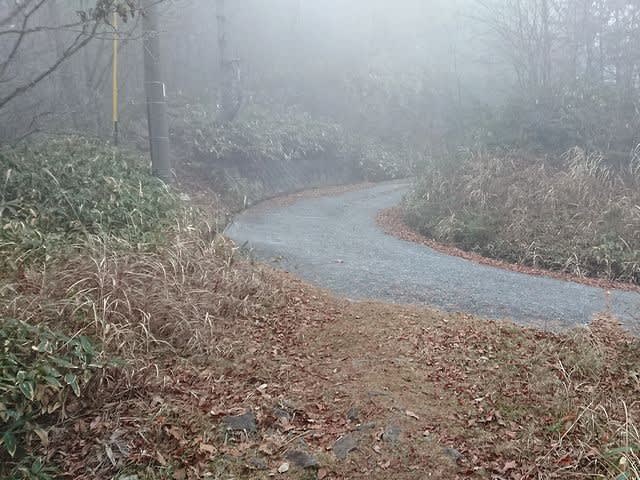
↓整備された登山道を登る。
↑Climb the maintained mountain trail.
↓一旦舗装の林道に合流。電柱の先で、また登山道に戻る。
↑Join the paved forest road once. Immediately return to the trail.
↓再び舗装林道に出る。
↑Return to the paved forest road again.
3回目の舗装林道に出てからは、林道を進む。
After coming out to the paved forest road for the third time, proceed along the forest road.
↓林道沿いの木に霧氷が少しついている。
↑There is a little frost on the trees along the forest road.
↓アップにするとこんな感じ。
↑It looks like this when zoom in.
↓ここから左の方に曲がって登る。
↑From here, turn left and climb up.
↓先の電柱の手前を右に曲がる。
↑Turn right in front of the pillar ahead.
↓雨量観測所の脇を通る。
↑Pass by the rainfall observatory.
↓観測所の横辺りで右下の笹藪の方に降りる。
↑At the side of the observatory, go down to the bamboo grove on the lower right.
↓あまり笹藪が刈られていなくて、はみ出している。
↑The bamboo grove is not cut so much and it sticks out.
↓しばらく行くと山頂の展望台が見えて来た。
↑ After a while, the observatory at the top of the mountain came into view.
↓山頂到着。今日は53分程掛かった。
↑Arrive at the summit. It took 53 minutes today.
↓暫らく展望台は登れ無かった様だが階段の「KEEP OUT」のテープは切られてる。
↑It seems that couldn't climb the observation deck for a while, but the "KEEP OUT" tape has been cut.
下をよく見るが特に修理されて様な跡は見つけられなかった。
I looked closely at the bottom, but I couldn't find especially repaired.
↓登ってみて特に不安定さは無かった。山頂はガスの中で展望なし。
↑There was no particular instability when I climbed. The summit has no view in the gas.
↓山頂の気温は氷点下0.6度。
↑The temperature at the summit is -0.6°C.
ガスの中で日も差さないのでかなり寒い。
It's pretty cold because the sun doesn't shine in the gas.
↓無線機の準備をする。
↑Prepare the radio.
今日は21MHzからCQスタート。
CQ started from 21MHz today.
北米、台湾、ニュージーからコール。
Calls from North America, Taiwan and New Zealand.
18MHzでは北米からのコール。
Calls from North America on 18MHz.
14MHzは国内の局が少しのみ。
14MHz has only a few domestic stations.
7MHzの国内CONDXはまずまず良かった。
Domestic CONDX of 7MHz was reasonably good.
↓アンテナはこんな感じ。
↑Today's antenna.
一通り運用を終えたので、お湯を沸かしてお昼ご飯にする事に。
I finished the operation, so I boiled water and have lunch.
↓ガーン!!お湯が沸く頃に、カップヌードルを忘れた事に気が付く!
↑OMG! ! By the time the water boils, I realize I forgot my cup noodles!
往路のコンビニで買った昼飯一式車に置いて来たみたいだ。
It seems that I left the lunch set I bought at the convenience store on the way out in the car.
下山するまで昼飯抜きだ!(涙)
No lunch until I descend!
↓暇なので下に降りて展望台を確認すると一つターンバックルが外れている。
Because I'm free, I went down and checked the observatory, and one turnbuckle was off.
どうも、これがしばらく立ち入り禁止だった理由だろうか?
Could this be why it was "Keep OUT" for a while?
沢山人が上がってくるとちょっと危ないかも。
It might be a little dangerous when a lot of people come up.
↓お昼過ぎは少し晴れて、多少暖かくなって来た。
↑ It was a little sunny in the afternoon, and it got a little warmer.
↓S2Sが概ね終わった所で、腹も減ったので撤収して下山する。
↑ When S2S was almost over, I was hungry, so I withdrew and descended.
今日はストックも忘れたので、下りはゆっくり。
I forgot my stock today, so I went down slowly.
↓やっと先に駐車場の車が見えて来た。
↑I finally saw a car in the parking lot.
↓車まで帰着。
↑Return to the car.
↓やっとお昼ご飯に有りつける。(笑)
I finally have lunch. (smile)
と言う事で、今日は昼飯、ストック、汗拭きタオルを忘れて、山頂でひもじい思いをした。
With that said, I forgot lunch, stock, and a sweat towel today, and felt very hungry at the top of the mountain.
次回は忘れ物に気を付けて登り始めよう。
Next time, let's start climbing without forgetting anything.
本日の結果 Today's result
21MHz/CW 10-QSO ZL=1 W=4 BV=2 include
18MHz/CW 4-QSO W=1 S2S=2(JA) include
14MHz/CW 2-QSO
7MHz/CW 22-QSO S2S=8(JA) include
7MHz/SSB 3-QSO S2S=3(JA)
430MHz/FM 3-QSO S2S=3(JA)
合計 Total 44-QSO
本日もお相手頂いたor追いかけて頂いた各局様有難うございました。
TNX for all stations who QSO with me or searching for me!