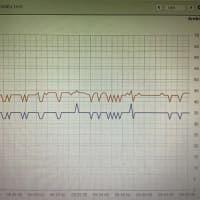
以前のセンサーはもう機械に付いているが、それの場所を移動してこの液晶に交換しようか?
スケッチはこちら。
----------------------------------------------
//Temp. checking with DS18B20 sensors + 2.4inch TFT
//DB12B20 Library 温度センサーのライブラリ
#include
#include
//2.4 TFT Library
#include
#include
//2.4 TFT section
// The control pins for the LCD can be assigned to any digital or
// analog pins...but we'll use the analog pins as this allows us to
// double up the pins with the touch screen (see the TFT paint example).
#define LCD_CS A3 // Chip Select goes to Analog 3
#define LCD_CD A2 // Command/Data goes to Analog 2
#define LCD_WR A1 // LCD Write goes to Analog 1
#define LCD_RD A0 // LCD Read goes to Analog 0
#define LCD_RESET A4 // Can alternately just connect to Arduino's reset pin
// Assign human-readable names to some common 16-bit color values:
#define BLACK 0x0000
#define BLUE 0x001F
#define RED 0xF800
#define GREEN 0x07E0
#define CYAN 0x07FF
#define MAGENTA 0xF81F
#define YELLOW 0xFFE0
#define WHITE 0xFFFF
Adafruit_TFTLCD_ILI9342 tft(LCD_CS, LCD_CD, LCD_WR, LCD_RD, LCD_RESET);
// If using the shield, all control and data lines are fixed, and
// a simpler declaration can optionally be used:
// Adafruit_TFTLCD tft;
//DB18B20 section 液晶シールドで使っていないピンが0番と1番しかない。
#define ONE_WIRE_BUS 1 //Sensor pin No. (Yellow wire)
#define SENSER_BIT 9 //Sensing resolution setting
//SD18B20 Lib. special command 温度センサーのおまじない。
OneWire oneWire(ONE_WIRE_BUS);
DallasTemperature sensors(&oneWire);
//SD18B20 each sensor ID (fill up manually) センサー変更したら書き換えせよ。
DeviceAddress sens1D1Z = { 0x28, 0xFF, 0x4A, 0xDE, 0x93, 0x16, 0x5, 0xBD };
DeviceAddress sens1D2Z = { 0x28, 0xFF, 0x89, 0x28, 0x94, 0x16, 0x5, 0xD3 };
DeviceAddress sens2D1Z = { 0x28, 0xFF, 0xC7, 0xE0, 0x93, 0x16, 0x5, 0xC7 };
DeviceAddress sens2D2Z = { 0x28, 0xFF, 0xFF, 0x40, 0x8C, 0x16, 0x3, 0x1C };
DeviceAddress sens3D1Z = { 0x28, 0xFF, 0x2C, 0x8E, 0xA1, 0x16, 0x4, 0x27 };
DeviceAddress sens3D2Z = { 0x28, 0xFF, 0x95, 0xE7, 0xA1, 0x16, 0x3, 0x1B };
DeviceAddress sens4D1Z = { 0x28, 0xFF, 0x89, 0xE3, 0xA1, 0x16, 0x3, 0x48 };
DeviceAddress sens4D2Z = { 0x28, 0xFF, 0x42, 0x91, 0xA1, 0x16, 0x4, 0x36 };
DeviceAddress sens4D3Z = { 0x28, 0xFF, 0xCC, 0x93, 0xA1, 0x16, 0x4, 0x58 };
// Gloval valiables for temp. 温度の値を書き込む変数の定義。
float temp1D1Z;
float temp1D2Z;
float temp2D1Z;
float temp2D2Z;
float temp3D1Z;
float temp3D2Z;
float temp4D1Z;
float temp4D2Z;
float temp4D3Z;
void setup(void) {
//2.4 TFT section (initialize)
tft.reset();
tft.begin();
//SD18B20 section (initialize) センサーの初期化。
sensors.setResolution(SENSER_BIT);
sensors.begin();
}
void loop(void) {
sensors.requestTemperatures(); //Temp. reading request 温度読み取り命令
//inserting Temp. value into valiables 温度の値を変数に入れる。
temp1D1Z = sensors.getTempC(sens1D1Z);
temp1D2Z = sensors.getTempC(sens1D2Z);
temp2D1Z = sensors.getTempC(sens2D1Z);
temp2D2Z = sensors.getTempC(sens2D2Z);
temp3D1Z = sensors.getTempC(sens3D1Z);
temp3D2Z = sensors.getTempC(sens3D2Z);
temp4D1Z = sensors.getTempC(sens4D1Z);
temp4D2Z = sensors.getTempC(sens4D2Z);
temp4D3Z = sensors.getTempC(sens4D3Z);
uint8_t rotation=1; //Set LCD direction 0,1,2,3
tft.setRotation(rotation);
testText(); //Text drawing function
delay(10000); //Drawing interval
tft.fillScreen(BLUE);
delay(1000);
}
unsigned long testText() {
tft.fillScreen(BLACK); //Fill screen with color first
tft.setCursor(0, 0); //Set origin point
tft.setTextSize(2); //Text size
tft.setTextColor(RED); //Text color
tft.println("TEMP. CHECK"); //output
tft.setTextSize(1);
tft.println();
tft.setTextSize(3);
tft.setTextColor(WHITE);
tft.print(" 1D1Z ");
tft.println(String(temp1D1Z, 1)); //Limit No. of digit
tft.print(" 1D2Z ");
tft.println(String(temp1D2Z, 1)); //小数点以下を1桁にした。
tft.println();
tft.setTextColor(GREEN);
tft.print(" 2D1Z ");
tft.println(String(temp2D1Z, 1));
tft.print(" 2D2Z ");
tft.println(String(temp2D2Z, 1));
tft.println();
tft.setTextColor(WHITE);
tft.print(" 3D1Z ");
tft.println(String(temp3D1Z, 1));
tft.print(" 3D2Z ");
tft.println(String(temp3D2Z, 1));
tft.println();
tft.setTextColor(GREEN);
tft.print(" 4D1Z ");
tft.println(String(temp4D1Z, 1));
tft.print(" 4D2Z ");
tft.println(String(temp4D2Z, 1));
tft.print(" 4D3Z ");
tft.println(String(temp4D3Z, 1));
}
つづく