


本格アプリの作り方
【開発環境】
os:Windows 10 (64ビット)
IDE(統合開発環境):VisualStudio 2017
言語;VB
【参考書】
株式会社秀和システム「作って覚えるVisualBasic2017」
著者:萩原 博之/宮崎 昭世
【目的】
簡易家計簿アプリを通して本格的なアプリの作り方を学ぶ事。どのようにプログラミングを進めていくか?を考える。
●アプリを作る目的
→パソコンで家計簿を作る
●家計簿に必要な機能をまとめる
→1.日々の買い物・金額などのデータを入力する機能
→2.入力データの確認や、合計を表示する機能
→3.入力データを保存する機能
→4.入力データを合計する機能
→5.間違えたデータを修正・削除する機能
→6.買い物を月ごとに集計・計算する機能
●処理
機能に実行するプログラムを考える。コントロールの選定などやプログラムなど
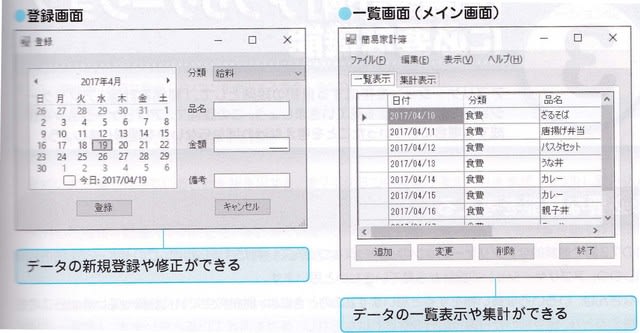
【画面デザイン】
こんな感じにする。画面は登録画面とメイン画面の2画面を用意する。
■メイン画面の設定

コントロールの配置
①Formコントロール
Textプロパティ=家計簿
②MenuStripコントロール
(Name)プロパティ=mainMenu
③DataGridViewコントロール
(Name)プロパティ=dgy
④Buttonコントロール
(Name)プロパティ=buttonAdd
Textプロパティ=追加
⑤Buttonコントロール
(Name)プロパティ=buttonChange
Textプロパティ=変更
⑥Buttonコントロール
(Name)プロパティ=buttonDelete
Textプロパティ=削除
⑦Buttonコントロール
(Name)プロパティ=buttonEnd
Textプロパティ=終了
■登録画面
登録用のフォームを作成する
①プロジェクトの[追加]から「Windowファーム」を選択する
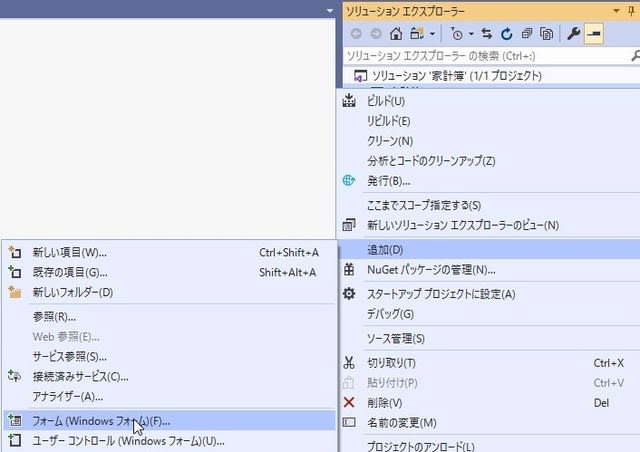
②[新しい項目の追加]ダイアログボックスから、「Windowファーム」を選択し、
名前の項目に「ItemForm」と記入し、「追加ボタン」を押す

③「ItemForm」フォームに各コントロールを配置して登録画面を作る

[ItemFormのコントロール設定]
①Formコントロール
Textプロパティ=登録
②MonthCalenderコントロール
(Name)プロパティ=MonCalender
③Labelコントロール
Textプロパティ=分類
④Labelコントロール
Textプロパティ=品名
⑤Labelコントロール
Textプロパティ=金額
⑥Labelコントロール
Textプロパティ=備考
⑦ComboBoxコントロール
(Name)プロパティ=cmbCategory
DropDownStyleプロパティ=DropDownList
⑧TextBoxコントロール
(Name)プロパティ=txtItem
⑨MaskedTextBoxコントロール
(Name)プロパティ=mtxtMoney
Maskプロパティ=999999(6桁)
TextAlign=Right
⑩TextBoxコントロール
(Name)プロパティ=txtRemarks
⑪Buttonコントロール
(Name)プロパティ=buttonOK
Textプロパティ=登録
DialogResultプロパティ=OK
⑫Buttonコントロール
(Name)プロパティ=buttonCancel
Textプロパティ=キャンセル
DialogResultプロパティ=Cancel
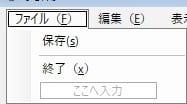
【メインのメニュー項目の作成】
・ファイル
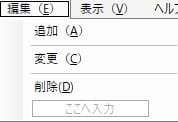
・編集
・表示

・ヘルプ
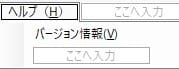
※区切り線は[ここへ入力]の横の↓をクリックし、リストから[Separator]を選ぶ
【データセット】
登録画面で追加したデータをメインの一覧画面に反映させたい場合に、このデータを格納する領域が必要となる。そのため、VBでは複数のデータを扱うデータセットという仕組みがある。
ここでは型付きデータセットを使う。
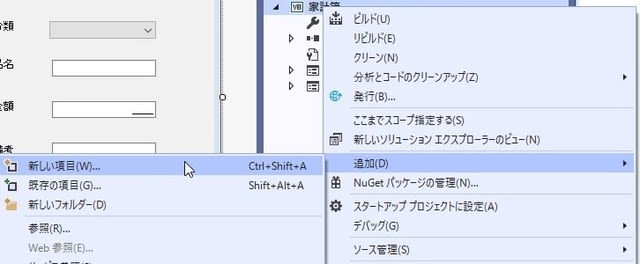
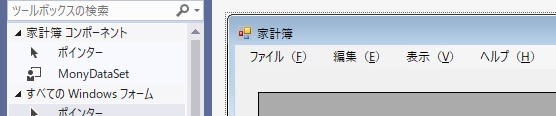
①ソリューションエクスプローラーにある家計簿を右クリックし、[追加]-[新しい項目]を選択する
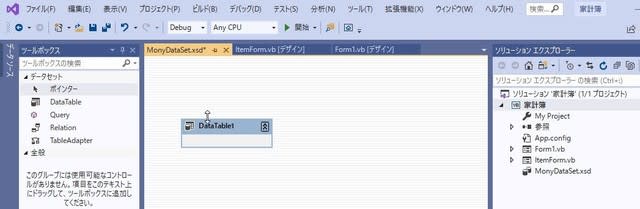
②「テンプレート」-[データセット]を選択し、名前の欄に「MoneyDataSet.xsd」と記入し、「追加」ボタンを押す

③ツールボックスから[DataTabel]コントロールをドラック&ドロップして画面に貼る
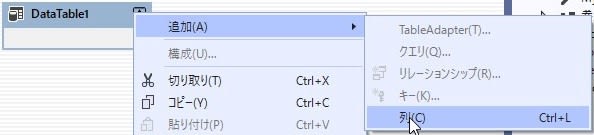
④[DataTabel]コントロールを右クリックし、[追加]-[列]をクリックし、下図のように作成する
■それぞれのColumn(列)コントロール
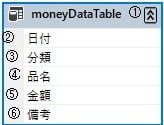
①Data Tableコントロール
Nameプロパティ=moneyDataTable
②Columnコントロール
Nameプロパティ=日付
DataTypeプロパティ=System.DateTime
③Columnコントロール
Nameプロパティ=分類
DataTypeプロパティ=System.String
④Columnコントロール
Nameプロパティ=品名
DataTypeプロパティ=System.String
⑤Columnコントロール
Nameプロパティ=金額
DataTypeプロパティ=System.In32
⑥Columnコントロール
Nameプロパティ=備考
DataTypeプロパティ=System.String
⑤MoneyDataSetのビルド
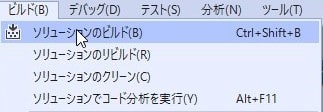
⑥ビルドの確認
【DataGridViewコントロールにデータセットを結びつける】
1)一覧画面のDataGridViewコントロールのスマートタグをクリックする
2)DataGridViewタスクから[meneyDataTable]を選択する。
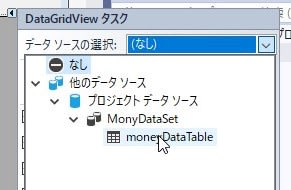
3)列が表示される


※コメント投稿者のブログIDはブログ作成者のみに通知されます