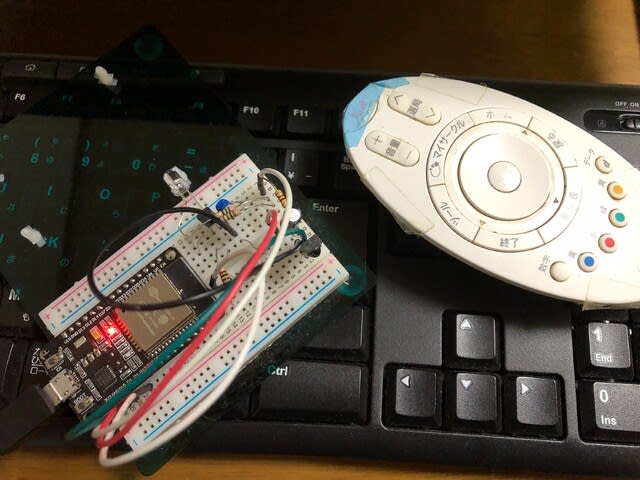
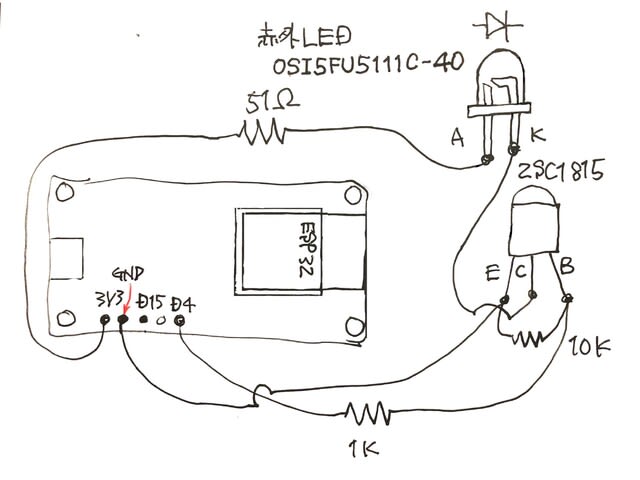
この記事は書きかけなので、変更するかもしれません。
ポイント
シリアルモニタからリモコン送信スケッチのパリティ入力不要にした。
ライブラリ"IRremoteESP8266"のサンプルスケッチ"IRsendDemo"を改変
ESP32 DEV Module互換品(?)でテスト

使い方
シリアルモニタを開いて、通信速度を合わせ、テキストボックスへテストしたいcommandを入力し"送信"を押す。
"0x"は省略可、”F148”は固定、commandは3桁、パリティは"0"(ゼロ)で入力する。
パリティは算出された値に置き換えられて送信される。
下は入力例の画像です。"0xF148C880"入力して送信すると、下から2行目の"F148C881"が
送信されます。

参考スケッチ//省略
const uint16_t kIrLed = 4; // ESP8266 GPIO pin to use. Recommended: 4 (D2).
uint32_t IRcommand = 0;
String SerialRead;
//中略
void setup() {
irsend.begin();
Serial.begin(115200);
}
loop()関数の中に追加
if (Serial.available()) {
//例 line=line.substring(0,line.indexOf('#')); //インデックス0(行頭)から(#までのインデックス数)の文字列取得
SerialRead = Serial.readStringUntil('\n'); //終端文字'\n'検出まで読み文字列全体を変数へ(Stringオブジェクト)
SerialRead.trim();
//strtol関数は文字列をlong int型の数値に
//strtoul関数はunsigned long int型の数値に変換します
IRcommand = strtoul(SerialRead.c_str(), NULL, 16);
//パリティ計算に不要な最上位のFを消しておく例0xF148A887と0xF0000000のXOR取る
uint32_t aIRcommand = IRcommand ^ 0xF0000000;
Serial.println(aIRcommand, BIN);
uint32_t val1 = aIRcommand >> 24;//upper
Serial.println(val1, BIN);//デバック
uint32_t val2 = aIRcommand << 8;
val2 = val2 >> 28;
Serial.println(val2, BIN);//デバック
uint32_t val3 = aIRcommand << 12;
val3 = val3 >> 28;
Serial.println(val3, BIN);//デバック
uint32_t val4 = aIRcommand << 16;
val4 = val4 >> 28;
Serial.println(val4, BIN);//デバック
uint32_t val5 = aIRcommand << 20;
val5 = val5 >> 28;
Serial.println(val5, BIN);//デバック
uint32_t val6 = aIRcommand << 24;
val6 = val6 >> 28;
Serial.println(val6, BIN);//デバック
uint32_t valP = val1^val2;
valP = valP^val3;
valP = valP^val4;
valP = valP^val5;
valP = valP^val6;
Serial.println(valP, BIN);//デバック
IRcommand = IRcommand | valP;//パリティを追加
Serial.println(IRcommand, BIN);//デバック
Serial.println(IRcommand, HEX);//デバック
//
Serial.println("Sharp AQUOS TV sendPanasonic");
//irsend.sendPanasonic(0x555A, 0xF148A887, 48); //例 音量- 48bit repeatなし
irsend.sendPanasonic(0x555A, IRcommand, 48); // 48bit repeatなし
//delay(2000);
}
//省略
つづくかも


※コメント投稿者のブログIDはブログ作成者のみに通知されます