Color

日々の備忘録

WPF ComboBox に新しい ItemsSource を追加する

2023年09月12日 10時43分52秒 | Windows

◆ReactiveCollection を用いて、簡単に ComboBox に新しい ItemsSource を追加する手順

1.準備
●OS:Windows 10 Pro 64bit Version 22H2
●IDE:Visual Studio Community 2022 Version 17.7.3

2.WPFアプリケーション(Prismフレームワーク)
プロジェクトのテンプレートとして Prism Blank App(WPF) を選択して、新しいプロジェクトを作成

3.Nuget
ReactiveProperty.WPF
MaterialDesignThemes【任意】
MaterialDesignColors【任意】

4.App.xaml

    001: <prism:PrismApplication x:Class="WPFComboBoxSample.App" 002: xmlns="http://schemas.microsoft.com/winfx/2006/xaml/presentation" 003: xmlns:x="http://schemas.microsoft.com/winfx/2006/xaml" 004: xmlns:local="clr-namespace:WPFComboBoxSample" 005: xmlns:md="http://materialdesigninxaml.net/winfx/xaml/themes" 006: xmlns:prism="http://prismlibrary.com/" > 007: <Application.Resources> 008: <ResourceDictionary> 009: <ResourceDictionary.MergedDictionaries> 010: <md:BundledTheme 011: BaseTheme="Light" 012: PrimaryColor="DeepPurple" 013: SecondaryColor="Lime" /> 014: <ResourceDictionary Source="pack://application:,,,/MaterialDesignThemes.Wpf;component/Themes/MaterialDesignTheme.Defaults.xaml" /> 015: </ResourceDictionary.MergedDictionaries> 016: </ResourceDictionary> 017: </Application.Resources> 018: </prism:PrismApplication>

5.MainWindow.xaml

    001: <Window x:Class="WPFComboBoxSample.Views.MainWindow" 002: xmlns="http://schemas.microsoft.com/winfx/2006/xaml/presentation" 003: xmlns:x="http://schemas.microsoft.com/winfx/2006/xaml" 004: xmlns:md="http://materialdesigninxaml.net/winfx/xaml/themes" 005: xmlns:prism="http://prismlibrary.com/" 006: prism:ViewModelLocator.AutoWireViewModel="True" 007: Title="WPFComboBoxSample" Height="350" Width="525" > 008: <Window.Resources> 009: <Style TargetType="ComboBox" x:Key="MenuComb" 010: BasedOn="{StaticResource MaterialDesignOutlinedComboBox}" > 011: <Setter Property="Width" Value="400" /> 012: <Setter Property="Margin" Value="10,0,0,0" /> 013: <Setter Property="IsEditable" Value="True" /> 014: </Style> 015: <Style TargetType="Button" x:Key="CommandBtn" 016: BasedOn="{StaticResource MaterialDesignFlatAccentBgButton}"> 017: <Setter Property="FontSize" Value="20" /> 018: <Setter Property="Width" Value="100" /> 019: <Setter Property="Margin" Value="0,0,0,0" /> 020: <Setter Property="IsEnabled" Value="True" /> 021: </Style> 022: </Window.Resources> 023: <Grid> 024: <ContentControl prism:RegionManager.RegionName="ContentRegion" /> 025: 026: <DockPanel > 027: <ComboBox md:HintAssist.Hint="Site" md:TextFieldAssist.HasClearButton="True" 028: Style="{StaticResource MenuComb}" 029: Text="{Binding SiteText.Value}" 030: ItemsSource="{Binding SiteList}" 031: SelectedValue="{Binding SiteName.Value}" /> 032: <Button x:Name="SiteAdd" Content="Add" 033: Style="{StaticResource CommandBtn}" 034: Command="{Binding MainCommand}" 035: CommandParameter="Add" /> 036: </DockPanel> 037: </Grid> 038: </Window>

6.MainWindowViewModel.cs

    001: using Prism.Commands; 002: using Prism.Mvvm; 003: using Reactive.Bindings; 004: 005: namespace WPFComboBoxSample.ViewModels 006: { 007: public class MainWindowViewModel : BindableBase 008: { 009: // ComboBox.ItemsSource 010: public ReactiveCollection<string> SiteList { get; set; } = new ReactiveCollection<string>(); 011: // ComboBox.SelectedValue 012: public ReactiveProperty<string> SiteName { get; set; } = new ReactiveProperty<string>(); 013: // ComboBox.Text 014: public ReactiveProperty<string> SiteText { get; set; } = new ReactiveProperty<string>(); 015: // Command 016: public DelegateCommand<string> MainCommand { get; } 017: 018: public MainWindowViewModel() 019: { 020: // Command実装 021: MainCommand = new DelegateCommand<string>(ExcuteCommand); 022: // サイトアドレス初期値 023: SiteList.Add("https://www.google.com/"); 024: SiteList.Add("https://www.yahoo.co.jp/"); 025: SiteList.Add("https://chat.openai.com/auth/login"); 026: } 027: private void ExcuteCommand(string _commandParamete) 028: { 029: switch (_commandParamete) 030: { 031: case "Add": 032: AddCommand(); // 新しいサイトアドレスを追加 033: break; 034: } 035: } 036: private void AddCommand() 037: { 038: string _s = SiteText.Value; 039: if (_s != null) 040: { // 新しい行の追加 041: SiteList.Add(_s); 042: } 043: } 044: } 045: }

7.実行
サイトアドレス初期状態

新しいサイトアドレスを入力して、 Add ボタンをクリック

ComboBox のリストに新しいサイトアドレスが追加されている

─以上─


Selenium 4.0 で Google Chrome の検索結果を取得

2023年08月30日 10時46分06秒 | Windows

◆Selenium 4.0 を用いて Google Chrome の検査結果を取得する手順

1.準備
●OS:Windows 10 Pro 64bit Version 22H2
●IDE:Visual Studio Community 2022 Version 17.7.3

2.コンソールアプリケーション

言語:C#

フレームワーク: .NET 6.0

コンソールアプリケーションを✅最上位レベルのステートメント使用しない で作成

3.Nuget

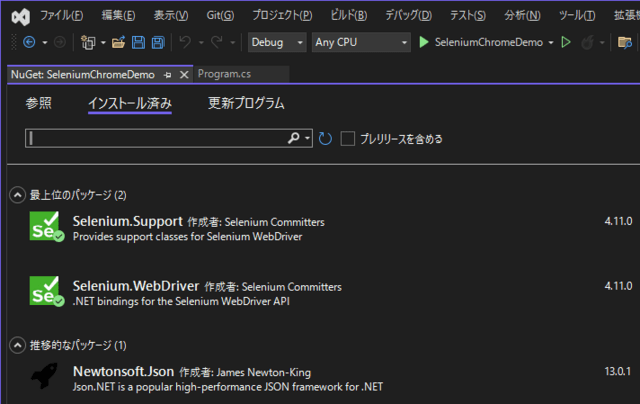
Nuget で Selenium.Support, Selenium.WebDriver を導入

4.chromedriver.exe

ここへアクセス

プラットフォーム win64 をダウンロードして解凍

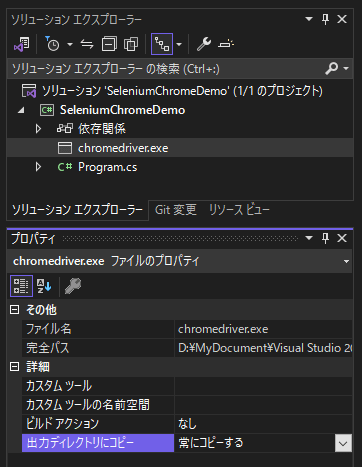
ソリューションエクスプローラー上で <追加> → <既存の項目> → <実行可能ファイル>

chromedriver.exe を追加、出力ディレクトリにコピー : 常にコピーする

5.ソースコード

  1. using System.Collections.ObjectModel;
  2. using System.Diagnostics;
  3. using System.Threading.Tasks;
  4. using OpenQA.Selenium;
  5. using OpenQA.Selenium.Chrome;
  6. using OpenQA.Selenium.Support.UI;
  7. namespace SeleniumChromeDemo
  8. {
  9.     internal class Program
  10.     {
  11.         static void Main(string[] args)
  12.         {
  13.             // google chrome を起動
  14.             System.Diagnostics.Process.Start(@"C:\Program Files\Google\Chrome\Application\chrome.exe", " -remote-debugging-port=9222 --user-data-dir=C:\\Temp_ForChromium");
  15.             Thread.Sleep(3000);
  16.             // 検索ワード
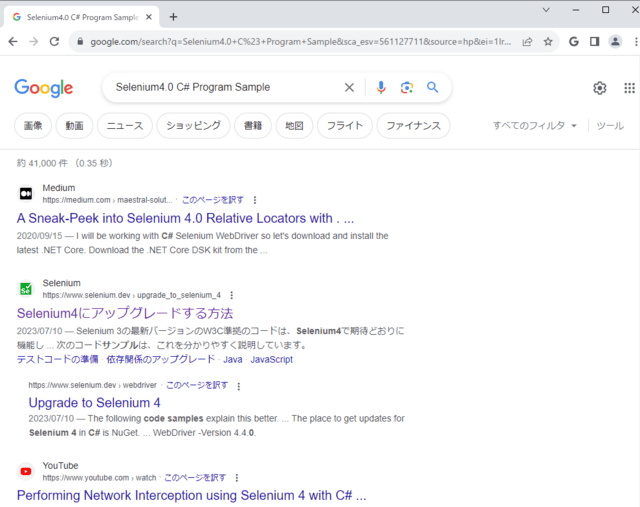
  17.             string searchWord = "Selenium4.0 C# Program Sample";
  18.             var options = new ChromeOptions
  19.             {
  20.                 DebuggerAddress = "127.0.0.1:9222"
  21.             };
  22.             using (var driver = new ChromeDriver(options))
  23.             {
  24.                 // 任意のブラウザ操作処理 ↓↓↓
  25.                 var wait = new WebDriverWait(driver, new TimeSpan(0, 0, 15));
  26.                 driver.Url = "https://www.google.com";
  27.                 var q = driver.FindElement(By.Name("q"));
  28.                 wait.Until(d => q.Displayed);
  29.                 q.Clear();
  30.                 q.SendKeys(searchWord);
  31.                 q.Submit();
  32.                 Thread.Sleep(1000);
  33.                 // ざっくり抽出
  34.                 ReadOnlyCollection<IWebElement> _elemnt_class = driver.FindElements(By.ClassName("MjjYud"));
  35.                 if (_elemnt_class.Count > 0)
  36.                 {
  37.                     foreach (IWebElement _e in _elemnt_class)
  38.                     {
  39.                         IWebElement _t;
  40.                         string _u = string.Empty;
  41.                         string _tx = string.Empty;
  42.                         try
  43.                         {
  44.                             _t = _e.FindElement(By.TagName("a")).FindElement(By.TagName("h3"));
  45.                             _tx = _t.Text;
  46.                         }
  47.                         catch
  48.                         {
  49.                             ;
  50.                         }
  51.                         try
  52.                         {
  53.                             _u = _e.FindElement(By.TagName("a")).GetAttribute("href");
  54.                         }
  55.                         catch
  56.                         {
  57.                             ;
  58.                         }
  59.                         // 検索された URL
  60.                         Console.WriteLine($"URL : {_tx}:{_u}");
  61.                     }
  62.                 }
  63.                 // 記事の抽出
  64.                 ReadOnlyCollection<IWebElement> _txt = driver.FindElements(By.XPath("//div[@data-sncf='1']"));
  65.                 if (_txt.Count > 0)
  66.                 {
  67.                     string _tt = string.Empty;
  68.                     foreach (IWebElement _e in _txt)
  69.                     {
  70.                         try
  71.                         {
  72.                             _tt = _e.Text;
  73.                             // 検索された記事
  74.                             Console.WriteLine($"Text : {_tt}");
  75.                         }
  76.                         catch
  77.                         {
  78.                             ;
  79.                         }
  80.                     }
  81.                 }
  82.             }
  83.         }
  84.     }
  85. }

6.実行

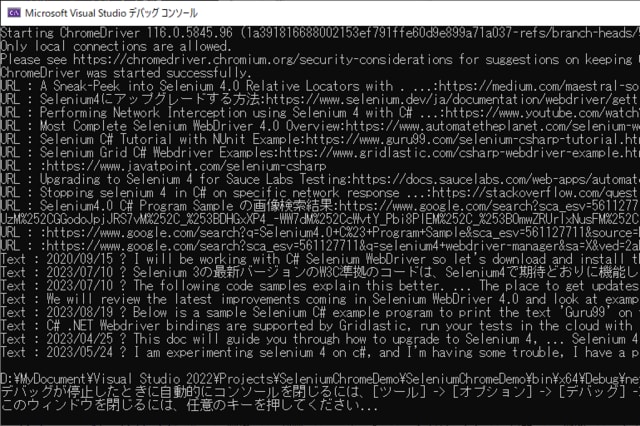
URL と 記事の一部が取得できる

─以上─

LibVLCSharp で動画再生

2022年08月20日 00時07分42秒 | Windows

◆LibVLCSharp を用いて動画再生手順

1.準備
●OS:Windows 10 Pro 64bit Version 21H2
●IDE:Visual Studio Community 2022 Version 17.3.1
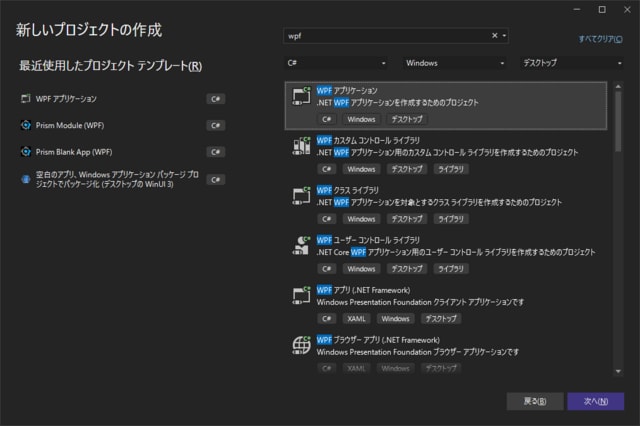
2.新しいプロジェクトの作成

Visual Studio 2022 を起動
<ファイル(F)> → <新規作成(N)> →
WPFアプリケーションを選択 →
<次へ(N)>

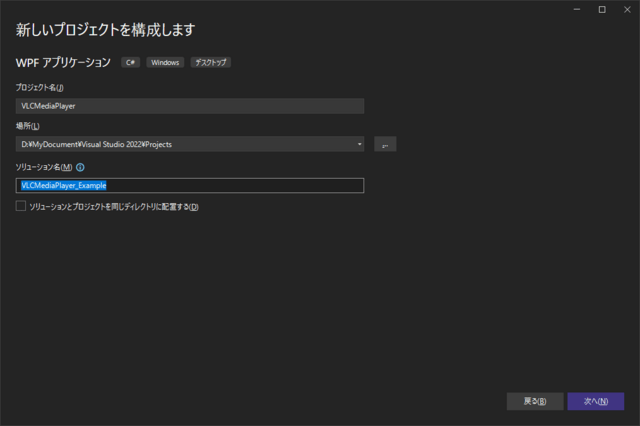
プロジェクト名: VLCMediaPlayer
ソリューション名: VLCMediaPlayer_Example
<次へ(N)>

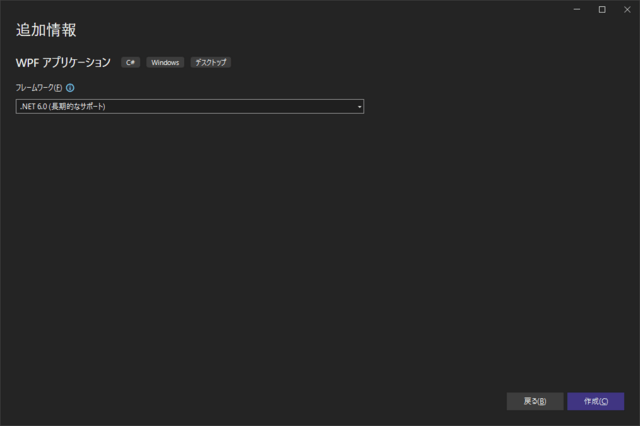
.NET 6.0(長期的なサポート)を選択
<作成(C)>

<プロジェクト(P)> → <Nugetパッケージの管理(N)> → 
LibVLCSharp を検索して、インストール

LibVLCSharp.WPF を検索して、インストール

VideoLAN.LibVLC.Windows を検索して、インストール

3.MainWindow.xaml

ここを参照すること

    001: <Window x:Class="VLCMediaPlayer.MainWindow" 002: xmlns="http://schemas.microsoft.com/winfx/2006/xaml/presentation" 003: xmlns:x="http://schemas.microsoft.com/winfx/2006/xaml" 004: xmlns:d="http://schemas.microsoft.com/expression/blend/2008" 005: xmlns:mc="http://schemas.openxmlformats.org/markup-compatibility/2006" 006: xmlns:local="clr-namespace:VLCMediaPlayer" 007: xmlns:uc="clr-namespace:LibVLCSharp.WPF;assembly=LibVLCSharp.WPF" 008: mc:Ignorable="d" 009: Title="Media Player" Height="450" Width="800" Closed="MainWindow_Closed"> 010: <Grid> 011: <uc:VideoView x:Name="VideoView" MediaPlayer="{Binding" Path="VideoPlayer}" Panel.ZIndex="1"> 012: <StackPanel Orientation="Horizontal" x:Name="videoPanel"> 013: <Button Content="PLAY" Height="25" Width="50" VerticalAlignment="Bottom" HorizontalAlignment="Left" Click="PlayButton_Click" /> 014: <Button Content="STOP" Height="25" Width="50" VerticalAlignment="Bottom" HorizontalAlignment="Left" Click="StopButton_Click" /> 015: </StackPanel> 016: </uc:VideoView> 017: </Grid> 018: </Window>

4.MainWindow.xaml.cs

    001: using LibVLCSharp.Shared; 002: using System; 003: using System.IO; 004: using System.Windows; 005: using System.Windows.Controls; 006: using System.Windows.Media; 007: using MediaPlayer = LibVLCSharp.Shared.MediaPlayer; 008: 009: 010: namespace VLCMediaPlayer 011: { 012: /// <summary> 013: /// Interaction logic for MainWindow.xaml 014: /// </summary> 015: public partial class MainWindow : Window 016: { 017: LibVLC _libVLC; 018: MediaPlayer _mediaPlayer; 019: Label _label; 020: public MainWindow() 021: { 022: InitializeComponent(); 023: _label = new Label 024: { 025: Content = "TEST", 026: HorizontalAlignment = HorizontalAlignment.Right, 027: VerticalAlignment = VerticalAlignment.Bottom, 028: Foreground = new SolidColorBrush(Colors.Red) 029: }; 030: videoPanel.Children.Add(_label); 031: _libVLC = new LibVLC(); 032: _mediaPlayer = new MediaPlayer(_libVLC); 033: // we need the VideoView to be fully loaded before setting a MediaPlayer on it. 034: VideoView.Loaded += (sender, e) => VideoView.MediaPlayer = _mediaPlayer; 035: } 036: 037: /// <summary> 038: /// MediaPlayer再生開始 039: /// </summary> 040: /// <param name="sender"></param> 041: /// <param name="e"></param> 042: private void PlayButton_Click(object sender, RoutedEventArgs e) 043: { 044: if (!_mediaPlayer.IsPlaying) 045: { 046: string _myVideoPath = System.Environment.GetFolderPath(Environment.SpecialFolder.MyVideos); 047: string _fileName = _myVideoPath ?? "C:"; 048: _fileName += @"\sample.mp4"; 049: if (File.Exists(_fileName)) 050: { 051: _label.Content = _fileName; // ファイル名表示 052: using (var media = new Media(_libVLC, new Uri(_fileName))) 053: _mediaPlayer.Play(media); 054: } 055: } 056: } 057: 058: /// <summary> 059: /// MediaPlayer再生停止 060: /// </summary> 061: /// <param name="sender"></param> 062: /// <param name="e"></param> 063: private void StopButton_Click(object sender, RoutedEventArgs e) 064: { 065: if (_mediaPlayer.IsPlaying) 066: { 067: _mediaPlayer.Stop(); 068: } 069: } 070: 071: /// <summary> 072: /// Window閉じるときの手当 073: /// </summary> 074: /// <param name="sender"></param> 075: /// <param name="e"></param> 076: private void MainWindow_Closed(object sender, EventArgs e) 077: { 078: _mediaPlayer.Stop(); 079: _mediaPlayer.Dispose(); 080: _libVLC.Dispose(); 081: } 082: } 083: } 084:

5.動画ファイルの用意

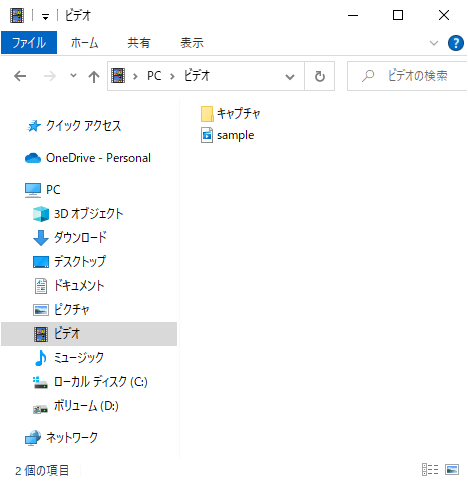
ビデオフォルダに sample.mp4 を用意

6.実行

<デバッグ(D)> → <デバッグの開始(S)>
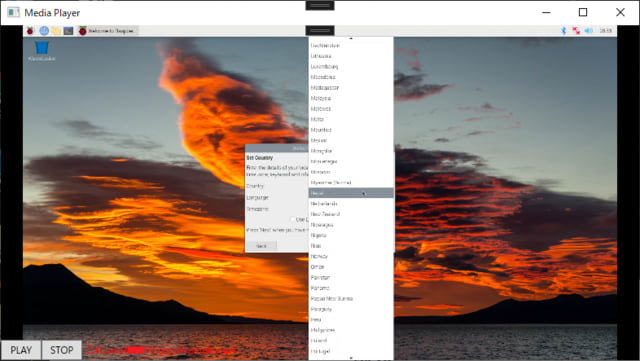
<PLAY>
動画の再生開始を確認

─以上─

Windows10 に Flutter を導入[その2]

2022年03月19日 18時04分33秒 | Windows

◆Windows10 に Flutter開発環境を構築する手順。[その1]からの続き


5.Cmdline-tools のセットアップ


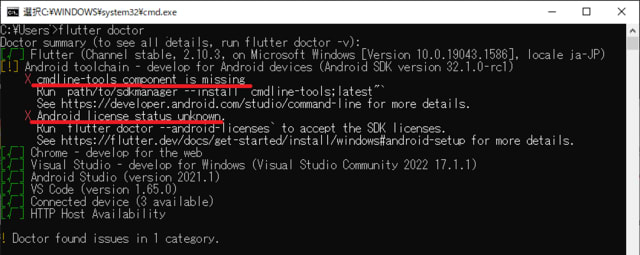
コマンドプロンプトで、flutter doctor を実行
cmdline-toolsAndroid ライセンスが見つからない

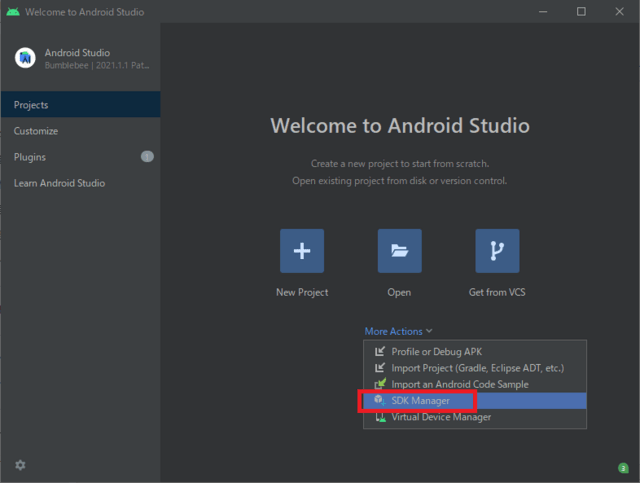
Android Studio → <SDK Manager>をクリック

SDK Tools タブを選択して、Android SDK Command-line Tools(Latest) をチェック
<OK>をクリック

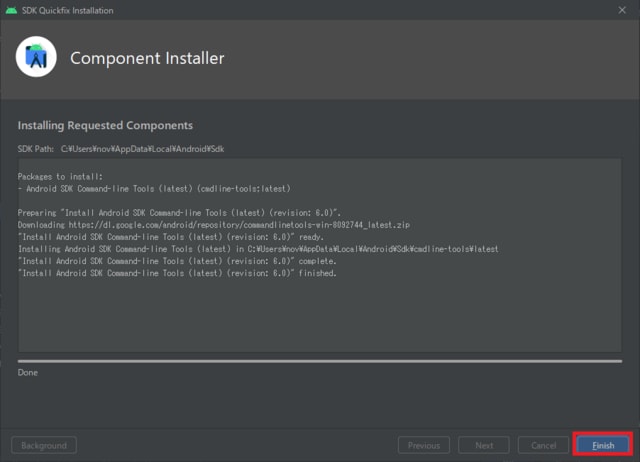
<Finish>をクリック
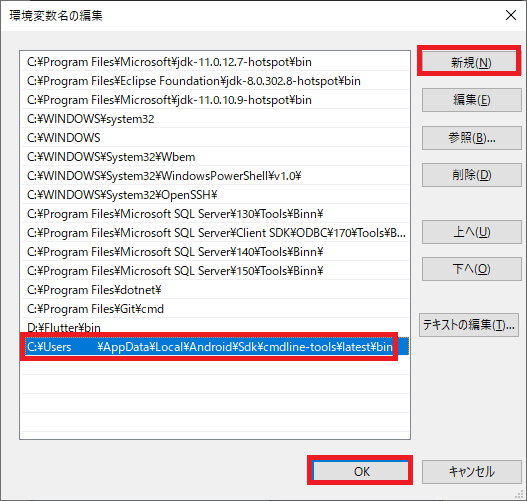
Windows10 の<システム> → <詳細設定> → <環境変数(N)> →
 Path を選択して、 <編集(I)>

<新規(N)> → C:\Users\ユーザー名\AppData\Local\Android\Sdk\cmdline-tools\latest\bin
を入力 → <OK> をクリック

6.android-licenses のセットアップ


コマンドプロンプトで、flutter doctor --android-licenses を実行
すべてのライセンス承認に<y>を入力
すべてのライセンスが承認されたことを確認

コマンドプロンプトで、flutter doctor を実行して、問題がないことを確認

7.Visual Studio Code にFlutter を導入

Visual Studo Code Ver.1.65.2 を起動

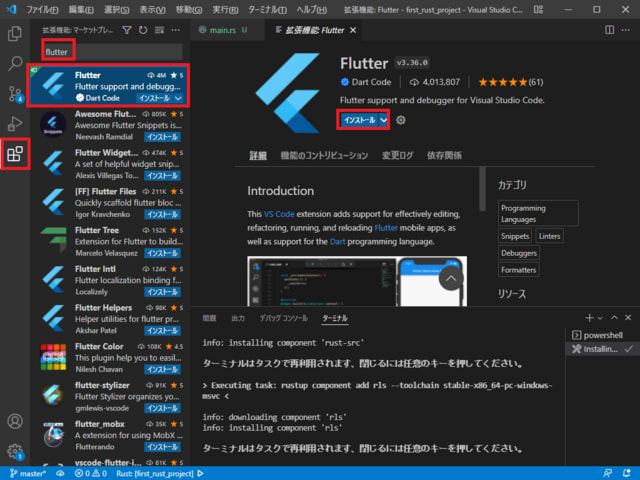
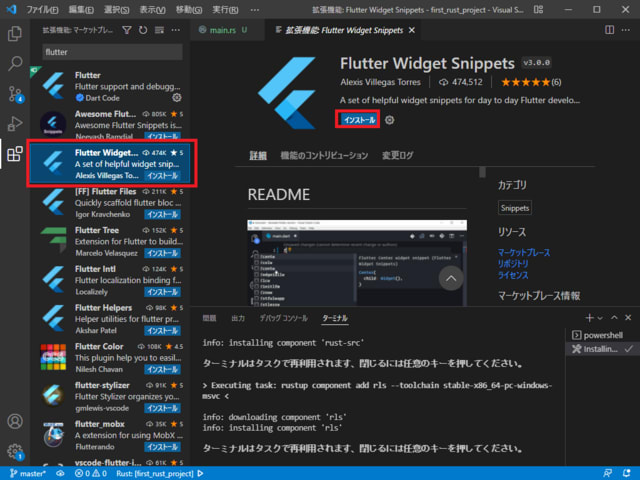
<拡張機能> → flutter を検索 → Flutter を選択
 → <インストール>をクリック

Flutter Widget Snippets を選択 → <インストール>をクリック

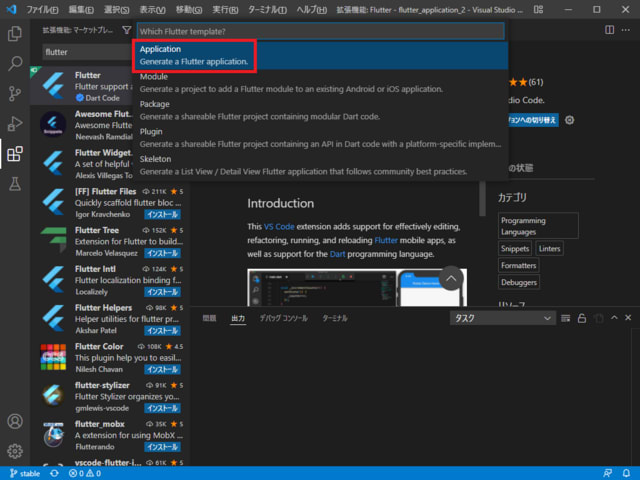
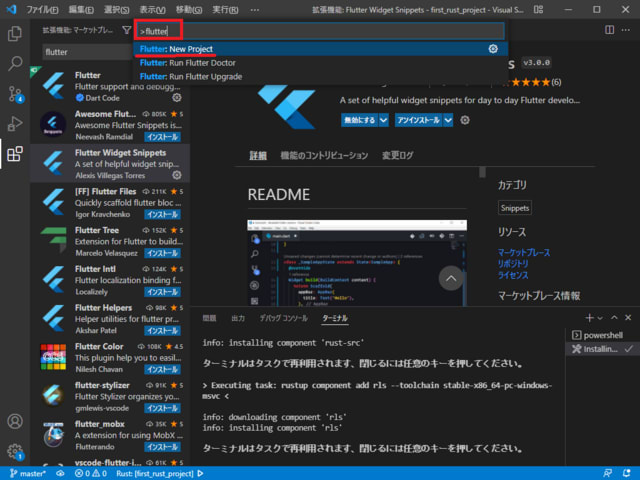
<F1>を入力 → flutter を入力 → Flutter: New Project を選択

Application を選択

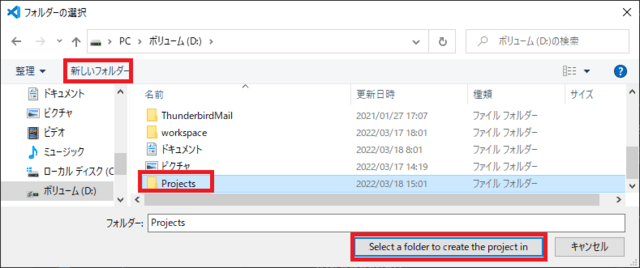
<新しいフォルダー> → Projects と入力
 → <Select a folder to create the project in >をクリック

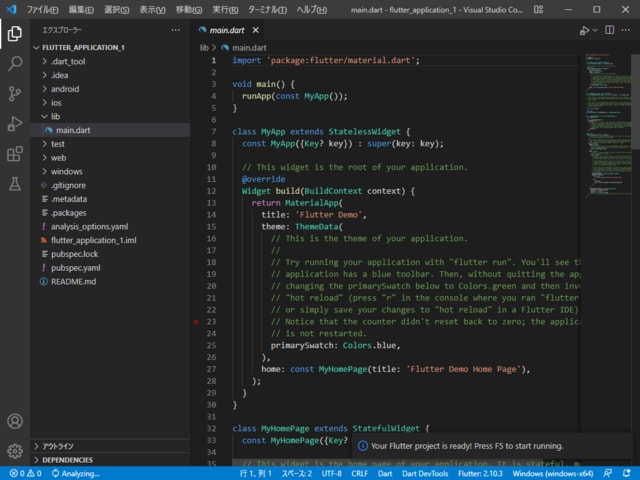
flutter_application_1 と入力

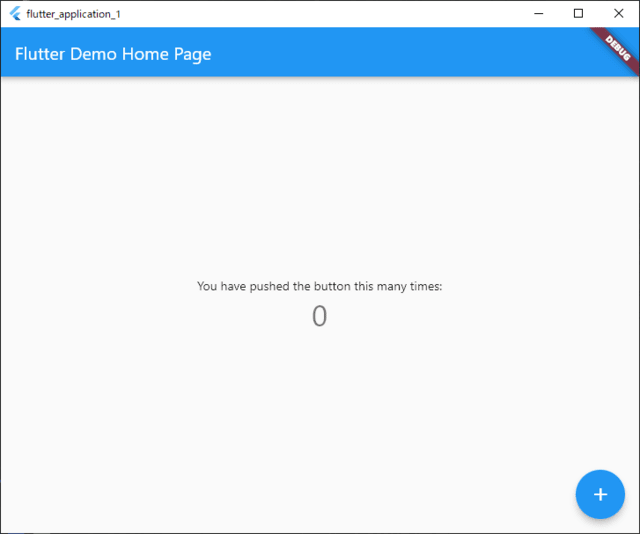
flutter のテンプレートプロジェクトが作成される
<F5>を入力

flutter のデモプログラムが起動する

─以上─


Windows10 に Flutter を導入[その1]

2022年03月18日 11時37分42秒 | Windows

◆Windows10 に Flutter開発環境を構築する手順

1.準備

●OS:Windows 10 Pro Version 21H1
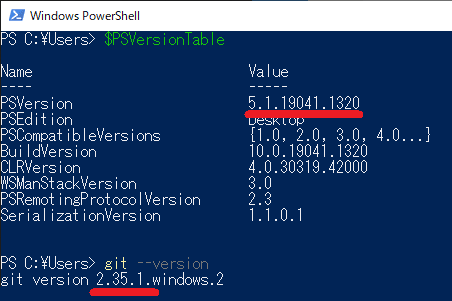
●Tool: Windows PowerShell 5.1.19041.1320
●Tool: Git for Windows 2.35.1

2.Flutter SDK をダウンロード

Windows PowerShell と Git for Windows のバージョンを確認

ここへアクセスして<flutter_windows_2.10.3-stable.zip>をクリック
zipファイルを解凍

3.パスの更新

解凍した Flutter フォルダをD:ドライブにコピー(使用するPC環境で変更する)
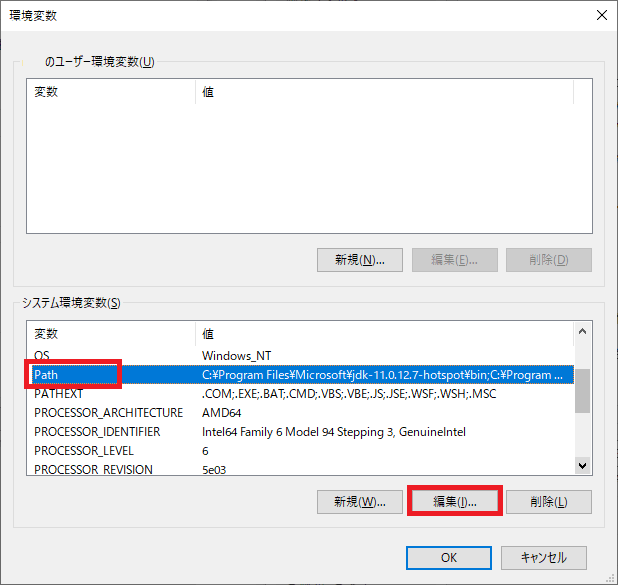
<システム> → <詳細設定> → <環境変数(N)>

Path を選択して、 <編集(I)>をクリック

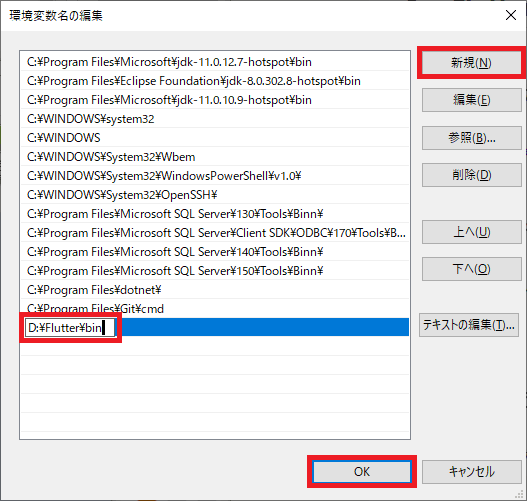
<新規(N)> → D:\flutter\bin を入力 → <OK> をクリック
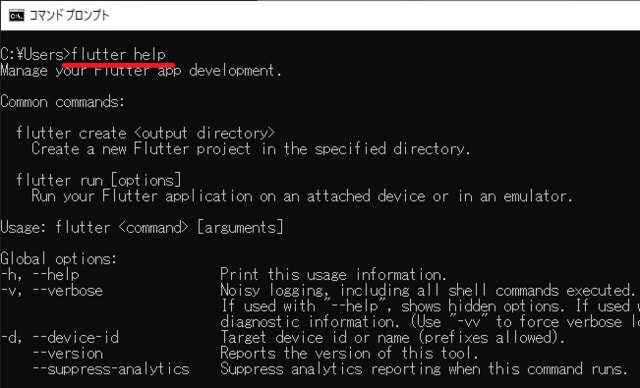
コマンドプロンプトで

flutter help を実行
Flutterにパスが通っているか確認

4.Android SDK のセットアップ


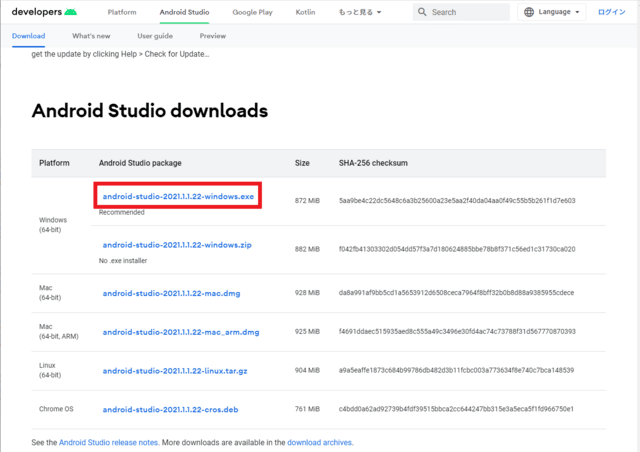
ここへアクセスして、<android-studio-2021.1.1.22-windows.exe>をダウンロード
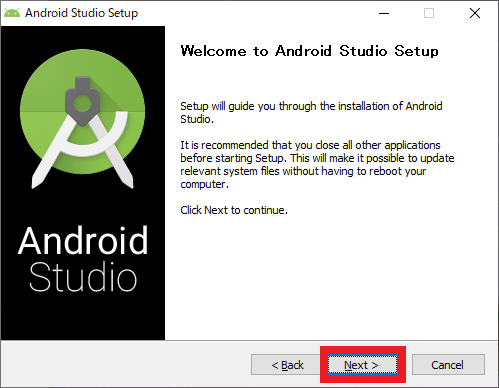
android-studio-2021.1.1.22-windows.exe を実行

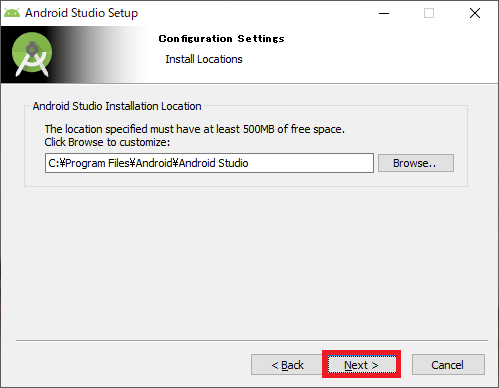
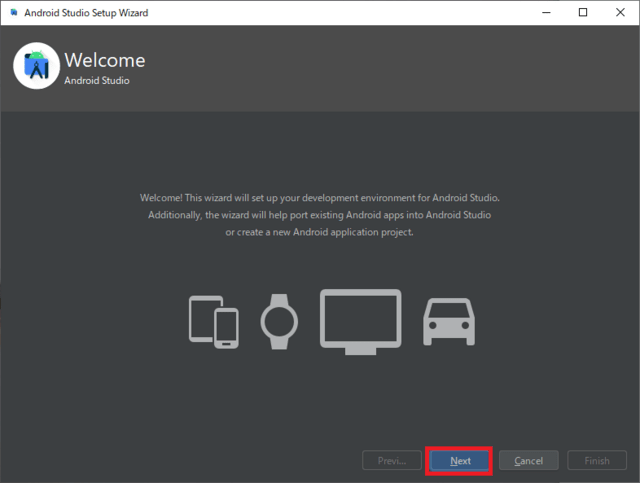
<Next>をクリック

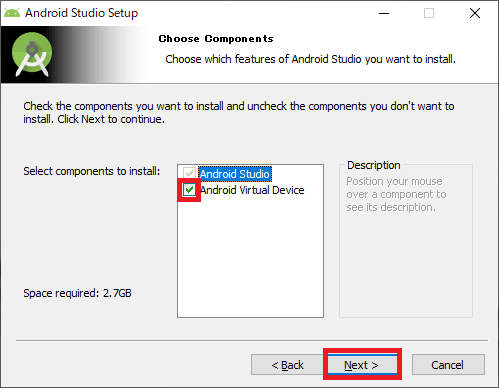
Android Virtual Device を選択して、<Next>をクリック

<Next>をクリック

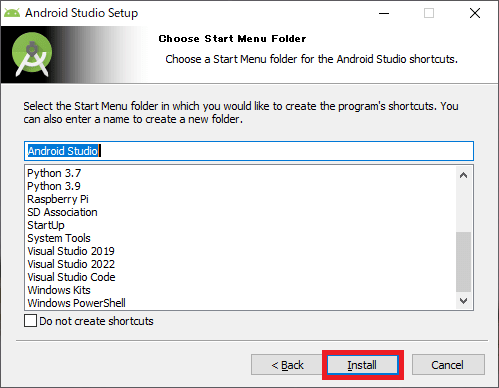
<Install>をクリック

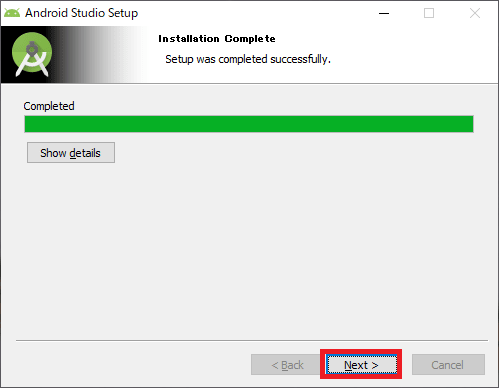
<Next>をクリック

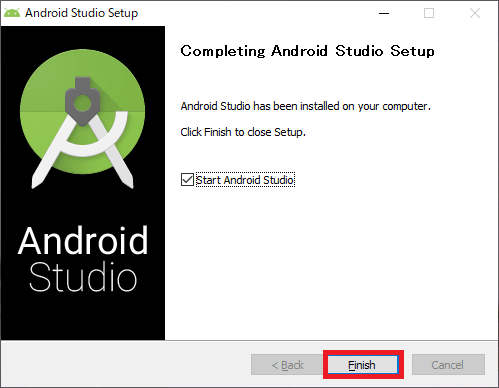
<Finish>をクリック

<Do not import setting>を選択して、<OK>をクリック

<Don't send>をクリック

<Next>をクリック

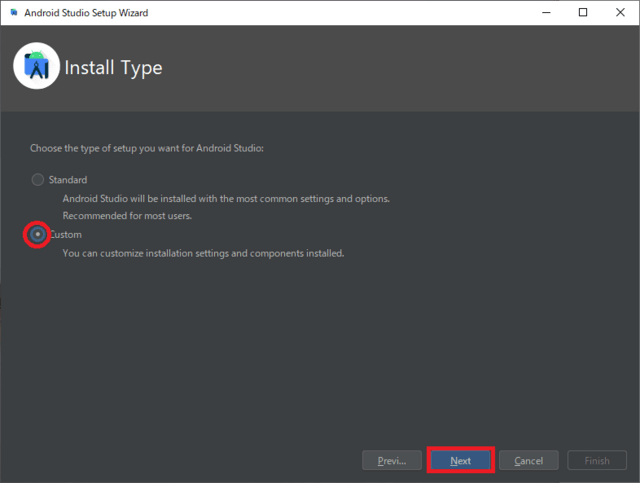
<Custom>を選択して、<Next>をクリック

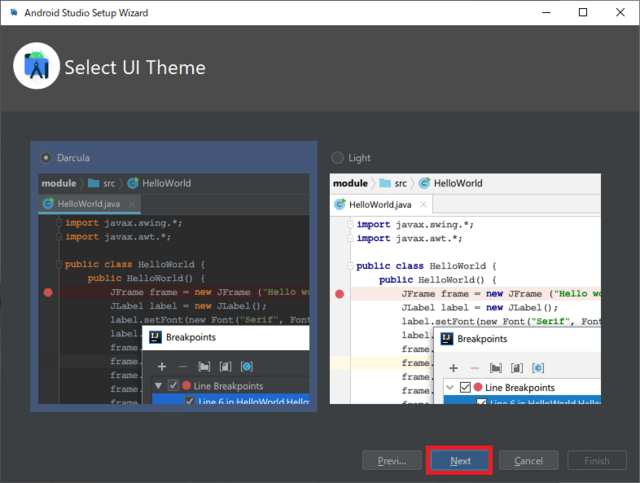
<Next>をクリック

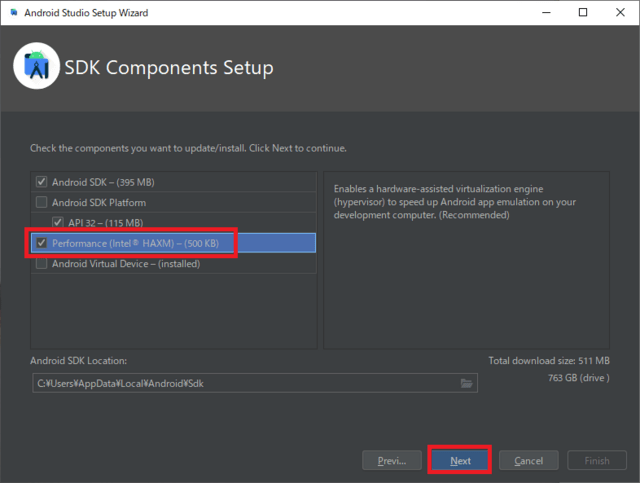
<Next>をクリック

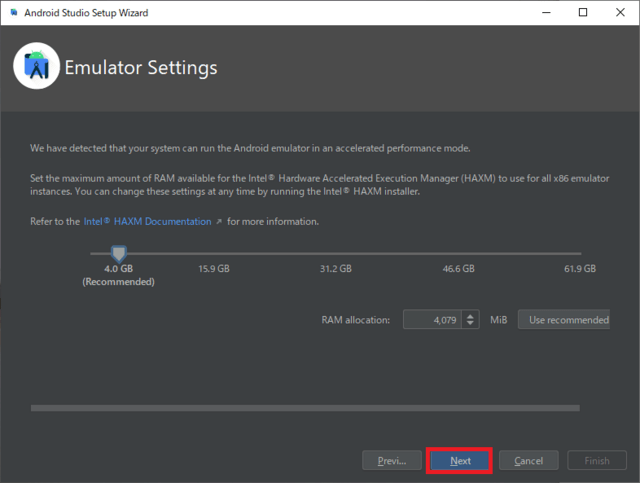
<Perfomance(Intel HAXM)>を選択して、<Next>をクリック

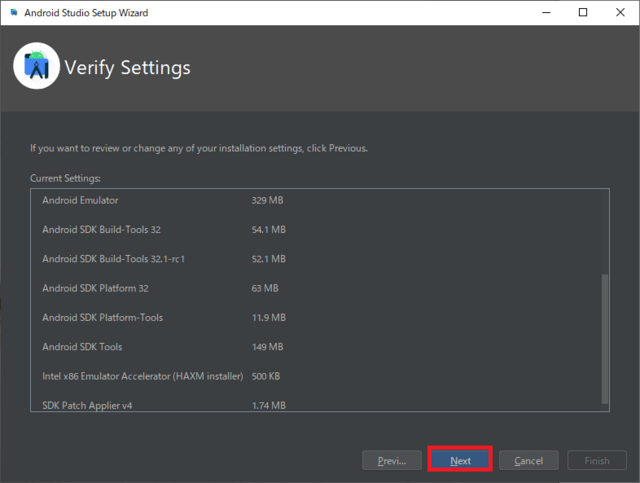
(使用するPC環境で変化する)<Next>をクリック

<Next>をクリック

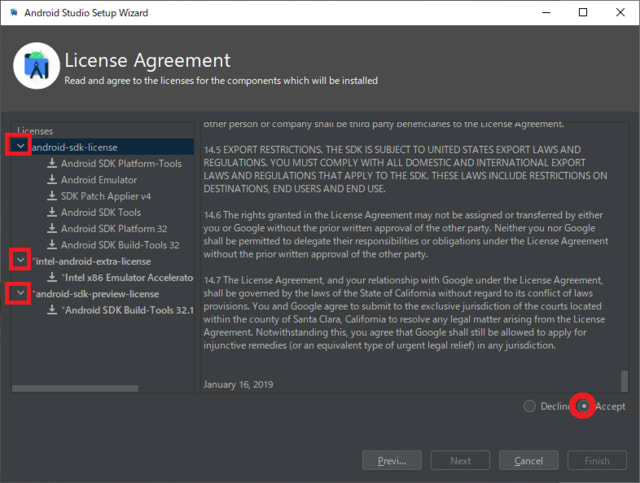
android-sdk-laicense で <Accept>を選択
intel-android-extra-license で <Accept>を選択
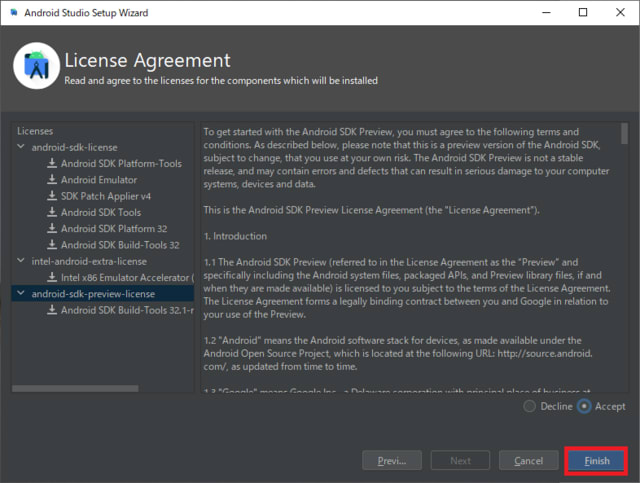
android-sdk-preview-license で <Accept>を選択

<Finish>をクリック

<Finish>をクリック

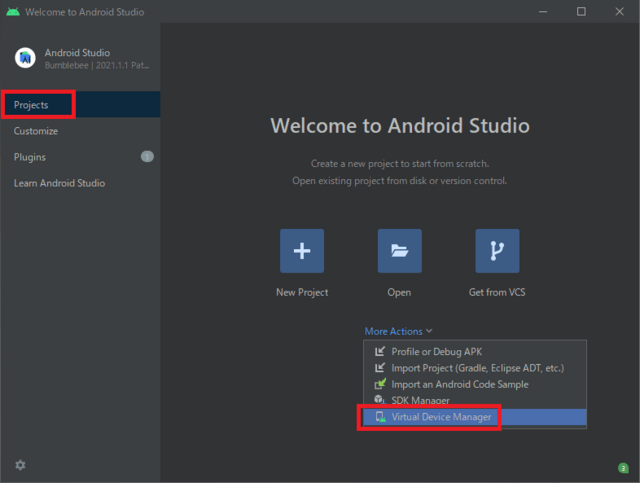
<Virtual Device Manager>をクリック

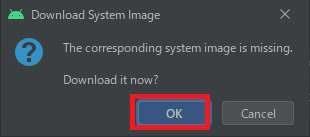
<OK>をクリック

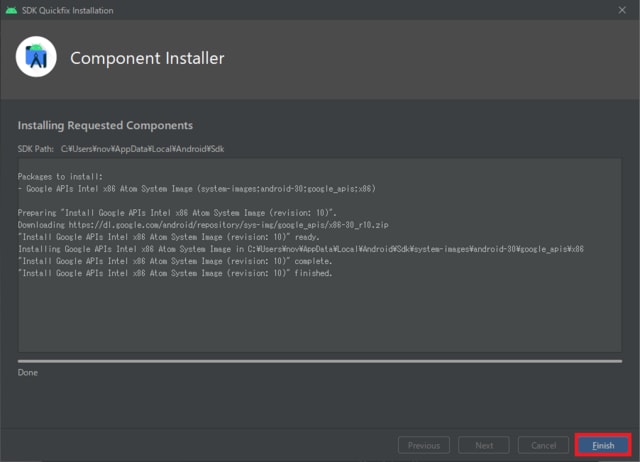
<Finish>をクリック

<▶>をクリック

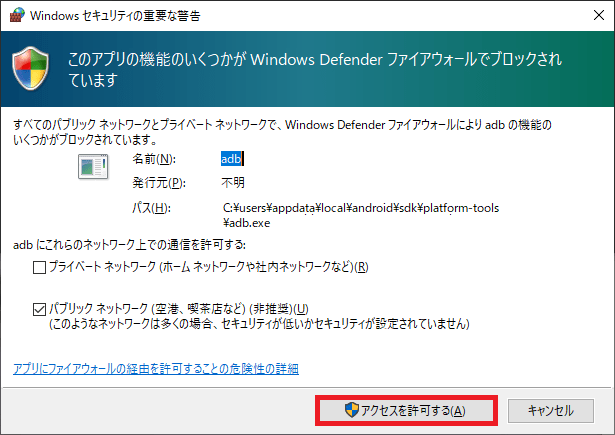
<アクセスを許可する(A)>をクリック

The emulator process for AVD Android_Emulator_30 has terminated.
エラーメッセージが表示されて、エミュレータが動作しない
【対応策】
<設定> → <アプリと機能>
Android Studio をアンインストール
C:\Users\ユーザー名\AppData\Local\Android ファオルダごとを削除
android-studio-2021.1.1.22-windows.exe を再実行

Android Studio → <Virtual Device Manager>をクリックするまで、再インストールを進める

<Create device>をクリック

<Pixel 4>を選択して、<Next>をクリック

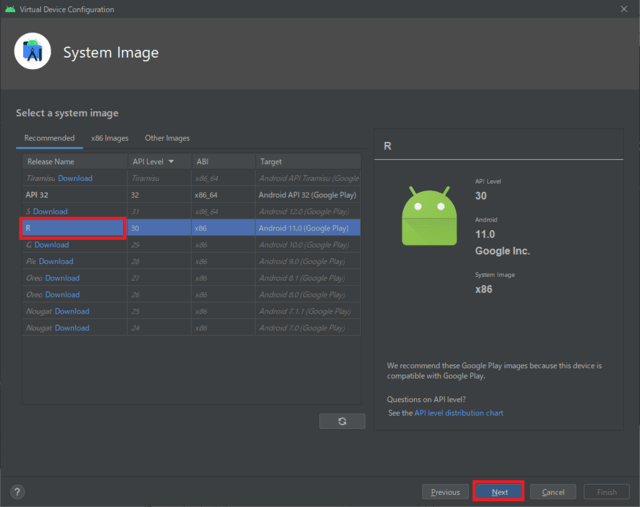
Release Name - <R>を選択して、<Next>をクリック

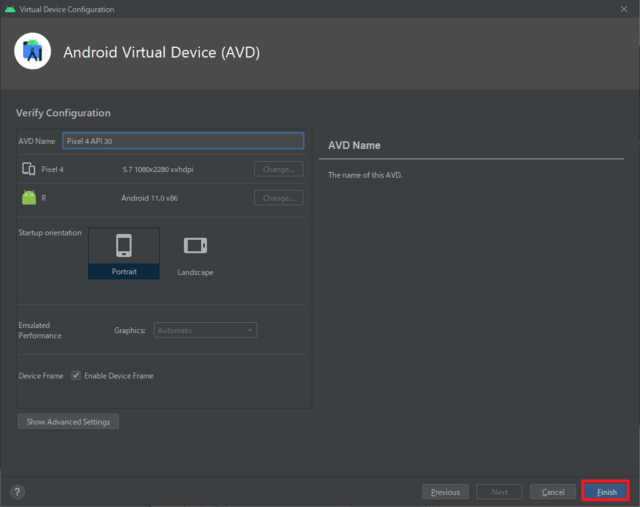
<Finish>をクリック

<▶>をクリック

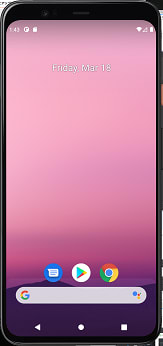
エミュレータが動作することを確認

─つづき─