こんにちは。匠技術研究所の谷山 亮治です。
ubuntu7にfirefox3をインストールする手順を紹介します。他のLinuxにインストールする参考にもなります。
1.firefox3をダウンロード
以下のリンクからどうぞ。基本ソフトの種類は自動判別でダウンロードの案内が出る。

ホームディレクトリにダウンロードファイルができる。
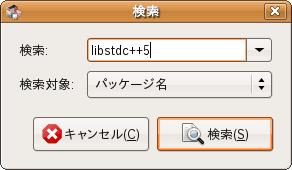
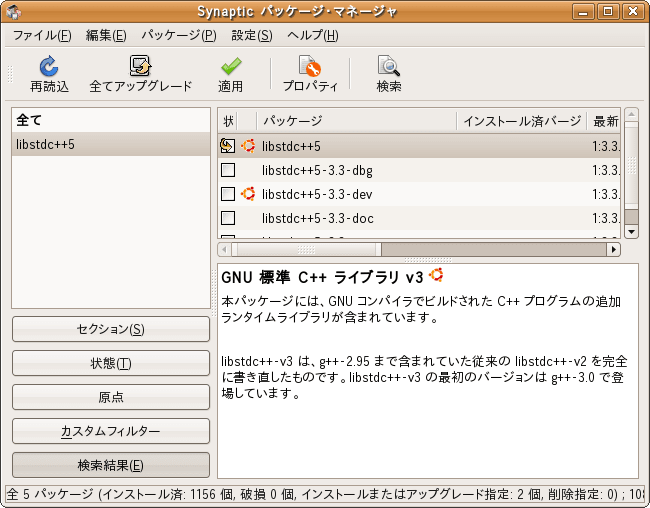
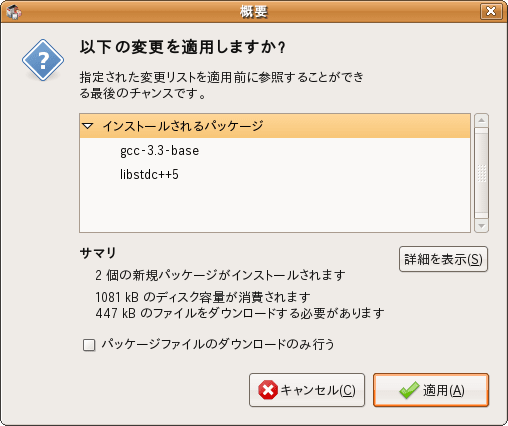
2.libstdc++5をインストール
Synapticパッケージマネージャでインストールする。
ライブラリを検索し、インストールする。
3.firefox2の自己の履歴を保管
ホームディレクトリの履歴保管ディレクトリを確認
$ cd
$ ls -la
...
drwx------ 4 mutech mutech 4096 2008-06-18 05:45 .mozilla
コピーを作る
$ sudo cp -R ~/.mozilla ~/.mozillabackup
4.ダウンロードしたFirefox3を展開
ホームディレクトリにfirefox3がダウンロードされていることを確認する。
$ cd
$ ls
....
firefox-3.0.tar.bz2
....
/optにfirefox3を展開する
$ sudo tar -C /opt -jxvf firefox-3.0.tar.bz2
展開されたことを確認する
$ ls /opt/
firefox
/opt/firefoxがfirefox3の実行環境になる。
5.firefox2で使った/usr/lib/mozilla/plugins/のリンクを張る
firefox3のプラグインのディレクトリに移動
$ cd /opt/firefox/plugins/
firefox3の内容を確認
$ ls
libnullplugin.so
firefox2で使っているプラグインディレクトリを確認
$ ls /usr/lib/mozilla/plugins/
flashplugin-alternative.so libtotem-mully-plugin.so
libtotem-basic-plugin.so libtotem-mully-plugin.xpt
libtotem-basic-plugin.xpt libtotem-narrowspace-plugin.so
libtotem-gmp-plugin.so libtotem-narrowspace-plugin.xpt
libtotem-gmp-plugin.xpt
/opt/firefox/plugins/からfirefox2のpluginsへのリンクを張る
$ sudo ln -s /usr/lib/mozilla/plugins/* .
リンクができたことを確認
$ ls
flashplugin-alternative.so libtotem-gmp-plugin.xpt
libnullplugin.so libtotem-mully-plugin.so
libtotem-basic-plugin.so libtotem-mully-plugin.xpt
libtotem-basic-plugin.xpt libtotem-narrowspace-plugin.so
libtotem-gmp-plugin.so libtotem-narrowspace-plugin.xpt
6.firefox実行ファイルのリンクを張る
リンク先を確認
$ ls /usr/bin/firefox
firefox
これが実行ファイル。保存する。
$ sudo mv /usr/bin/firefox /usr/bin/firefox2
リンクを張る
$ sudo ln -s /opt/firefox/firefox /usr/bin/firefox
7./etc/firefoxのリンクを張る
今のフォルダを保存する
$ sudo mv /etc/firefox /etc/firefox2
$ sudo ln -s /opt/firefox/ /etc/firefox
8.firefoxを起動しバージョンを確認する
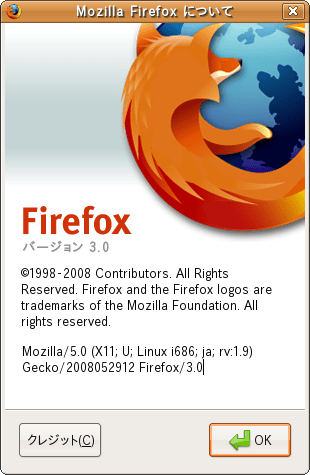
ちゃんと動作しているようです。
このブログはLinux/Ubuntu 7.10 日本語ローカライズド Desktop CDよりインストールした日本語ubuntu上のFirefox3正式リリース版上で作成しました。
☆匠ヤマハルータRT58i/RTX設定講習会のお知らせ
☆中小企業のIT活用に関する、ご質問・ご相談はお気軽にどうぞ!

ubuntu7にfirefox3をインストールする手順を紹介します。他のLinuxにインストールする参考にもなります。
1.firefox3をダウンロード
以下のリンクからどうぞ。基本ソフトの種類は自動判別でダウンロードの案内が出る。
ホームディレクトリにダウンロードファイルができる。
2.libstdc++5をインストール
Synapticパッケージマネージャでインストールする。
ライブラリを検索し、インストールする。
3.firefox2の自己の履歴を保管
ホームディレクトリの履歴保管ディレクトリを確認
$ cd
$ ls -la
...
drwx------ 4 mutech mutech 4096 2008-06-18 05:45 .mozilla
コピーを作る
$ sudo cp -R ~/.mozilla ~/.mozillabackup
4.ダウンロードしたFirefox3を展開
ホームディレクトリにfirefox3がダウンロードされていることを確認する。
$ cd
$ ls
....
firefox-3.0.tar.bz2
....
/optにfirefox3を展開する
$ sudo tar -C /opt -jxvf firefox-3.0.tar.bz2
展開されたことを確認する
$ ls /opt/
firefox
/opt/firefoxがfirefox3の実行環境になる。
5.firefox2で使った/usr/lib/mozilla/plugins/のリンクを張る
firefox3のプラグインのディレクトリに移動
$ cd /opt/firefox/plugins/
firefox3の内容を確認
$ ls
libnullplugin.so
firefox2で使っているプラグインディレクトリを確認
$ ls /usr/lib/mozilla/plugins/
flashplugin-alternative.so libtotem-mully-plugin.so
libtotem-basic-plugin.so libtotem-mully-plugin.xpt
libtotem-basic-plugin.xpt libtotem-narrowspace-plugin.so
libtotem-gmp-plugin.so libtotem-narrowspace-plugin.xpt
libtotem-gmp-plugin.xpt
/opt/firefox/plugins/からfirefox2のpluginsへのリンクを張る
$ sudo ln -s /usr/lib/mozilla/plugins/* .
リンクができたことを確認
$ ls
flashplugin-alternative.so libtotem-gmp-plugin.xpt
libnullplugin.so libtotem-mully-plugin.so
libtotem-basic-plugin.so libtotem-mully-plugin.xpt
libtotem-basic-plugin.xpt libtotem-narrowspace-plugin.so
libtotem-gmp-plugin.so libtotem-narrowspace-plugin.xpt
6.firefox実行ファイルのリンクを張る
リンク先を確認
$ ls /usr/bin/firefox
firefox
これが実行ファイル。保存する。
$ sudo mv /usr/bin/firefox /usr/bin/firefox2
リンクを張る
$ sudo ln -s /opt/firefox/firefox /usr/bin/firefox
7./etc/firefoxのリンクを張る
今のフォルダを保存する
$ sudo mv /etc/firefox /etc/firefox2
$ sudo ln -s /opt/firefox/ /etc/firefox
8.firefoxを起動しバージョンを確認する
ちゃんと動作しているようです。
このブログはLinux/Ubuntu 7.10 日本語ローカライズド Desktop CDよりインストールした日本語ubuntu上のFirefox3正式リリース版上で作成しました。
☆匠ヤマハルータRT58i/RTX設定講習会のお知らせ
☆中小企業のIT活用に関する、ご質問・ご相談はお気軽にどうぞ!