


◆ArduinoとPCとのアプリケーションを.NET Coreで構築する手順およびDispatcherTimerの使い方
1.準備
OS:Windows 10 Pro Version 1909
IDE:Visual Studio Community 2019 Version 16.6.2
Board:Arduino UNO
1.準備
OS:Windows 10 Pro Version 1909
IDE:Visual Studio Community 2019 Version 16.6.2
Board:Arduino UNO
2.プロジェクトの作成
Visual Studio起動後に
新しいプロジェクトの作成(N)をクリック
すべての言語(L) → C#
すべてのプラットフォーム → Windows
すべてのプロジェクト種類 → デスクトップ
WPF App(.NET Core) を選択
<次へ(N)>をクリック
プロジェクト名(N)) → Wpf_NET_Core_Timer と入力
<作成(C)>をクリック
<プロジェクト(P)> → <NuGetパッケージの管理(N)> でNuGetパッケージマネージャーを開く
検索ボックスに System.IO.Ports と入力
System.IO.Poats 作成者:Microsoft を選択
<インストール> をクリック
<OK> をクリック
3.PC側MainWindow.xamlソースコード
1 2 3 4 5 6 7 8 9 10 11 12 13 14 15 16 17 18 19 20 | <Window x:Class="Wpf_NET_Core_Timer.MainWindow" xmlns="http://schemas.microsoft.com/winfx/2006/xaml/presentation" xmlns:x="http://schemas.microsoft.com/winfx/2006/xaml" xmlns:d="http://schemas.microsoft.com/expression/blend/2008" xmlns:mc="http://schemas.openxmlformats.org/markup-compatibility/2006" xmlns:local="clr-namespace:Wpf_NET_Core_Timer" mc:Ignorable="d" Title="Wpf .NET Core Timer Sample" Height="220" Width="400"> <Grid> <Grid.RowDefinitions> <RowDefinition Height="1*"/> <RowDefinition Height="1*"/> </Grid.RowDefinitions> <TextBox Name="txtTimer" Text="Timer1" Grid.Row="0" HorizontalAlignment="Center" VerticalAlignment="Bottom" FontSize="56" TextWrapping="Wrap"/> <StackPanel Name="panel1" Grid.Row="1" HorizontalAlignment="Center" Orientation="Horizontal"> <Button Name="btnDown" Content="◀" VerticalAlignment="Top" FontSize="64" Click="btnDown_Click"/> <Button Name="btnUp" Content="▶" VerticalAlignment="Top" FontSize="64" Click="btnUp_Click"/> </StackPanel> </Grid> </Window> |
4.PC側MainWindow.xaml.csソースコード
1 2 3 4 5 6 7 8 9 10 11 12 13 14 15 16 17 18 19 20 21 22 23 24 25 26 27 28 29 30 31 32 33 34 35 36 37 38 39 40 41 42 43 44 45 46 47 48 49 50 51 52 53 54 55 56 57 58 59 60 61 62 63 64 65 66 67 68 69 70 71 72 73 74 75 76 77 78 79 80 81 82 83 84 85 86 87 88 89 90 91 92 93 94 95 96 97 98 99 100 101 102 103 104 105 106 | using System;
using System.IO.Ports;
using System.Windows;
using System.Windows.Threading;
namespace Wpf_NET_Core_Timer
{
/// <summary>
/// Interaction logic for MainWindow.xaml
/// </summary>
public partial class MainWindow : Window
{
/// <summary>
/// インスタンス
/// </summary>
SerialPort _serialPort1 = new SerialPort();
DispatcherTimer _timer1 = new DispatcherTimer(DispatcherPriority.Normal)
{ // タイマーインターバル = 500mSEC
Interval = TimeSpan.FromMilliseconds(500),
};
/// <summary>
/// LEDフラグ
/// </summary>
Boolean _ledFlag;
/// <summary>
/// タイマーインターバル値
/// </summary>
double _timer1Inerval;
/// <summary>
/// メインメソッド
/// </summary>
public MainWindow()
{
InitializeComponent();
setupTimer();
setupSerial();
_timer1Inerval = 500;
this.txtTimer.Text = _timer1Inerval.ToString();
_ledFlag = true;
}
/// <summary>
/// タイマー生成
/// </summary>
private void setupTimer()
{
_timer1.Tick += (sender, e) =>
{ // タイマーイベントの記述
if (_ledFlag)
_serialPort1.WriteLine("H"); // LED点灯
else
_serialPort1.WriteLine("L"); // LED消灯
_ledFlag = !(_ledFlag);
_timer1.Interval = TimeSpan.FromMilliseconds(_timer1Inerval); // タイマーインターバル値代入
this.txtTimer.Text = _timer1Inerval.ToString(); // タイマーインターバル値表示
};
_timer1.Start(); // タイマーイベント開始
this.Closing += (sender, e) => _timer1.Stop(); // プログラム終了時の手当て
}
/// <summary>
/// シリアルポート設定
/// </summary>
private void setupSerial()
{
_serialPort1.PortName = "COM4"; // 自分の環境に合わせる事
_serialPort1.BaudRate = 9600;
_serialPort1.Parity = Parity.None;
_serialPort1.DataBits = 8;
_serialPort1.StopBits = StopBits.One;
_serialPort1.Handshake = Handshake.None;
_serialPort1.NewLine = "\n";
_serialPort1.DtrEnable = true;
_serialPort1.ReadTimeout = 1000;
try
{
_serialPort1.Open(); // シリアルポート開通
}
catch(Exception ex)
{
MessageBox.Show(ex.Message);
}
}
/// <summary>
/// 減算ボタンイベント
/// </summary>
/// name="sender"></param>
/// name="e"></param>
private void btnDown_Click(object sender, RoutedEventArgs e)
{
if (_timer1Inerval < 200)
return;
_timer1Inerval -= 100;
}
/// >
/// 加算ボタンイベント
/// </summary>
/// name="sender"></param>
/// name="e"></param>
private void btnUp_Click(object sender, RoutedEventArgs e)
{
if (_timer1Inerval > 3000)
return;
_timer1Inerval += 100;
}
}
} |
5.Arduino側ソースコード
<ファイル> → <スケッチ例> → <4.Communication> → <PhysicalPixel> を選択
6.実行
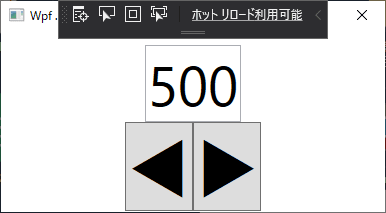
ArduinoのLEDがインターバール間隔で点滅をする
6.実行
ArduinoのLEDがインターバール間隔で点滅をする
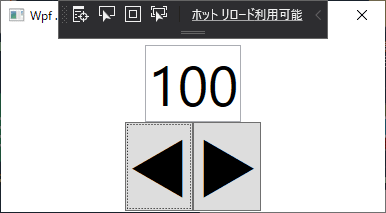
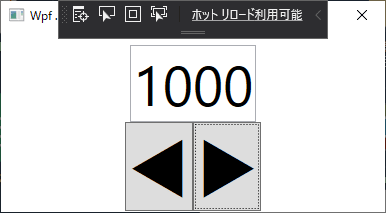
ボタンをクリックして、インターバル間隔が増減する事を確認
━以上━
━以上━