◆Windows UI (WinUI) ライブラリ ツールキットを利用するプロジェクトの場合でのナビゲーションビューのひな型を作成手順
1.準備
●OS:Windows 10 Pro Version 21H1
●IDE:Visual Studio Community 2022 Version 17.1.0
2.新しいプロジェクトの作成

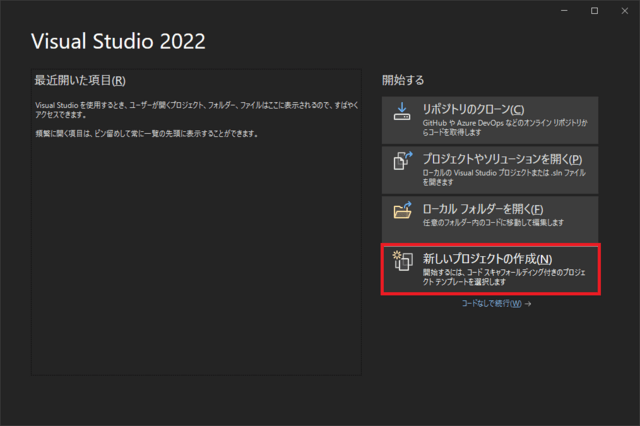
Visual Studio Community 2022 を起動
<新しいプロジェクトの作成(N)>をクリック

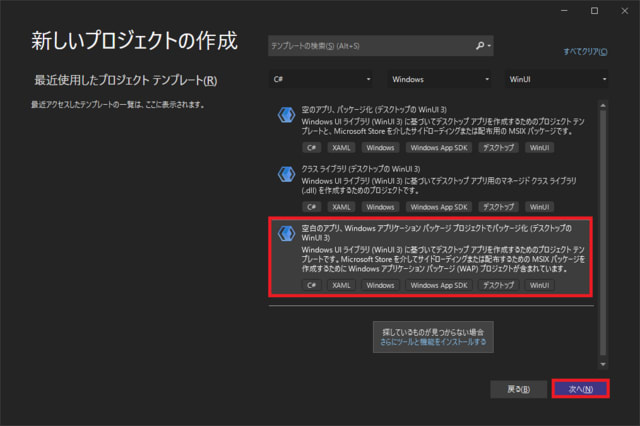
<空のアプリ、Windows アプリケーション パッケージ プロジェクトでパッケージ化 (デスクトップの WinUI 3)>をクリック
<次へ(N)>をクリック

プロジェクト名を入力
<作成(C)>をクリック

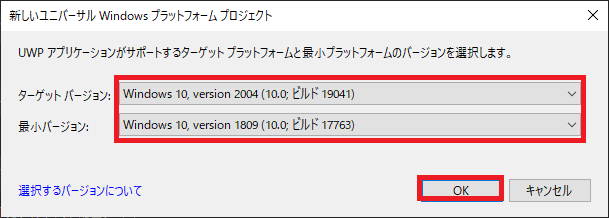
ターゲットバージョン:Windows 10 バージョン 2004 (ビルド 19041)
最小バージョン:Windows 10 バージョン 1809 (ビルド 17763)
に設定

構成:Debug 、プラットフォーム:x64 を選択
3.MainWindow.xamlのコード
<Window
x:Class="MyWinUICSharpNavigationView.MainWindow"
xmlns="http://schemas.microsoft.com/winfx/2006/xaml/presentation"
xmlns:x="http://schemas.microsoft.com/winfx/2006/xaml"
xmlns:local="using:MyWinUICSharpNavigationView"
xmlns:d="http://schemas.microsoft.com/expression/blend/2008"
xmlns:mc="http://schemas.openxmlformats.org/markup-compatibility/2006"
mc:Ignorable="d">
<Grid>
<NavigationView x:Name="NavigationViewControl" >
<NavigationView.MenuItems>
<NavigationViewItem Content="A" x:Name="A" />
<NavigationViewItem Content="B" x:Name="B" />
<NavigationViewItem Content="C" x:Name="C" />
</NavigationView.MenuItems>
</NavigationView>
<VisualStateManager.VisualStateGroups>
<VisualStateGroup>
<VisualState>
<VisualState.StateTriggers>
<AdaptiveTrigger
MinWindowWidth="{x:Bind NavigationViewControl.CompactModeThresholdWidth}" />
</VisualState.StateTriggers>
<VisualState.Setters>
<Setter Target="NavigationViewControl.PaneDisplayMode" Value="Top"/>
</VisualState.Setters>
</VisualState>
</VisualStateGroup>
</VisualStateManager.VisualStateGroups>
</Grid>
</Window>
4.デバッグ実行
ソリューションのビルド を実行
デバッグの開始<F5>を実行

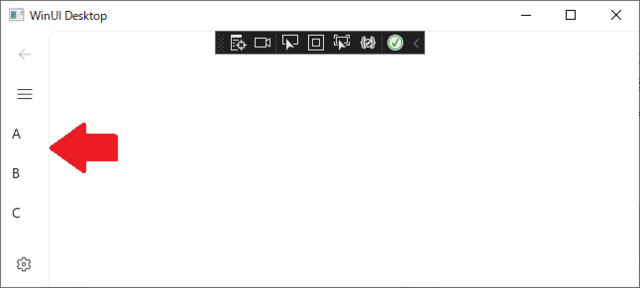
ナビゲーションビューが表示される事を確認
─以上─


