X-431 GDS

Launch X431 GDS , Launch GDS ,X-431 GDS

How to install tech2 software on VXDIAG VCX Nano for 2003 GMC Sierra diagnosis

2020-01-31 19:04:27 | 日記
One user has a 2003 GMC Sierra HD Diesel 2500 4×4 to test the airbag sensor. But has no idea how to install
Tech 2 software on VXDIAG VCX Nano to troubleshoot, and don’t know what files can help confirm what cables are compatible with the car.
Here attach 5 diagnosing images:
install-tech2-software-on-vxdiag-vcx-nano-01
install-tech2-software-on-vxdiag-vcx-nano-02
install-tech2-software-on-vxdiag-vcx-nano-03
install-tech2-software-on-vxdiag-vcx-nano-04
install-tech2-software-on-vxdiag-vcx-nano-05
OBD2TOOLengineer solution: please watch this Youtube video on how to install tech2 software on VXDIAG VCX Nano

Reviews of VXDIAG SUBARU SSM-III Multi Diagnostic Tool

2020-01-31 16:16:34 | 日記
Support language: English, German, Spanish, French, Italian

SUBARU SSM-III Software Function:
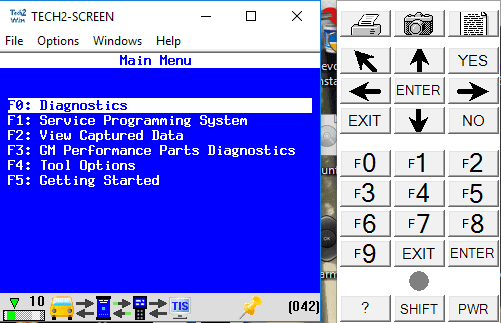
1.All System Diagnosis. Selecting this item displays on a single screen the fault detect status of all control system control modules for which SSMΙΙΙ diagnosis is supported, and memorized diagnostic codes.
2.Each System Check. Selecting this item makes it possible to select a particular system from among the control systems forwhich SSMΙΙΙ diagnosis is supported, and perform fault diagnosis.
This item can be used to view input/output data of the system control modules that perform fault diagnosis, memorized diagnostic codes, and other data on the PC display. This menu item is also used after repair work is complete to delete diagnostic codes, to configure control module settings, etc.
3.Saved Data Display. This item can be used to save various data sampled during fault diagnosis operations, and to load data for viewing after work is complete.
4.Immobilizer. This item performs immobilizer registration.
5.Reprogram. This item performs reprogramming of the control module.
6.Read CF application measurement data. This item performs reading stand alone measurement data saved in a CF card to hard disk of your PC.
7.Convert/Save measurement data on driving recorder. Loads data sampled on the driving recorder to the PC from the CF card, and converts and saves that data.
8.Oscilloscope. After attaching the optional pulse/analog cartridge to SDI, connect the pulse/analog box to the SDI and using pulse/analog probe to perform analog sampling.
9.Program Subaru smart key

Reviews of Vxdiag SubaruSSM-III:
I have a Vxdiag Subaru and find it useful as it will talk to everything on the car, including immobilizer systems. . . it emulates the Vxdiag Subaru SSM iii and uses cracked SSM software (which is why it’s such a pain to set up). It is *extremely* picky about OS. I wound up having to buy a new(ish) laptop running win7 to get it going. Wouldn’t work with XP or 10.

The error code is due to the lack of the CF card. It’s benign.

But my mission is a bit different from most. I make and program keys for a living and for a while the SSM was the only thing that would program the prox fobs. Not true anymore but I still paid less for the VXdiag with software than I would for a single piece of software for my T-code pro. . and there are 3 for Subaru. I have one which only covers the earliest models.

I also find it handy for doing stuff like turning off the passenger seat belt warning (my dog rides over there sometimes and doesn’t like wearing his belt) or setting the wiper de-icer to work for as long as I tell it to instead of a 12 minute cycle. Or make the door locks unlock with one press of the remote. All of this is stuff you won’t be able to do (AFAIK) with any other scanner.

I also rebuild wrecks and it’s the only thing that will talk to the airbag systems so I can figure out WTF is making the light stay on after cobbling together a car from 2 or 3 others.

You could pay the $3k for a legit SSM3 plus another $2k/year for software and have no problems with install. . .

But if all you want to do is check/clear codes and view live engine data occasionally, yeah, you don’t need this.

Btw. You have to have a NASTF LSID or be very good friends with a Subaru parts manager.

You need an immobilizer code (which is VIN specific) to program keys/fobs. It does not change so once you have it for your car you can go nuts. Odds are your dealer would probably give you YOUR immobilizer code if you shop there somewhat regularly. They may charge you for it as I know they have to pay a couple of bucks to mama subie for them.

There’s also an ‘enabling password’ which is also static and I suppose is a very flimsy extra layer of security to protect the immobilizer features of the SSM. It’s 3781.

How to program new key on VW Polo 2017 with OBDSTAR X300 DP PLUS PAD2?

2020-01-24 06:28:13 | 日記


OBDSTAR X300 DP PLUS is a new Android-based vehicle trouble
diagnostic device developed for internet applications. It inherits from
OBDSTAR advanced diagnosing technology and it is characterized by
covering wide range of vehicles, featuring powerful function, and
providing precise result. Through vehicle diagnostic OBD connector and
variant mobile intelligent terminals, it achieves vehicle trouble
diagnosis for full car model and full system vehicle.


Part 1: x300 dp plus adds new key on MQB NEC+35XX ICM (After June 14)


Open OBDSTAR X300 DP Plus, tap “IMMOBILISER”, then “VW”, then ” MQB NEC+35XX ICM (After June 14)”.


1


Message “This function is available by connecting the server, please ensure the internet connection is normal”.


2


Have options:


Read IMMO data


Make ordinary dealer key


Program keys


reset ICM


3


Part 2: obdstar X300 DP plus adds new key on NEC+24C64 ICM


Open OBDSTAR X300 DP Plus, tap “IMMOBILISER”, then “VW”, then”NEC+24C64 ICM”.


4


5


6


Message “This function is available by connecting the server, please ensure the internet connection is normal”.


7


Have keys.


8


Have options:


Read EEPROM


Read IMMO data


Make ordinary dealer key


Program keys


Write EEPROM


reset ICM


9


10


Continue operating by following the on-screen instruction.


How to setup Printer on Auro IM600 Autel IM608

2020-01-24 06:19:49 | 日記


Q: Anyone know how to setup printer on Auro OtoSys IM600/ Autel MaxiIM IM608?


A: Same process as Autel Maxisys series scanners. Check step-by-step instructions below.


How to enable IM600/IM608 wireless printing?


Autel scan tools cannot sent files directly to a wireless printer.


Instead, you need to install PC Suite software onto a computer which the scan tool will use as a gateway to print.


Install the Maxi PC Suite from the Autel


Download thew new Maxi PC Suite from Autel official website


Autel Printer App system requirement:


A computer connected to the same network (wired or wireless) as the Autel unit
Win7 Extractor or WinRAR (The Autel file is downloaded in a .ZIP format and must be extracted)
A restart is required after installation


The drivers for the Autel j2534 and PC Link for wireless printing are included in the Maxi PC suite.


Go to Supports & Updates->Firmware & Download-> Update Client-> Download Here


setup-printer-on-im600-im608-1
Remove Maxi PC Suite is it is currently installed.
Skip this step if you have latest Maxi PC Suite installed


setup-printer-on-im600-im608-2


Install the new Maxi PC Suite software


setup-printer-on-im600-im608-3


setup-printer-on-im600-im608-4
setup-printer-on-im600-im608-5


Make sure the latest Adobe Acrobat Reader is installed


setup-printer-on-im600-im608-6


Add exceptions to anti virus


setup-printer-on-im600-im608-7


Allow PC Link Program on Windows Firewall


setup-printer-on-im600-im608-8


Open PC Link from Maxi PC Suite


setup-printer-on-im600-im608-9


Make sure the PC Link is running in the background process


Open MaxiSys Printer


(Verify the Maxi PC suite is running? The easiest way to check the
system tray at the bottom right on the task bar for the Maxisys Printer
Icon.)


setup-printer-on-im600-im608-10
Disable Auto Print


setup-printer-on-im600-im608-11


Perform a test print from the Autel IM608


setup-printer-on-im600-im608-12


setup-printer-on-im600-im608-13


After tapping the print option, you should see the “Creating print file” dialog box.


setup-printer-on-im600-im608-14


You may be asked to select a “Printer”, which is simply the name of
the computer, if there is more than one computer running the PC Link
software. Tap to select a computer destination which will be indicated
by the blue check mark. Then press, “OK”


setup-printer-on-im600-im608-15


The “Upload file to the printer” dialog box should appear for several
seconds, and will disappear when the file is transfer to the computer.


setup-printer-on-im600-im608-16
Print confirmed


setup-printer-on-im600-im608-17


setup-printer-on-im600-im608-18


setup-printer-on-im600-im608-19


setup-printer-on-im600-im608-20


You should now be able to print any single page or entire report from
your Autel diagnostic tools by selecting the print icon in the top
right of the Maxi PC Suite pages.


Autel MaxiIM IM608 VS MaxiIM IM508 VS Auro OtoSys IM600 VS IM100

2020-01-24 04:38:42 | 日記
Autel factory combineObd2tool.com engineer make a comparison table about Autel MaxiIM IM608 VS Autel MaxiIM IM508 VS Auro OtoSys IM600 VS Auro OtoSys IM100. They can compare with each other in the aspects of IMMO (key programming, key learning, pin code read etc.), programming, OE-Level diagnosis, Advanced Service Functions, configurations etc.
Here we go for details:


Product Autel MaxiIM IM508 Autel MaxiIM IM608 Auro OtoSys IM100 Auro OtoSys IM600
Image im508 im608-1 im100 im600
IMMO


Smart Mode (Guided and Automated Key Learning Function)
Expert Mode (Advanced key Learning)

Auto Detect Make/Model/Year/System

Read PIN/CS

Read PIN/CS (All Keys Lost)
Key Generation

Key Learning
IMMO ECU Reset/Adaption
IMMO ECU Refresh/Coding
Remote Learning
Backup /Restore IMMO Data

AUDI Q5/A4/A5 2015-2017 Read PIN/CS

N/A
BMW FEM/BDC Key Learning and Adaption

Mercedes Key Learning

×
Benz 3rd Generation IMMO Add key, all key lost, key Learning N/A

BMW FEM/BDC Key Learning and ECU adaptation

BMW CAS4/3/2 key learning CAS4 available when connected to XP400

VW /Audi MQB (VDO & JCI) add key, IMMO V A4/A5/Q5 2015+ Key learning N/A

VW /Audi /Skoda / Seat IMMO III /IV /V add key, all key lost

Programming


Key read /write

EEPROM Read/Write
MCU Read/Write Basic Advanced Basic Advanced
ECU Read/Write When connected to XP400

MC9S12 Encryption Chip read/write When connected to XP400

IC Card Read/Write When connected to XP400 N/A
Mercedes Infrared Key Read/Write When connected to XP400 N/A
Remote Frequency Detect When connected to XP400 N/A
Support PC When connected to XP400

OE-Level Diagnostics


All Systems for Over 80 Makes and Models N/A
AutoVIN /Auto scan

Read /Erase codes

View, record, playback live data

View Freeze Frame data

Shop and data Manager applications

MaxiFlash JVCI ECU Reprogrammer (Bluetooth /USB cable) N/A

OtoFlash (J2534 ECU Reprogrammer)

N/A
Advanced Service Functions


Oil Serive Reset
Parking Brake Pad Relearn After Replacement
Steering Angle Sensor Relearn
Battery Registration and Reset
Diesel Particulate Filter Regeneration
Tire Pressure Monitoring System Sensor ID Relearn
ECU Coding N/A N/A
VW/Audi Component Protection

N/A
Complete Service Functions N/A N/A
Tool Features


Built-in Rechargeable Li-ion Battery 5000 mAh 15000 mAh 5000 mAh 15000 mAh
Internet Updatable Wi-Fi Wi-Fi Wi-Fi Wi-Fi
Multilingual Support
One Year Warranty
Free Online Update Two Years
Touchscreen 7-inch 10.1-inch 7-inch 10.1-inch
Memory 32 GB 64 GB 32 GB 64 GB
Processor Cortex-A9 processor Cortex A7+A15 six-core processor Quad-core processor Hexa-core processor
Camera N/A 8.0 Megapixel N/A 8.0 Megapixel
Resolution 1024×600 1920×1200 1024×600 1920×1200
Note: XP400 can be purchased separately.
Some listed functions are manufacture dependent. Constantly update MaxiIM for current vehicle coverage. Update software regularly for most accurate tool features.