


いろんな事情があってしばらく止まっていたエレキですが、いよいよ製作再開です。
今日はロッドを入れます。
まずはロッド溝を掘る為の治具を作ります

そしてトリマーで掘ります

ナット部分も加工します

埋め木も作ります
メイプル材で木取りして

幅、長さ、R等を調整します
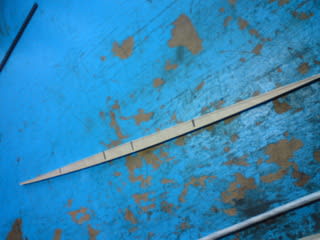
これで準備完了

中でカタカタ音がしないようにロッドにマスキングをまいて
埋めます

今日はロッドを入れます。
まずはロッド溝を掘る為の治具を作ります
そしてトリマーで掘ります
ナット部分も加工します
埋め木も作ります
メイプル材で木取りして
幅、長さ、R等を調整します
これで準備完了
中でカタカタ音がしないようにロッドにマスキングをまいて
埋めます


※コメント投稿者のブログIDはブログ作成者のみに通知されます