


今日は「米」とエレキの続き
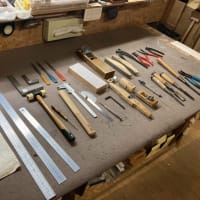
まずは指板のフレット溝切り

エレキの方は指板の接着をします。
準備をして

接着します

こちらは「米」の表板の剥ぎ

そしてネックヒールブロックとエンドブロックの接着

あとはブレイシングの整形

どちらも着々と進んでいます。
まずは指板のフレット溝切り
エレキの方は指板の接着をします。
準備をして
接着します
こちらは「米」の表板の剥ぎ
そしてネックヒールブロックとエンドブロックの接着
あとはブレイシングの整形
どちらも着々と進んでいます。


※コメント投稿者のブログIDはブログ作成者のみに通知されます