パエ-リャ

木製カトラリ-

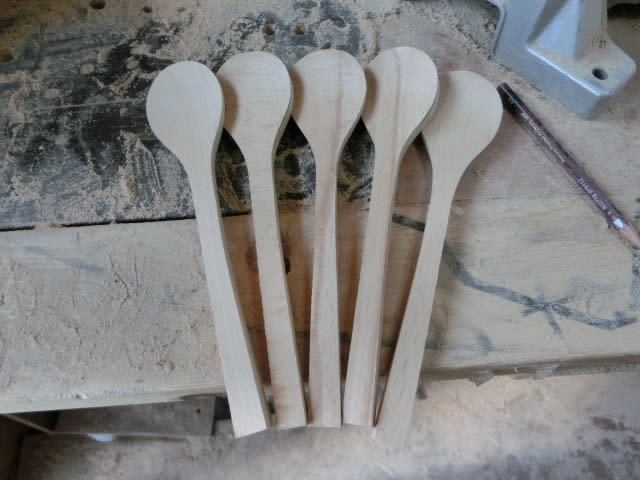
Curry spoons completed

2015-04-22 16:58:34 | Weblog


In addition to above 5 I have another one which is being coated at the moment. It is very likely that I will be producing a lot more of this spoon type pretty soon, but for the moment 6 will suffice.

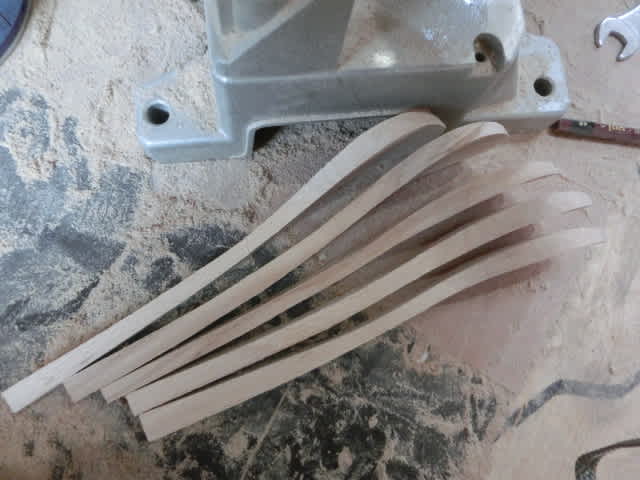
The photos to follow just show how convex surfaces are created.


Before the bottom surface is sanded the back neck of the stem close to the intake area must be sanded down, so that this portion does not get accidentally and wrongly sanded.

When they are properly sanded they look like below,


OK, that is about all I can show with my spoon making, I think.

Dynamics of planer contacts

2015-04-21 17:49:10 | Weblog
only laws of thermodynamics assumed

European history, the Pacific

OK, let's get started. I do not even know quite how all this might develop. I am only guided by my gut-feelings.

Before considering planer examples let us look at the three dimensional case of galactic collisions. As far as I am aware all galactic collisions are peaceful, because the mean free path is so large.

By "mean free path" is meant the average distance a particle travels in a straight path before its course is deflected by the collision with another particle. In the case of galactic collisions the particles involved are obviously stars. And, the mean free path is almost equal to the size of the galaxies.

Although looking like a collision externally the volumes occupied by the colliding members are so empty and they are not aware that they are colliding. In fact, they just travel past one another. I should imagine that the same thing could happen in the two dimensional world.

Let us think about it with a rather simplistic model, of a flat plane of finite size. Let us imagine that there are two areas, initially separated by emptiness. Let us imagine also that these areas are both circular, with well physically separated and distinct centres.

In fact, these circular areas are there, as a result of spontaneous expansion from the centres (either fixed or moving), purely driven by the laws of thermodynamics.

Therefore, there is no possibility of spontaneous contraction.

As time goes by these circles keep expanding. And, eventually there will come a time when these two circles come into contact. In order to proceed any further with our thought experiments here we might as well introduce another concept into these circles. That way, it will be easier to visualize the dynamical behaviour of the contact events.

Each circle is therefore now filled with particles of the same kind, lots and lots of them and randomly placed within the circles.

So, in theory, we can now perhaps think in terms of population density, mean free path, population density gradients, and perhaps even mutually attractive force between particles of the same kind and repulsive force between particles of different kinds. Particles can be even coloured!

Anyway, remember that this is merely a thought experiment. Einstein made his own and yet did not get a Nobel prize. So, we can take it easy...

(I will be looking for some photos of contacts by brainless biological systems before proceeding any further...)

planaria, slugs

More on jigs

2015-04-21 16:38:00 | Weblog


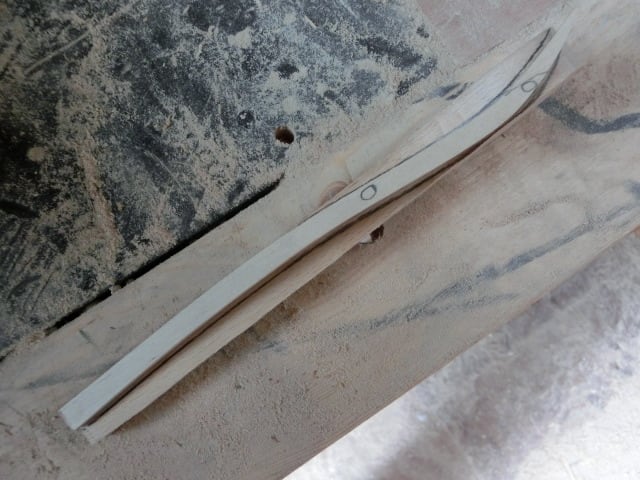
This is showing how the lateral profile jig is actually used. In order to maximize the space above concave (inner) surface the spoon bottom of the jig is set to one side of the block as shown here, while top of the stem end is set to the opposite side.

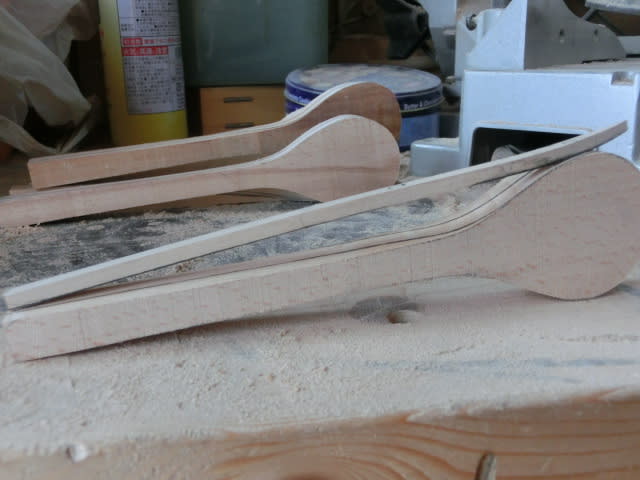
If you see it sideways,


You can see that there is a large gap between the jig and the block, because the jig is stiff. If the jig bends too much the pencil marks become unstable. Anyway, you can see the result here below,


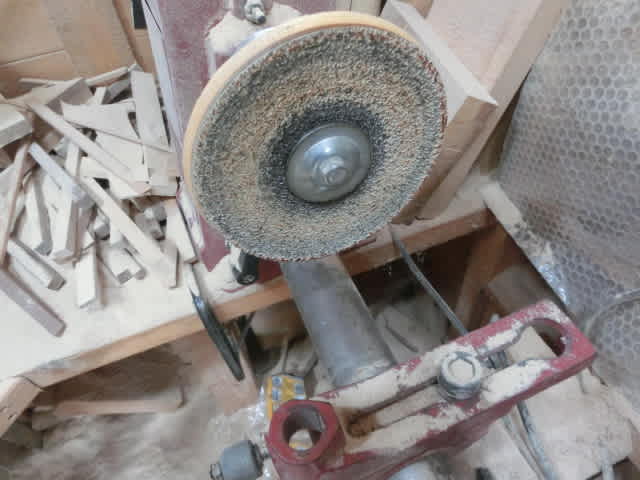
You then use a disk grinder (I made it myself) to loose enough mass outside the pencil lines. The grinder is here,


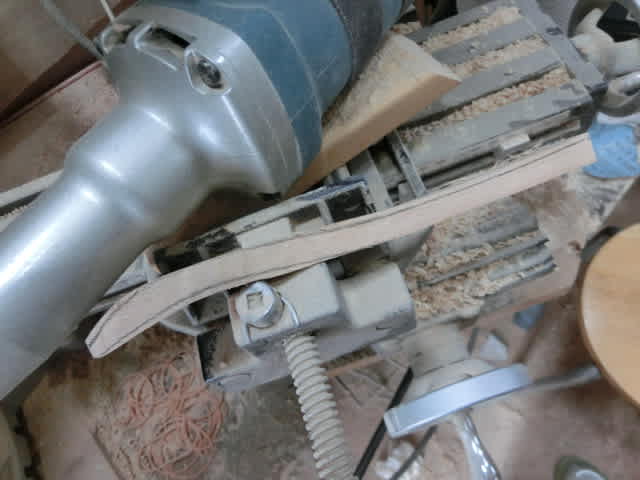
And, you stop grinding just before you reach pencil lines, because you can then use your belt sander. You can appreciate that because you can still see pencil lines in the following photo.


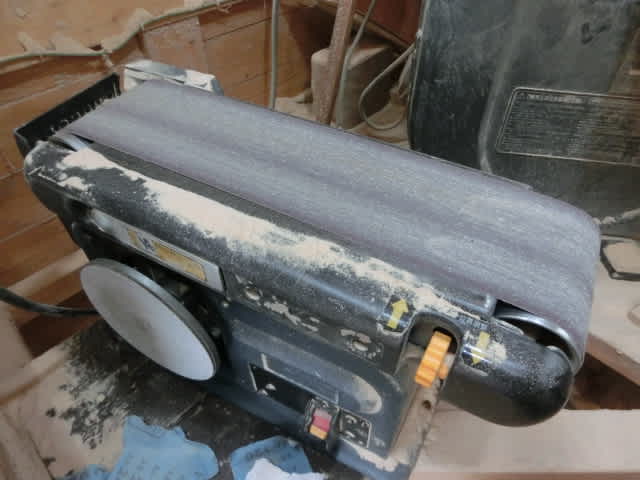
You then use the belt sander shown below, to get to the pencil lines, as close as possible.


and the result is shown below.


and the top view follows below.


Here, spoons' intake ends are still to be worked on, because bottom surfaces are not yet rounded to form convex surfaces.


Curry spoons and how jigs are used

2015-04-19 17:22:51 | Weblog


These are the jigs that I use for many different purposes, such as width, depth, thickness, of up to a few centimeters. When you want to make 20, 30 of the same thing you cannot afford to use normal measuring devices each time you want to draw pencil lines.

Instead, one of these is placed over the block of wood and you simply draw a line along the straight edge of the jig.

For instance, see below. An L angled metal is placed on top of a block.


Similarly, you can put a shape jig over an L angle jig and find out the practical thickness of a spoon's lateral profile. See below.


With this one, now matter how you jiggle with the shape profile it is too large for the plate block you can cut out from this L angle jig. This is how you can discover the minimum thickness of an S shaped spoon jig.

"Minimum", because you do not waste your materials. In the case of the first picture above you can only get one plate block, if the spoon thickness is equal to the L angle width. Ideally, you want at least two plate blocks out of a larger block.

On the other hand, the L angle jig below is just about right.


Having decided that you can get two plate blocks from a single larger block you must cut the thing down the middle. To that end you need auxiliary lines. In almost all cases you need two parallel lines like below.


Given that these lines are very close to each other it is easy to cut along the imaginary line between them.

Today, I made 6 new curry spoons, with 6 plate blocks from 3 larger ones.


During the course of this I had to change the shape of the lateral profile jig. Old and new jigs can be seen together here below.


Slightly less bending so that the new one fits within the desired limit. What follows is the result.


I am happy with this new lateral jig. I remember from long time ago that somebody wrote somewhere that spoons bending should not be too large. I think it is true, for a few reasons.

Great new discovery

2015-04-18 17:31:57 | Weblog
As I mentioned earlier I started making my spoons just recently after a lapse of nearly 2 years. I had not forgotten how. Basic approach cannot possibly change that much.

However, there has already been a new policy decision, not to cut out the lateral profiles with the band saw for safety reasons. That is one thing. And, this is all because I am having to look at the same procedures and same tools from slightly different angles.

Today, I was very pleased to find a new method for cleaning the inner surface of a spoon. It is merely a different combination of the driving tool and the end bits to go with it.

Here, it is.


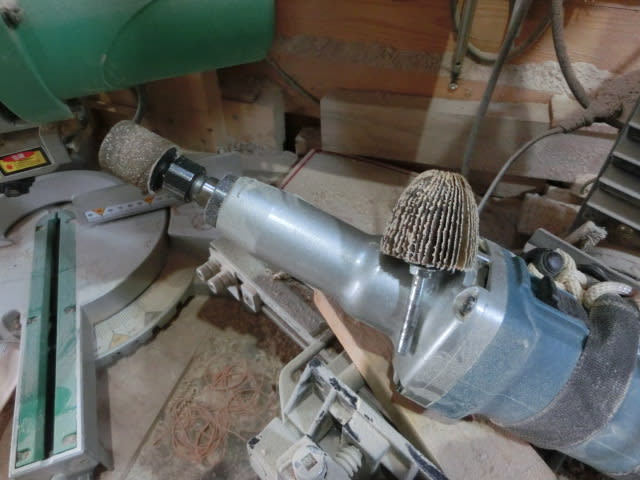
I used this bullet shaped abrasive bit with this driving tool. (This picture is actually showing the tool with a cylindrical bit for a different job.) Normally, I use another driving tool with this bullet shaped bit, but today I just tried this new combination. That was a revelation.

Up until today, I have been using another driving tool with an external speed controller. However, it fails to provide constant torque. That is a blow in itself. But, it also fails to provide constant angular speed.

Where it would have taken to do the same job in one hour this new combination allowed me to finish the same job in just 15 minutes or so. Simply because its rotational force is constant at a constant speed. And, this new combination is universally applicable to all other spoon making jobs.

As a result I have happily completed my cleaning job with these 15 spoons.


Only another 5 to go before coating of these spoons can begin.


In the meantime hashi coating is going steadily as you see below.


and, even curry spoons are being coated again and again, as per below.


Hashi sanding

2015-04-17 17:50:36 | Weblog
It is my gut-feeling that I should not leave the topic of hashi making without some movies of the final stage.

Right now, I have 22 new pairs of 21 cm long beech hashies in addition to some 50 old pairs which are currently undergoing the process of renewed coating. Consequently, I am very unlikely to return to hashi making in the near future.

So, all in all, about time I recorded hashi sanding with some movies. Just to re-cap, earlier and easier stages they are basically the process of sanding the pieces into those with square cross-section and tapering all the way down the length.

Following 3 movies take it up from there.

The very first process is to sand away the 4 right angled edges, from the thinning portion of a hashi piece. In the following movie my fingers cover about 75% of the hashi length and keep pressing it evenly.

It is important that you sand away each of these 4 edges in the same amount of time. Naturally, you cannot use a timing device, so you just count time to yourself in so doing.


At this stage, it is not important that edges have been sanded perfectly into round cross-section. You can always repeat the same sanding procedure, as you will see.

Having done with the 4 edges you flip over the piece and start sanding the holding end of it in the same fashion. What is important here is that you do not go for a completely round cross-section. The holding end must have a square cross-section with slightly rounded edges. That is all you want.


Having finished with the holding end of the piece you want to sand more on the thinning portion so that desired hashi tip is created. It is a delicate job, to say the least.

You cannot rely on any measuring device. You just judge everything with your eye-balls. The only consolation comes from being able to compare the two pieces from time to time. Next movie is just showing that process.


Once you have done with the tip end of the piece the remaining job is to hand sand both ends, carefully. Actually, it is a very delicate sanding process.

With a piece of sand paper you move in a segmented spiral, up to the very end each time so that the sand paper always passes over the very tip of the piece. This is because you do not want sharp edges left anywhere near the tip, in particular, but not so much care is taken at the other holding end.

The holding end has a much larger semi-spherical shape to it and it is not that critical that it is perfectly shaped into a semi-sphere. I hasten to add, though, that I always try to be perfect in shape making.

OK, that is about it on hashi making. My curry spoons and infant spoons were immersion coated today. Another 9 times of coating will follow and in the meantime I will be fabricating some more spoons of various kinds, I think.

Willy-nilly

2015-04-16 17:30:58 | Weblog
Today, I was not able to do much.

All 22 potential pairs of hashi were tapered on the remaining two sides, as shown here.


At this stage they are not yet exactly paired. It is only when edges are rounded that they are. Once they are properly paired I cannot afford to lose pairing information until they are eventually given away. Once coating is finished they will be stored in transparent plastic sheath.

Before that stage they are provisionally kept in sorting boxes as shown below.


It will take all day tomorrow, I think, to finish off with remaining pieces and once they are all paired they will be coated immediately, as spoon making is next in the pipeline.

Spoon making is more of my thing, so I am anxious to finish with hashies, soonest.

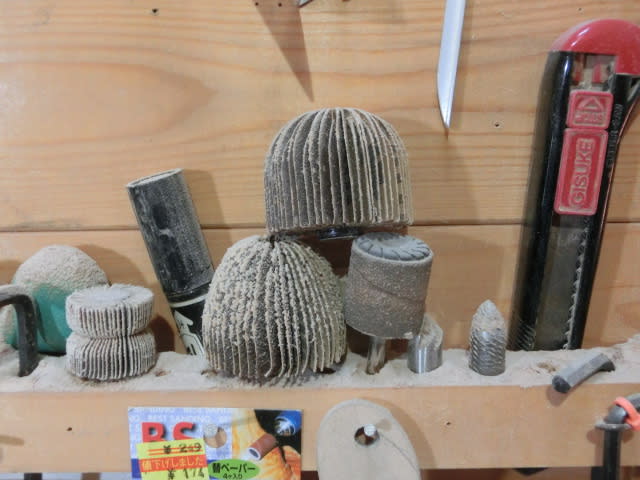
What is below is showing the abrasive pieces that I use.


Most useful of these is the bullet shaped sanding pieces. However, these are rather too large for anything. At the smaller end they are too small. Why on earth they cannot produce intermediate sized sanding pieces I fail to understand...

Starting from scratch

2015-04-15 17:01:40 | Weblog
Well, not exactly perhaps, but close, close enough, I think. I am actually being compelled to produce what I can, for a reason.

Anyway, I did produce some hashies recently. They were all 23 cm long. This time, they are 21 cm in length. They are being prepared as shown below.


These have been tapered on two sides.

What follows is the redundant pieces and the cutting jig (or, thickness jig). I might turn these redundant pieces into something, but they are more likely to be thrown away. It is a perennial problem...


I am about to move on to spoons with proper lateral profile. One example is a curry spoon. A photo is shown below.


One striking feature of these spoons is that their intake areas are all large and round in shape. They are also naturally very shallow, as I have been talking about. However, the biggest difference is their lateral profile. They are more strongly "S" shaped, and you can see that in the following photo.


These are the profile jigs for curry spoons. What is hidden also is the cost of the material. In order to accommodate their strong bending the thickness of the starting block will have to be double the normal thickness.

So, these innocently looking curry spoons are potentially, doubly more expensive, as a lot of mass will have to be sanded away, and lost as powders.

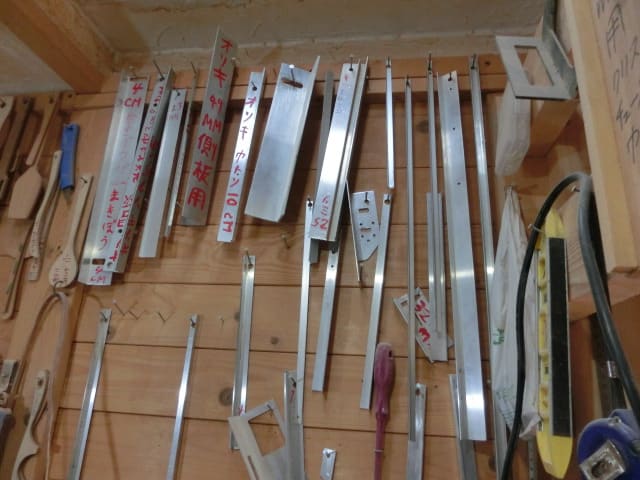
Some of the profile jigs I have been using are displayed on the walls of my workshop, as shown below.


For the next two days or so, I will be occupied with hashi making, but curry spoons will be starting pretty soon, in time for the shop opening on 2 May. I am, in a way, a little excited about it...


Forming outer and inner surfaces

2015-04-14 16:24:29 | Weblog
Not cutting out the lateral silhouette of a spoon, using a band saw, has advantages. First and foremost is that there is no need to keep the block of wood upright in a stable manner.

True, the band saw itself is always running vertically and anything that it is cutting is kept automatically vertical. That is the theory. At the end of the day, though, you need to use your fingers to make sure the block does not migrate or jump about, and fingers are always so close to the blade, with all the possible consequences one can think of...

In addition, the blade would have to be cutting very close to the block surfaces. Take a look at the lateral profile in the following picture.
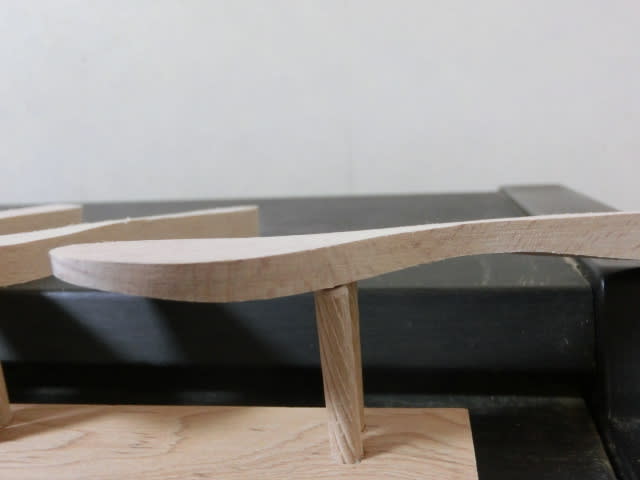


Halfway down the bottom length and towards the front end of the spoon the blade would have to be cutting at a glancing angle. On top of that tiny pieces of wood from the blade will be obscuring the pencil lines.

All in all, it is now my firm policy that all future lateral profiles will be sanded out, after cutting the top profiles. Case closed, forever. Now, let us take a look at the front end of a spoon. You can see them here.
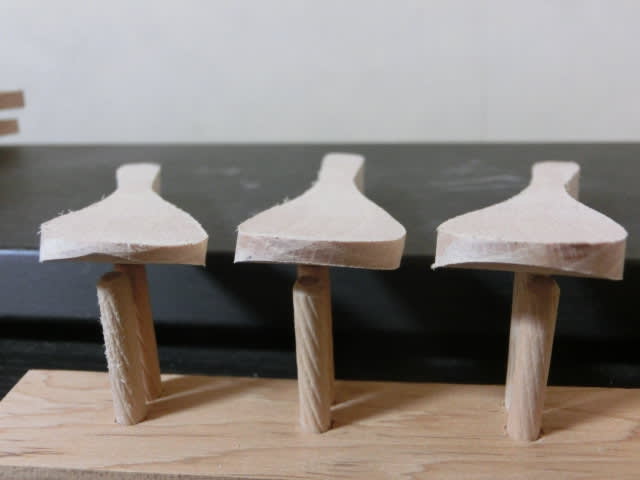


Front end thickness of these spoons is almost always 3 mm. I do not make measurements to arrive at this particular thickness. I certainly look at the tips, from time to time, but never measure them. It is sheer dexterity.

Anyway, the mass must be evenly distributed, right and left, as seen front end on, and you can see that with this picture. At this stage, they can be made into spoons, or alternatively they can be made into forks, as you can see in the following picture.
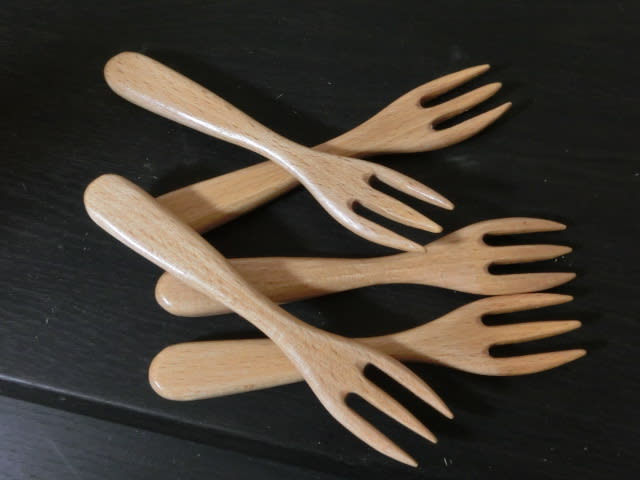


Forks are made using a milling machine to produce grooves, and it is not that complicated, with the knowledge that spoons and forks share the same curvatures. It is interesting, and it was interesting enough when I first discovered this fact. I would have thought they were totally different animals.

Going back to the second picture for today, the edges are simply sanded down to 2 mm, then further sanded down to 1 mm before finger held sanding papers are used. The inner mass is roughed out, very strongly abrasively first, then cleaned softly abrasively.

Yes, I am trying to be sufficiently vague about the inner surface...

パエ-リャ 274

2015-04-13 20:32:09 | Weblog
Conchita, muy buenas tardes y como estas y tu familia?

Aqui, ha sido bien hoy, a pesar de todas las previsiones.
Tenemos que ser muy seco, con una temporada de lluvias.

Y, lo que significa es que vamos a tener algunas lluvias
torrenciales en algun momento!

Hoy en dia, he tenido un desastre, y hablare de ellas
en el taller pagina. Ahora, vamos?

それって、甘苦い味がするわよ!
Eso tiene un sbor agridulce!

お米、野菜、果物で出来た美味しいパイ
una sabrosa tarta a base de arroz, verduras y frutas

だから、したがって
por (lo) tanto

そんな仕事、辞めても後悔してないわ!
No me pesa haber dejado ese trabajo!

貴方に良い事がありますように!
Solo quiero lo mejor para ti!

新居になる場所への引越し
la mudanza a la que sera su nueva casa

出来るだけの時間の余裕をもって
"cuanto antes"

Conchi, aqui vamos ingles.

動かないで!
Stay where you are!

もし出来れば
if you possibly can, if I possibly could

何でも多すぎると害があるのよ!
too much of anything can only do you harm!

ウサギがDOUNOKOUNOSURUなんて変ね!
It is rather unusual for a rabbit to DOUNOKOUNO!

時間が経てば慣れるわよ!
You will get used to it in time!

変ねエ、どこに消えたのかしら!
How strange! I wonder where it could have gone!

Conchita, I am stopping here. Take care and vaya con Dios!