


It is very ironic that I will have to be away at my
mountain cottage with my mother for the next one
week or so, so soon after resumption of my loggings.
I never really thought about it. I may even pop back after
a few days, much depending on how the weather holds out.
On a separate issue, not having a spell checker with
this service is a blow. I make many mis-spellings.
I could use external editors and transplant my articles
into this environment, but I could not be bothered.
I am busy, anyway.
So, readers, I offer my profuse apologies in advance
re my mis-spellings.

Today's main topics are blade configurations and
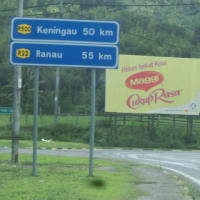
coating of my artefacts. First, take a look at photo 4.
You see a very tight curvature where the stems are
narrowest. This has been a perrenial issue, how to negotiate
those sharp bendings with my bandsaw.
What you could do is shown in the next illustration
and I will tell you why this thought occurs to me
in relation to the schematic diagram of the blade
configuration.

Even with an 8 mm blade it is awfully difficult to
negotiate the portion in red. However, I can go jigsaw
only for this portion. The mere thought of using a jigsaw
for the entire circumference of the workpiece is
daunting, as the thickness is something like 15mm
or over. But, then, if the cutting length is short enough,
you can go jigsaw, easily. Green lines are, of course,
cut by the bandsaw.
As you can see there are other tight curvatures, and
dotted lines are actual cutlines. I can use my disk sander to
loose the mass left over with considerable ease.
Now, lte us take a look at blade configuration, which is
of extreme importance. The illustration below should
suffice.

1 and 1.1 are normal configuration of the bandsaw blade,
a little exergerated, of course. This is typically when I am
cutting my workpiece more or less along straight lines.
A and Bs are roller bearings, seen from above. 1.1 is telling you
that the blade is bent backward due to the pressure from the workpice
being cut. Actually, it is me, who is applying the pressure.
2 and 2.1 are saying what happens if you press ahead with
tight curvature cutting with the bandsaw blade. It is awfull!
Blade is twisted and bent backward, bringing in
unbearable stress on the blade, leading to premature
lifetime, leading to increased operational costs!
Enough for blade configuration and all that!
Next, let us take a look at the coating process.
The illustration below should give you an insight
into my coating process.
Apologies, somehow it has gone into the top of this page.
Anyway, I use polyurethane for coating my artefacts,
occasionally using WATOCO for those which do not
come into direct contact with foods.
My artefatcs are coated with 3 different polyurethane
coating materials. First three times spent with penetration
coating, as indicated by 1,2, and 3.
I then apply 7 surface protection coatings, then,
finally matting with chemical reaction with another
kind of polyurethane materials. I will talk about them
in the near future, anyway.
Part of the same illustration is showing how my artefatcs
are dried on a bed of nails. Problem with this mode of
drying is that you see small polyps forming where they
are in contact with the nails. They are shown in red.
First thing every morning, I remeove these polyps with a sharp cutter knife, and then apply wet sanding (in water!).
More on that later.
Other photos, yes, my gas mask, my toast holders, and today's spoons,
arranged in a circular manner. They look flat and thin, but they are not!
(not underneath) I will make hollows in them while staying at my mountain cottage.
3rd photo is my coating tool, I do not use anything else. Easy to throw away after coatings.
As I said earlier, my logging will be stopped as from
now and not resumed probably until a week laterr, I should think.


※コメント投稿者のブログIDはブログ作成者のみに通知されます