


先週の作業です。
ロケットの内部の部品を複製するため型を作りました。

エンジンに使う部品も同時に型を作りました。
ひとつしか複製できませんので、いくつか作って、また型を作ります。

できた複製にパイプを短く切って接着して、太いのも作ります。

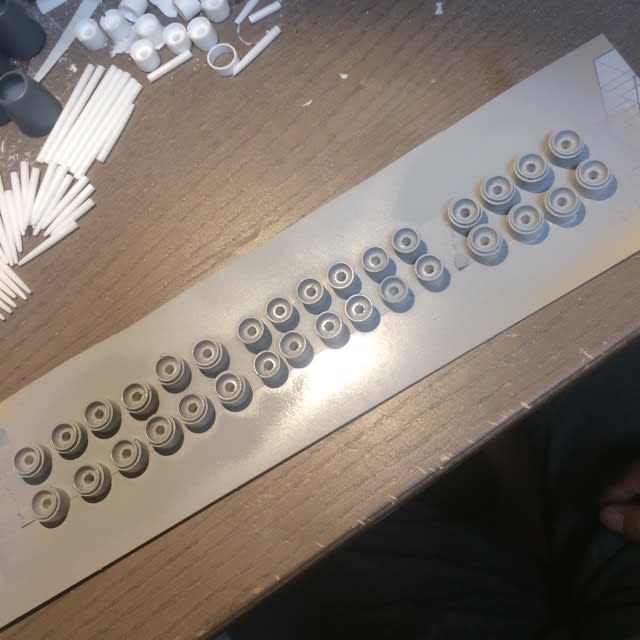
今度はこれを型取りしました。
この部品は全部で30個必要ですので、ここは頑張りどころです!(^O^)/

型を作ってる間にロケットの真ん中に付く黄色い棒を作ります。
これも30本必要です。
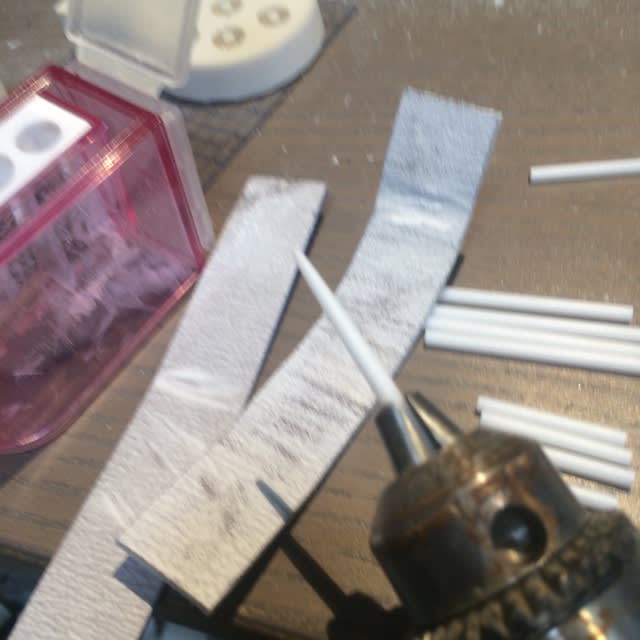
プラ棒をドリルに付けて、鉛筆削りで少し削って、ペーパーでとんがるようにしていきます。

荒削りですが、少しづつ削りました。
ジョイントパーツも複製が終わり、サフを噴いてます。
セミグロスブラックで塗装しました。

試しに組んでみました


あまり変わり映えしない記事でしたが
数があるので時間が掛かりましたー
つづく
ロケットの内部の部品を複製するため型を作りました。
エンジンに使う部品も同時に型を作りました。
ひとつしか複製できませんので、いくつか作って、また型を作ります。
できた複製にパイプを短く切って接着して、太いのも作ります。
今度はこれを型取りしました。
この部品は全部で30個必要ですので、ここは頑張りどころです!(^O^)/
型を作ってる間にロケットの真ん中に付く黄色い棒を作ります。
これも30本必要です。
プラ棒をドリルに付けて、鉛筆削りで少し削って、ペーパーでとんがるようにしていきます。
荒削りですが、少しづつ削りました。
ジョイントパーツも複製が終わり、サフを噴いてます。
セミグロスブラックで塗装しました。
試しに組んでみました
あまり変わり映えしない記事でしたが
数があるので時間が掛かりましたー
つづく