


実際の刷り(今回の作品は当初の原画と異なります)
Now, start printing.
(the work posted today is different from
the design shown on June 24)
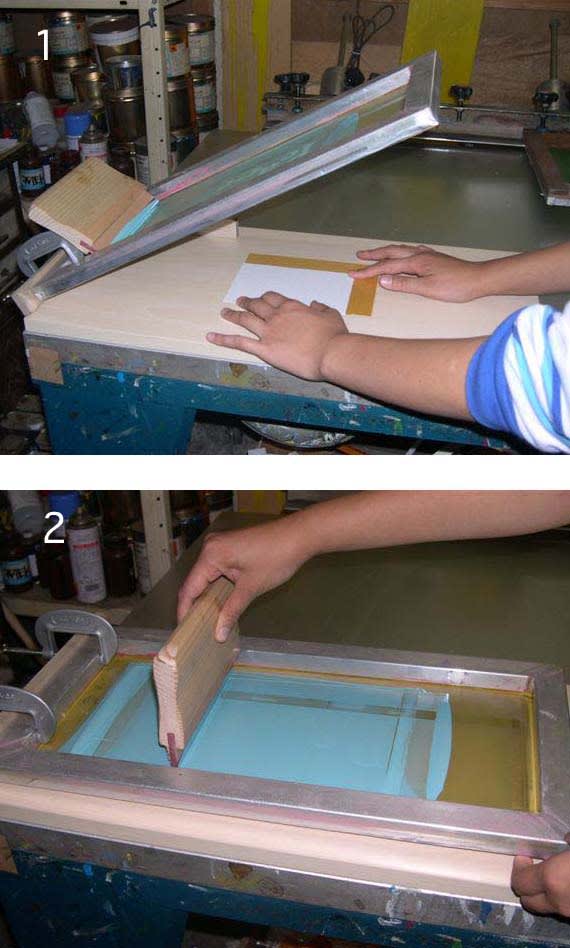
版の枠を刷り台に固定して
1 刷る紙の位置を決め
2 スキージでインクを版上に広げます。
1. Fix the frame on the printing table.
Place paper beneath the frame
and decide the position of the paper.
2. Spread ink on the screen with a squeegee.
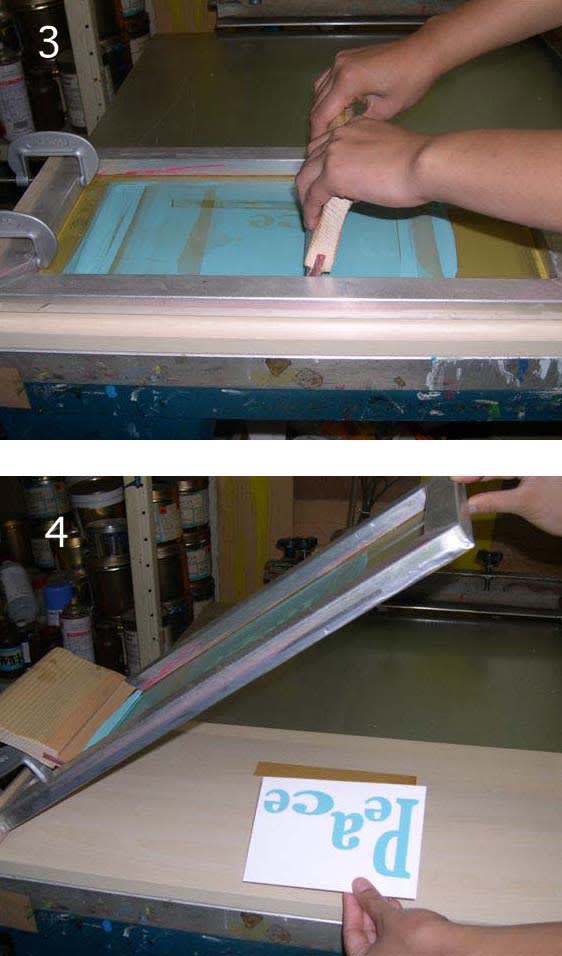
3 スキージを下に押し付けるように引くと
4 下の紙にインクが刷り込まれます。
(手の出演は娘です)
3, Pull the squeegee, then it forces ink
through the screen.
4, The ink forms images or letters on the paper below.
( My daughter demonstrated )
何かご質問がありましたら どうぞお寄せ下さい。
Any question and comment will be welcomed.


Now, start printing.
(the work posted today is different from
the design shown on June 24)
版の枠を刷り台に固定して
1 刷る紙の位置を決め
2 スキージでインクを版上に広げます。
1. Fix the frame on the printing table.
Place paper beneath the frame
and decide the position of the paper.
2. Spread ink on the screen with a squeegee.
3 スキージを下に押し付けるように引くと
4 下の紙にインクが刷り込まれます。
(手の出演は娘です)
3, Pull the squeegee, then it forces ink
through the screen.
4, The ink forms images or letters on the paper below.
( My daughter demonstrated )
何かご質問がありましたら どうぞお寄せ下さい。
Any question and comment will be welcomed.