I do realise, having come down from our mountain cottage,
that I am not doing things as efficiently as beofore
the onset of the summer heat...
It is really tormenting me. Once in my workshop,
sweats start dripping immediately like hell! Naturally,
I had arranged for an airconditioner for my workshop.
However, and the wall socket for one is there to be had
anytime, but the sheer dusts makes it impossible
for an aircon to operate without hitches.
Colder seasons are far better for my operation. Having said
that, I did do some work today and what follows shows that
190mm chopsticks are very nearlly coming to the end of
shape forming process. There are 41 pairs in all.

These will be coated soon, then comes the issue of their
containers. I have not yet given a serious thought to
this issue, except that those containers will be
fabricated from dark wallnut pieces. I have been away for so long,
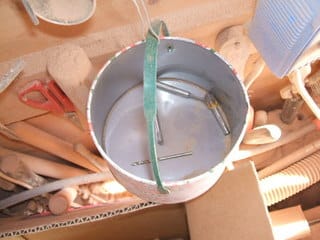
and it is reassuring to know that my bits for the containers
are securely stored in a metal can, as can be seen in the next image.

This is all too important, bacause if any one of these goes
missing it will be a hell of a work to relocate it. So, this is another
of my attempts to put the house in order.
The expected container fabrication is a delicate process, because
everything will have to be made as compact as ever possible.
I have an 8 mm wide trenches in mind so what go in them will have
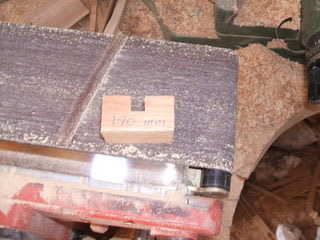
to be made as precisely as possible. What follows is the jig
I made and I am greatly helped by this small piece of wood.

With the 8 mm wide trenches the leeway for the chopsticks,
in terms of the maximum width is 1mm on either side of it.
It is a very tricky business, but I am optimistic...
Chopsticks are sanded down gradually so that the maxmimum
dimension just goes through the gap in the jig.
What follows is essentially the same as the one above, and
this was intended to show you the sanding operation, not just of
the chopstics, but more in general.

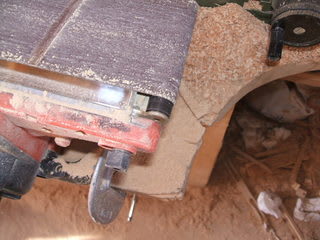
What you are looking at is a result of deorbiting of the
sanding belt. Right in the middle of this image is one
end of the roller. You can also see the gap between
the roller and the flat bench. Why this image?
I was going to tell you about chopsticks formation,
in a rather comprehensive manner. That was my promise
made a few monhs ago and I will stick by it.
However, today is not the right day for that. For a start,
I am already hungry for something to bite, and secondly,
it is going to be substantial, if I once get started on it.
So, for now, suffice to say that the gap between the roller
and the flat will play a very significant role in the
formation of chopstics.
This gap is a double bladed sword and I will talk more about it
later. Yes, the gap! It is to the left of the roller end,
which is seen black. You see a tiny square to the left of it.
This is the gap I am talking about and further to the left of the
gap is the flat. It looks shining, naturaly, as it is a
slab of alminium.
So much for now, and Conchita, make sure you send me the file
we were talking about!


that I am not doing things as efficiently as beofore
the onset of the summer heat...
It is really tormenting me. Once in my workshop,
sweats start dripping immediately like hell! Naturally,
I had arranged for an airconditioner for my workshop.
However, and the wall socket for one is there to be had
anytime, but the sheer dusts makes it impossible
for an aircon to operate without hitches.
Colder seasons are far better for my operation. Having said
that, I did do some work today and what follows shows that
190mm chopsticks are very nearlly coming to the end of
shape forming process. There are 41 pairs in all.

These will be coated soon, then comes the issue of their
containers. I have not yet given a serious thought to
this issue, except that those containers will be
fabricated from dark wallnut pieces. I have been away for so long,
and it is reassuring to know that my bits for the containers
are securely stored in a metal can, as can be seen in the next image.

This is all too important, bacause if any one of these goes
missing it will be a hell of a work to relocate it. So, this is another
of my attempts to put the house in order.
The expected container fabrication is a delicate process, because
everything will have to be made as compact as ever possible.
I have an 8 mm wide trenches in mind so what go in them will have
to be made as precisely as possible. What follows is the jig
I made and I am greatly helped by this small piece of wood.

With the 8 mm wide trenches the leeway for the chopsticks,
in terms of the maximum width is 1mm on either side of it.
It is a very tricky business, but I am optimistic...
Chopsticks are sanded down gradually so that the maxmimum
dimension just goes through the gap in the jig.
What follows is essentially the same as the one above, and
this was intended to show you the sanding operation, not just of
the chopstics, but more in general.

What you are looking at is a result of deorbiting of the
sanding belt. Right in the middle of this image is one
end of the roller. You can also see the gap between
the roller and the flat bench. Why this image?
I was going to tell you about chopsticks formation,
in a rather comprehensive manner. That was my promise
made a few monhs ago and I will stick by it.
However, today is not the right day for that. For a start,
I am already hungry for something to bite, and secondly,
it is going to be substantial, if I once get started on it.
So, for now, suffice to say that the gap between the roller
and the flat will play a very significant role in the
formation of chopstics.
This gap is a double bladed sword and I will talk more about it
later. Yes, the gap! It is to the left of the roller end,
which is seen black. You see a tiny square to the left of it.
This is the gap I am talking about and further to the left of the
gap is the flat. It looks shining, naturaly, as it is a
slab of alminium.
So much for now, and Conchita, make sure you send me the file
we were talking about!


