What was today like?
I was comfortable, not too warm, in fact, it was
cold? I had to wear long sleeves, both up and
down...
Output for today? Here you are!
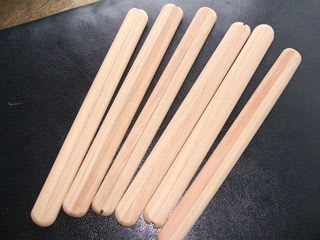
Here are some more on way to completion.
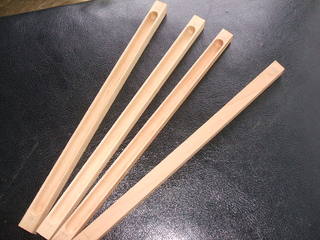
And, I am not exactly
sure what I am supposed to be doing with respect to these...
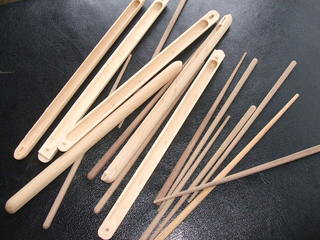
These are all shorter containers, for eating pretty.
I have about 10 of these, and that might be enough...
By the way, what follows shows the grand scheme I have
been chasing with the chopstic containers.
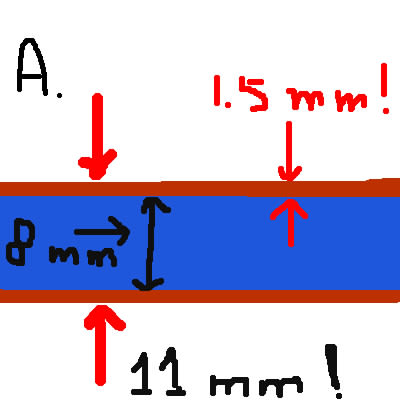
8mm is the trench width, 11mm starting material width, and
1.5mm wall thickness, and at the coating ready stage
the wall thickness may be down to 1mm, and that is
exactly the reason why I call them "skins"...
Part of my time today was spent on bringing the
chopstics to completion, as shown bellow.
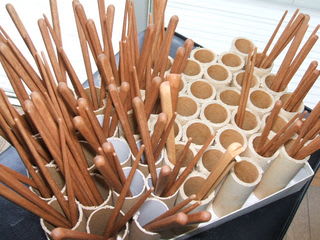
Of course, you have seen something similar, but,
with this there is no demarcation, indicating
that all of the postcoating work is now complete.
I tell you a little bit about postcoating work.
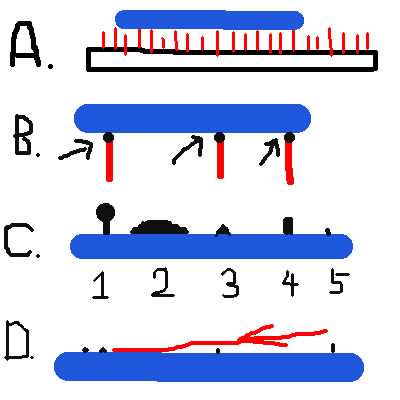
Here, A is my nail bed in schematic, with a blue bar
sitting over it, with a few contacts with the nails,
because nail height is not constant.
It also does mean that always my pollyurethane
coating is deposited at the nail heads, during the
drying stage...
B's red bars are the nails, and the black dots are
the depositions.
C is telling you the kind of shapes they can form.
1, 2, 3, and 5 are the easiest to remove with a sharp edge.
4 is the more difficult, and the 2 is not as a result of
contact, but an superfluous liquid solidifying.
I call these rather extensive obstacles "pools",
sometimes 'swamps", but they are not that difficult to tackle.
Once you have removed larger obstacles, you then slide across
the whole length of your chopstic with a sharp edge, at a
glancing angle, as depicted in D.
Why, because you cannot see them with your eyes. In what follows,
A is telling you that the texture of it makes it hard to
find them, them being the black dots...
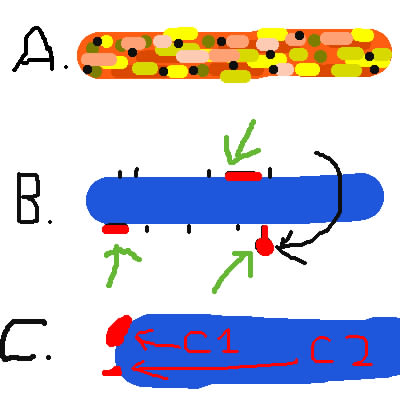
In B the larger blobs in red are easy to find ones.
As in C, you also need to be watching out for defects
on the ends, both thickest and thinnest. So, can you imagine
how time consuming the whole business of all surface
inspection is?!
That is how quite a proportion of my time is spent...


I was comfortable, not too warm, in fact, it was
cold? I had to wear long sleeves, both up and
down...
Output for today? Here you are!

Here are some more on way to completion.

And, I am not exactly
sure what I am supposed to be doing with respect to these...

These are all shorter containers, for eating pretty.
I have about 10 of these, and that might be enough...
By the way, what follows shows the grand scheme I have
been chasing with the chopstic containers.

8mm is the trench width, 11mm starting material width, and
1.5mm wall thickness, and at the coating ready stage
the wall thickness may be down to 1mm, and that is
exactly the reason why I call them "skins"...
Part of my time today was spent on bringing the
chopstics to completion, as shown bellow.

Of course, you have seen something similar, but,
with this there is no demarcation, indicating
that all of the postcoating work is now complete.
I tell you a little bit about postcoating work.

Here, A is my nail bed in schematic, with a blue bar
sitting over it, with a few contacts with the nails,
because nail height is not constant.
It also does mean that always my pollyurethane
coating is deposited at the nail heads, during the
drying stage...
B's red bars are the nails, and the black dots are
the depositions.
C is telling you the kind of shapes they can form.
1, 2, 3, and 5 are the easiest to remove with a sharp edge.
4 is the more difficult, and the 2 is not as a result of
contact, but an superfluous liquid solidifying.
I call these rather extensive obstacles "pools",
sometimes 'swamps", but they are not that difficult to tackle.
Once you have removed larger obstacles, you then slide across
the whole length of your chopstic with a sharp edge, at a
glancing angle, as depicted in D.
Why, because you cannot see them with your eyes. In what follows,
A is telling you that the texture of it makes it hard to
find them, them being the black dots...

In B the larger blobs in red are easy to find ones.
As in C, you also need to be watching out for defects
on the ends, both thickest and thinnest. So, can you imagine
how time consuming the whole business of all surface
inspection is?!
That is how quite a proportion of my time is spent...


