Today, I think I will talk about chopstics making
at some length, but before that take a look at the
following image.
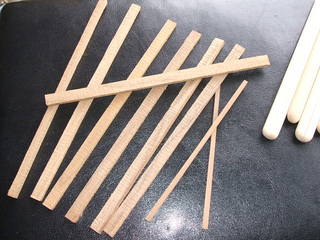
These are redundancies from my earlier work. I have
been wondering all this while how I might best make
use of them. What follows is the outcome.
Incidentally, I will show you how these redundancies
came about in the first place, with the first of
my illustrations for today.
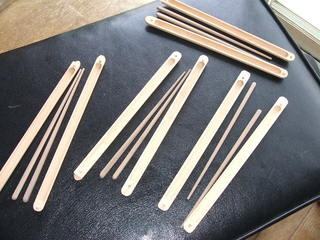
Only 4 pairs of shorter chopstics! It is pretty much
obvious that I did not divert a lot of my attention
to my work! Cannot help it!, with games going on
all the time and my wife wanting to go shopping with
me. One outcome of that is the next image.
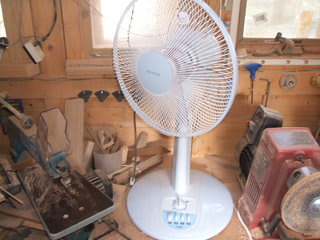
Rather simplistic way of getting myself a little
more comfortable, but it did wonder! I noticed
two things there.
First of all I was getting the breeze from behind.
That means that the dusts are blown away from me,
not depositing on my clothes and my arms.
Secondly, I was feeling very comfortable. I bought
a bucket, also, so that dusts covered arms of mine
can be dipped into water, for dusts removing and
generally lowering my body temperature, at least
partially...
I now have both! However, times spent on my
work will continute to be less than usual, due to
the games!
Now, let me start...
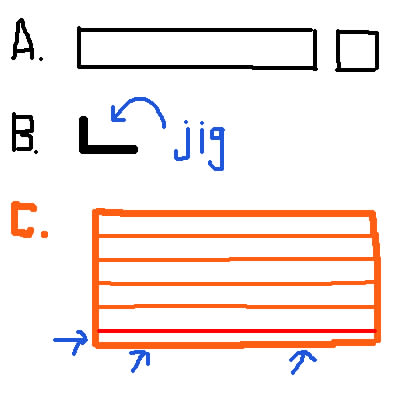
A. of this illustration is showing you the side view of
the chopstic to be, with its cross-section on the right.
It is a rectangular piece of bar, very simple.
B. is showing you the cross-section of my jig, made of
alminium, bought at a DIY nearby. You then set it against a piece
of a wooden block, one at a time, after one cutting process.
That is to say that once you have separated the first rectangular
piece from the block, you set the jig again and draw the
reference line with a pencil.
In the end you have several pieces of these rectangular bars
for forming them into chopstics. However, you are often left with
an odd-man-out, as indicated by the blue arrows.
This is how my redundant pieces came about, as shown in the
first photo of today. I am pleased that I did not throw them
away! They have been turned into chopstics!
Now, take a look at the next.

With this, A. is the schematic side view of my belt sander. In the middle is the flat bench, and on either side of it are the rollers
(in red) and the belt runs over the bed in the direction
indicated by the horizontal green arrow. You can also see
two gaps indicated by A and B. These are where problems
arise, particularly at the gap B.
In order to lose mas you need to press your work down
onto the flat bench, but at the gaps there is no effective
pressure exerted on the sanding belt.
In the end you end up with something like B. in
this illustration. Blue arrows indicate where
mas has been lost, and the red arrow shows the part
where not much mas has been lost. Remember that this is a schematic
and exageration is there...

What this illustration is telling you is that I prepare the rough
shape of my chopstic to be by my disc sander. Initially, the
piece is made into a long rectangular wedge.
Then, about two thirds of the 4 edges are sanded out, making the
narrower end looking like octagonal in cross-section, with red parts
having been rounded.
At this stage of the game, the whole thing is still too fat,
too thick, and the surface covered by horrible scurs,
due to the angle of holding the piece against the disc...
Scurs go at angles to the normal grain direction!
What then you will have to do is pretty obvious. That is
to say you use your belt sander to lose further mas,
wanting a long rectangular and tapered piece of wood.
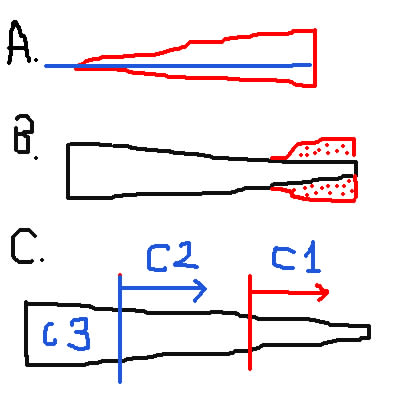
With the illustration above I no longer remember what I
was going to mention with A. Let us forget about this and
take a look at B.
In order to erase the scurs I always start with the thicker
ends, and because of the gap problem, you always end up
with the pointed ends (eventually..., that is) having
redundant mas, as indicated by the red dots. In reality,
it is ever so easy to remove them, by flipping over the
stick and sanding them out.
So, what do you have at this stage? Well, you have a much slimmer
piece of chopstic to be, well defined in all aspects, and without
scurs!
Having reached this stage, I refer you to the C. of the same
illustration. You have to further round the edges. I start with
the portion C1, and this portion will be round in the end
(cross-sectionally, that is).
Next comes the portion C2, press this portion against the
flat bed, fairly hard, so that its cross-section is neither
circular nor square, somewhere halfway between them.
If you do that the section C3's sharp edges are slightly
sanded automatiocally, and inevitably, but that is precisely what you want!
You want this section to be square in cross-section, but
not to the extent of its sharp edges hurting your hand!,
when you eventually hold your chopstics.
There are other minor details, but this is what my
chiopstics making process is all about!


at some length, but before that take a look at the
following image.

These are redundancies from my earlier work. I have
been wondering all this while how I might best make
use of them. What follows is the outcome.
Incidentally, I will show you how these redundancies
came about in the first place, with the first of
my illustrations for today.

Only 4 pairs of shorter chopstics! It is pretty much
obvious that I did not divert a lot of my attention
to my work! Cannot help it!, with games going on
all the time and my wife wanting to go shopping with
me. One outcome of that is the next image.

Rather simplistic way of getting myself a little
more comfortable, but it did wonder! I noticed
two things there.
First of all I was getting the breeze from behind.
That means that the dusts are blown away from me,
not depositing on my clothes and my arms.
Secondly, I was feeling very comfortable. I bought
a bucket, also, so that dusts covered arms of mine
can be dipped into water, for dusts removing and
generally lowering my body temperature, at least
partially...
I now have both! However, times spent on my
work will continute to be less than usual, due to
the games!
Now, let me start...

A. of this illustration is showing you the side view of
the chopstic to be, with its cross-section on the right.
It is a rectangular piece of bar, very simple.
B. is showing you the cross-section of my jig, made of
alminium, bought at a DIY nearby. You then set it against a piece
of a wooden block, one at a time, after one cutting process.
That is to say that once you have separated the first rectangular
piece from the block, you set the jig again and draw the
reference line with a pencil.
In the end you have several pieces of these rectangular bars
for forming them into chopstics. However, you are often left with
an odd-man-out, as indicated by the blue arrows.
This is how my redundant pieces came about, as shown in the
first photo of today. I am pleased that I did not throw them
away! They have been turned into chopstics!
Now, take a look at the next.

With this, A. is the schematic side view of my belt sander. In the middle is the flat bench, and on either side of it are the rollers
(in red) and the belt runs over the bed in the direction
indicated by the horizontal green arrow. You can also see
two gaps indicated by A and B. These are where problems
arise, particularly at the gap B.
In order to lose mas you need to press your work down
onto the flat bench, but at the gaps there is no effective
pressure exerted on the sanding belt.
In the end you end up with something like B. in
this illustration. Blue arrows indicate where
mas has been lost, and the red arrow shows the part
where not much mas has been lost. Remember that this is a schematic
and exageration is there...

What this illustration is telling you is that I prepare the rough
shape of my chopstic to be by my disc sander. Initially, the
piece is made into a long rectangular wedge.
Then, about two thirds of the 4 edges are sanded out, making the
narrower end looking like octagonal in cross-section, with red parts
having been rounded.
At this stage of the game, the whole thing is still too fat,
too thick, and the surface covered by horrible scurs,
due to the angle of holding the piece against the disc...
Scurs go at angles to the normal grain direction!
What then you will have to do is pretty obvious. That is
to say you use your belt sander to lose further mas,
wanting a long rectangular and tapered piece of wood.

With the illustration above I no longer remember what I
was going to mention with A. Let us forget about this and
take a look at B.
In order to erase the scurs I always start with the thicker
ends, and because of the gap problem, you always end up
with the pointed ends (eventually..., that is) having
redundant mas, as indicated by the red dots. In reality,
it is ever so easy to remove them, by flipping over the
stick and sanding them out.
So, what do you have at this stage? Well, you have a much slimmer
piece of chopstic to be, well defined in all aspects, and without
scurs!
Having reached this stage, I refer you to the C. of the same
illustration. You have to further round the edges. I start with
the portion C1, and this portion will be round in the end
(cross-sectionally, that is).
Next comes the portion C2, press this portion against the
flat bed, fairly hard, so that its cross-section is neither
circular nor square, somewhere halfway between them.
If you do that the section C3's sharp edges are slightly
sanded automatiocally, and inevitably, but that is precisely what you want!
You want this section to be square in cross-section, but
not to the extent of its sharp edges hurting your hand!,
when you eventually hold your chopstics.
There are other minor details, but this is what my
chiopstics making process is all about!


