


愛用のダイヤミルですが欠点としてはカスが溜まること。
挽き具合や耐久性については文句無しです、部屋のオブジェとしてもお気に入り
である。
気にしない人は掃除なんかしないだろうけど私は1年に一回は分解掃除を
しております。(以前にも記事にしています)

まずは調整ネジを外します。

パイプ状のパーツを引っ張り出します。

バネを引き出します。

ハンドルはプラスネジを緩めると抜けます。

本体のプラスネジを外します。

中身がゴソッと取れます。

歯ブラシか何かで擦れば綺麗になります。
組立は逆の手順ですが仮組して突っ込むといいです。

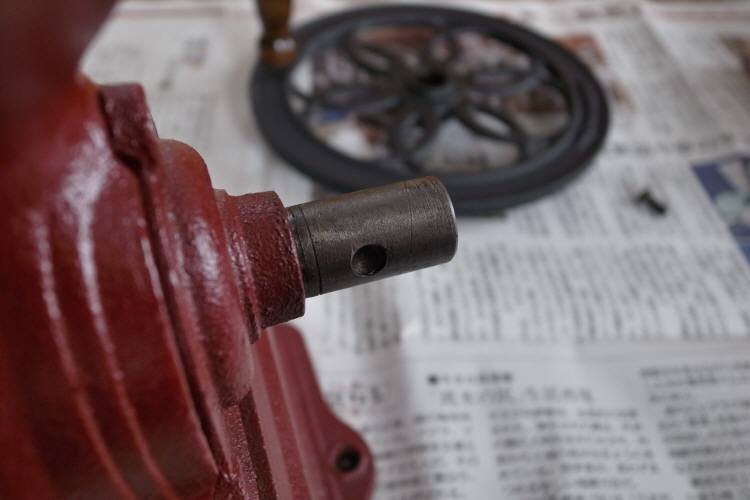
シャフトと本体が当る部分にはオイルを刺した方がいいでしょう。
カスがこれだけ入ってました。

気分的にもスッキリするね、コーヒーも美味いです。
挽き具合や耐久性については文句無しです、部屋のオブジェとしてもお気に入り
である。
 | カリタ 鋳鉄製ダイヤミルレッド (FML2001) |
| クリエーター情報なし | |
| Kalita (カリタ) |
気にしない人は掃除なんかしないだろうけど私は1年に一回は分解掃除を
しております。(以前にも記事にしています)
まずは調整ネジを外します。
パイプ状のパーツを引っ張り出します。
バネを引き出します。
ハンドルはプラスネジを緩めると抜けます。
本体のプラスネジを外します。
中身がゴソッと取れます。
歯ブラシか何かで擦れば綺麗になります。
組立は逆の手順ですが仮組して突っ込むといいです。
シャフトと本体が当る部分にはオイルを刺した方がいいでしょう。
カスがこれだけ入ってました。
気分的にもスッキリするね、コーヒーも美味いです。


 20W Type-C×1 / USB-A×1 【 iPhone / And...")


 山クッカー 角型 3 No.667705")
 フュアーハンドランタン 276 ジンク 【正規輸入品】")
 パニアバッグ [P-115] ブラック 左右セット")

 B17 NARROW ナロー サドル【並行輸入品】 (ハニー)")
 LEDライト ヘッドライト URBAN アーバン ブラック HL-EL145 自転車")
 セーフティライト リフレックスオート 自動点灯消灯リフレクター TL-LD570R ライ...")

 VIP")
")
※コメント投稿者のブログIDはブログ作成者のみに通知されます