何も153系や165系に、ただ取り付けるのでは有りません。
このライトユニットを古い製品の電球を使った113系や115系に使おうというお話です。

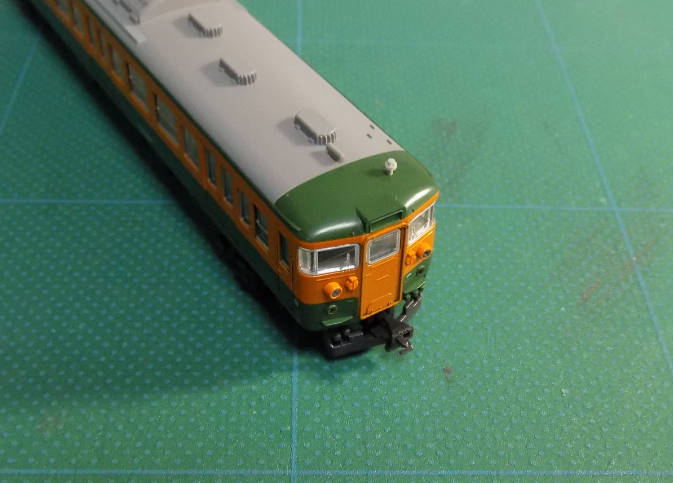
白羽の矢が当たったのは115系湘南色 今回は信越線に仕立てた車両です。
最初に上下を分解します。

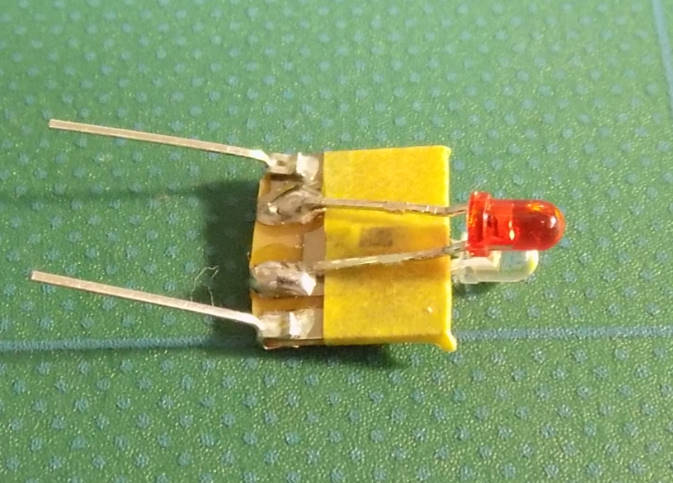
ライト部

付いていた電球の基盤を外しLEDの基盤を付けようとすると
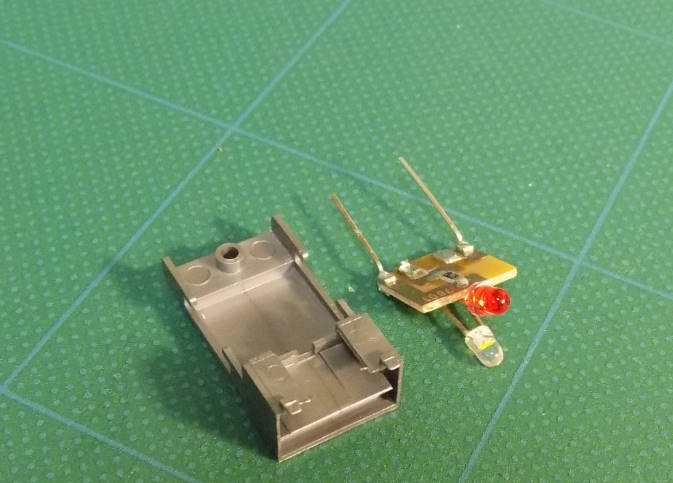
この様にテールライト用のLEDが首をつってしまいます。

ここからが加工の本筋
ヘッドライトを起こしテールライトの交換をしやすくします。 何べんも曲げ伸ばしをすると折れるので注意が必要です。

20W程度の半田鏝を使いテールライトを抜き取ります。
基板裏側のLEDの足が当たる所を絶縁テープ等を貼ってショートしない様にします。 (作例ではマスキングテープ使用)

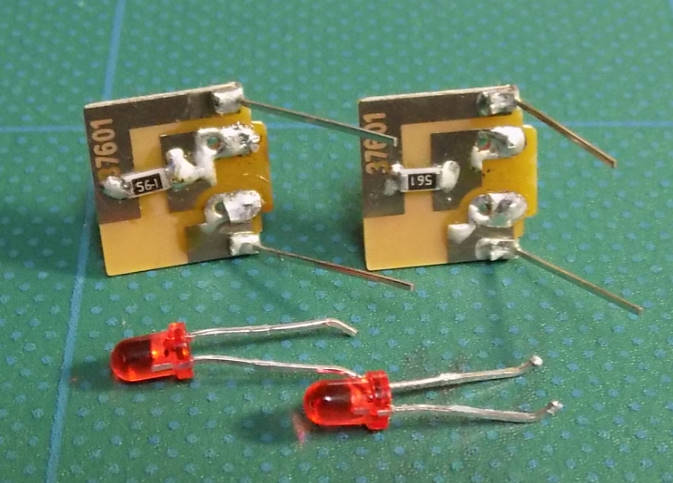
このように半田付けしてライト基盤の完成です。 この時、極性を間違わない様にします。
ライトケースのテール側を切り広げます。 バリが残っていますが当然綺麗に取り除きます。
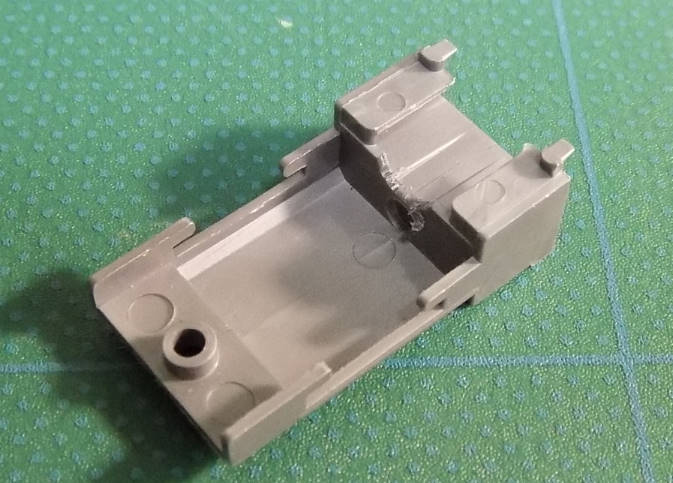
左側が未加工品

加工したライトケースに収め

床板に元通りに取り付けます。


ここで点灯テスト ヘッド側
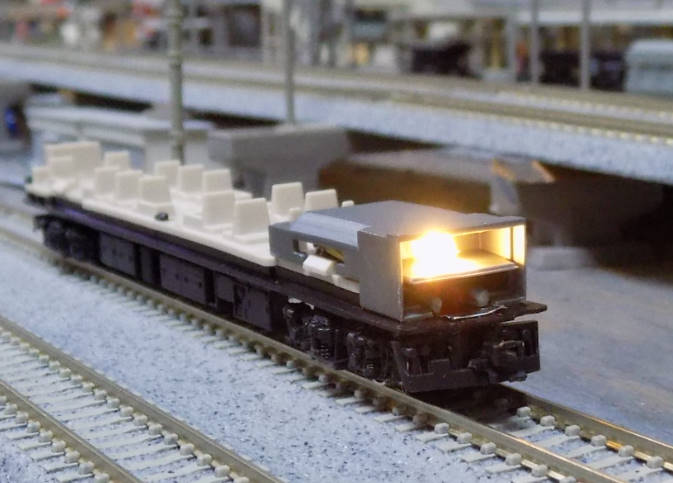
テール側 良いようです。

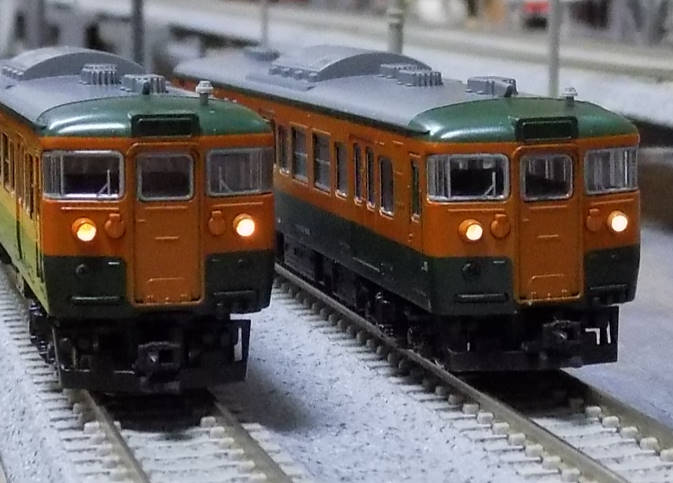
ボディを被せ再びヘッド側
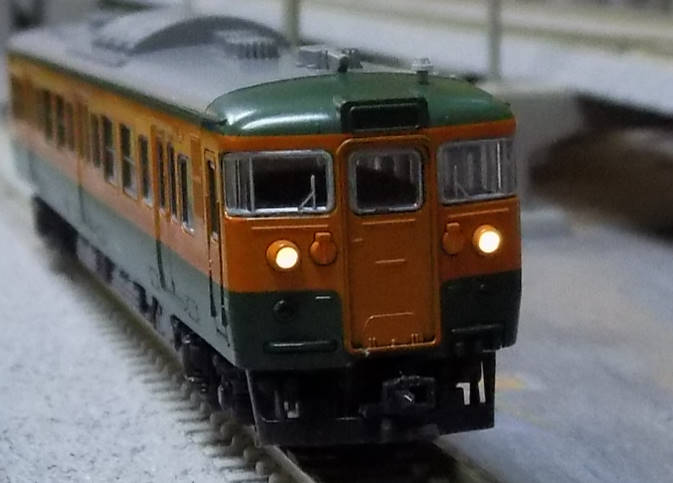
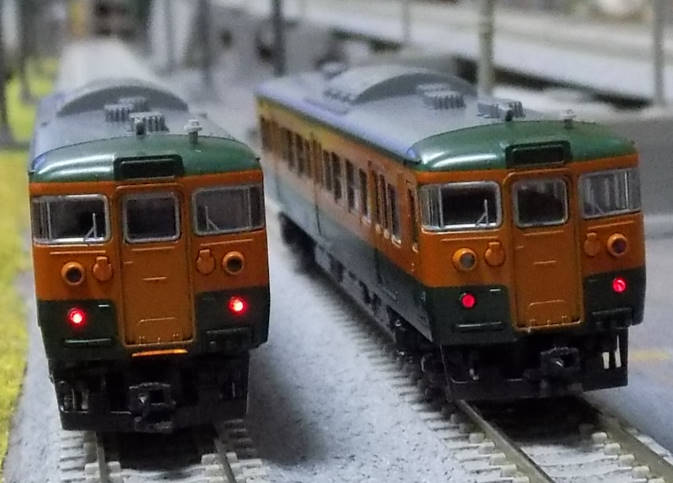
テール側

未交換車両との比較 左側が電球品(次の写真も)
ヘッド側
テール側
今度は交換品の前後進

これで、出来上がりです。
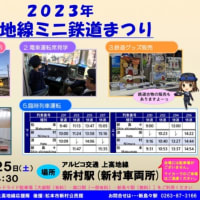
153・165系だけでなく旧式の電球を使用した113系や115系等へ対応できます。
今回の作例では信越線の115系でクモハ115・モハ114・モハ115・モハ114・クハ115の5連に入れてみました。

今回はここ迄 153系のライトユニットを使ったお話でした。
行きがかり上、信越線荷電併結列車に続く
このライトユニットを古い製品の電球を使った113系や115系に使おうというお話です。
白羽の矢が当たったのは115系湘南色 今回は信越線に仕立てた車両です。
最初に上下を分解します。
ライト部
付いていた電球の基盤を外しLEDの基盤を付けようとすると
この様にテールライト用のLEDが首をつってしまいます。
ここからが加工の本筋
ヘッドライトを起こしテールライトの交換をしやすくします。 何べんも曲げ伸ばしをすると折れるので注意が必要です。
20W程度の半田鏝を使いテールライトを抜き取ります。
基板裏側のLEDの足が当たる所を絶縁テープ等を貼ってショートしない様にします。 (作例ではマスキングテープ使用)
このように半田付けしてライト基盤の完成です。 この時、極性を間違わない様にします。
ライトケースのテール側を切り広げます。 バリが残っていますが当然綺麗に取り除きます。
左側が未加工品
加工したライトケースに収め
床板に元通りに取り付けます。
ここで点灯テスト ヘッド側
テール側 良いようです。
ボディを被せ再びヘッド側
テール側
未交換車両との比較 左側が電球品(次の写真も)
ヘッド側
テール側
今度は交換品の前後進
これで、出来上がりです。
153・165系だけでなく旧式の電球を使用した113系や115系等へ対応できます。
今回の作例では信越線の115系でクモハ115・モハ114・モハ115・モハ114・クハ115の5連に入れてみました。
今回はここ迄 153系のライトユニットを使ったお話でした。
行きがかり上、信越線荷電併結列車に続く