


ヘッドプレートの接着です。プレートをラフカットして、

ヘッドストックとプレート双方にタイトボンドをつけて、


クランプしていきます。


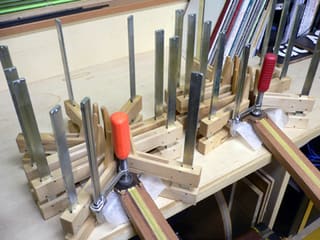
この後、ヘッドストックの成形・バインディング加工・インレイ加工と工程を勧めていきます。そしていよいよボディとの接合となるのです。
お問い合わせ ABE GUITARS
ヘッドストックとプレート双方にタイトボンドをつけて、
クランプしていきます。
この後、ヘッドストックの成形・バインディング加工・インレイ加工と工程を勧めていきます。そしていよいよボディとの接合となるのです。
お問い合わせ ABE GUITARS


