


自転車のメンテナンススタンドは色々な物が販売されていますが
使い易く 持ち運びのし易い物を作っています
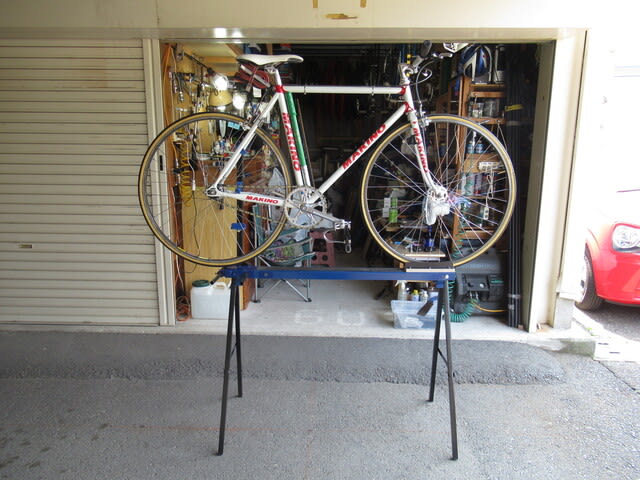
今回の整備台は後輩の自転車競技者から 部材の持込で製作を依頼されました
最近の全日本クラスの大会ではナショナルチームのメカニック等もこの様な物を使っています
市販品では無いので それぞれが工夫しています 前回までに基本部分は出来上がっています
もう少し手を加えたら完成です
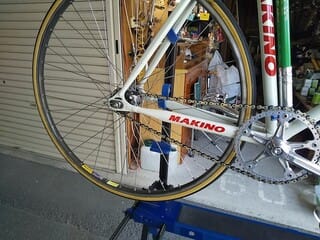
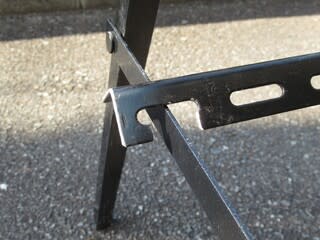
この整備台の要の部分です 自転車の保持は MINOURA の
市販品スタンドに手を加えて使っています

スタンドの脚は曲げ加工し 取り付け部は知恵を絞った部分で
ナットにタップを建てたり溶接したりの加工を施し
5mm のボルトを緩める事でスタンドの脱着が出来ます

自転車を正立させ腰の高さで 整備が出来るメンテ台ですが
ここに工具類を整理出来る様に考えます

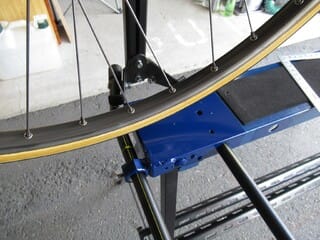
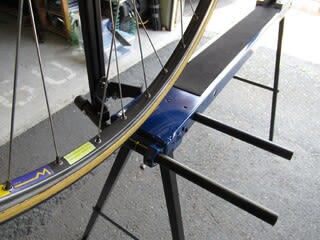
整備台の足元に 2本のアングルバーを据えていますが
組み立て棚を作る為の 市販品を用意しそれを
切断して使っています取り外しも可能です
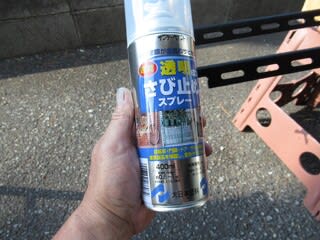
アングルの切断面は面取りをし 錆止めをスプレーします
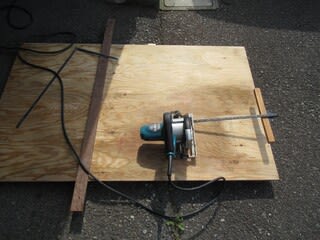
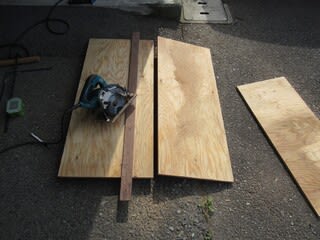
今日のメインの仕事、工具置き場を作ります 12mm の
構造用コンパネです 倉庫にこれが有ったので使います
必要な大きさにカットします
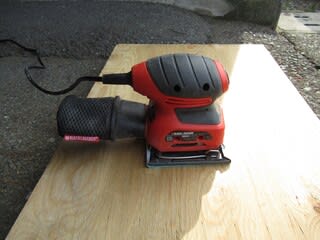
このコンパネは表面の手触りが荒いので オービタルサンダーで
表面を良く研磨します
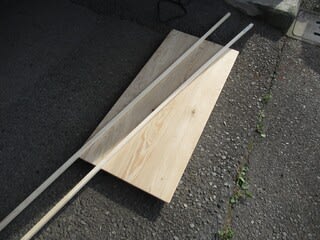

15mm 角の紐を用意しました これを使います

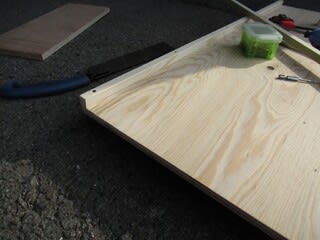
先程用意したコンパネの周囲に 寸法切りした紐を
木工ボンドとコーススレッドで取り付けます

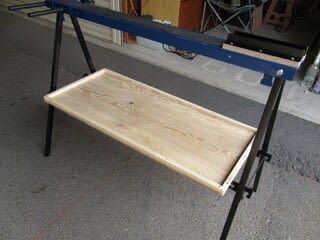
用意出来た木製棚を 整備台の足元に置きます
特に固定はしていません
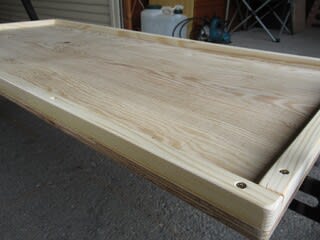

棚の周囲の紐はこんな感じです 小さな部品を置いた際の
落下防止程度に付けています
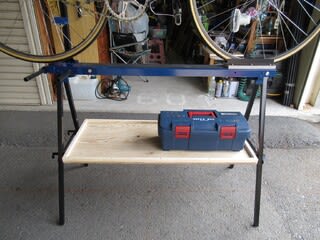

私が用意している遠征用の工具ボックスを置いてみました
製作依頼者の工具箱の大きさを聞いてそれに合せています
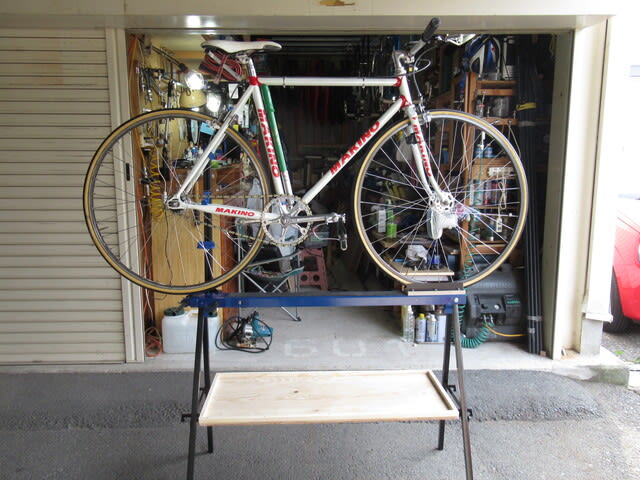
これで完成です
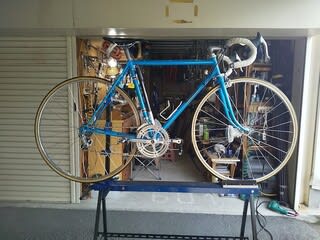

ロードレーサーを試しに置いてみましたが大丈夫でした
これにも使えます
このタイプの整備台は特に前ギアを交換する時に腰の負担が少なくて良いと言っています
完成後直ぐに引き渡しましたが、聞いていた希望は全てクリアしていた様で良かったです
また何処かの試合会場で見て頂けるかも分りません 製作時間は三日でした
画像が届きました

メンテ台を引渡し後 早速トラック競技大会の会場で使っている画像を送ってくれました
1台用の後部型スタンドを使うのが難しい Cervélo が乗っています これが使えれば大丈夫
前回の作業 【 自転車整備台 製作 前輪振れ止 】 - Kinoの自転車日記
使い易く 持ち運びのし易い物を作っています
今回の整備台は後輩の自転車競技者から 部材の持込で製作を依頼されました
最近の全日本クラスの大会ではナショナルチームのメカニック等もこの様な物を使っています
市販品では無いので それぞれが工夫しています 前回までに基本部分は出来上がっています
もう少し手を加えたら完成です
この整備台の要の部分です 自転車の保持は MINOURA の
市販品スタンドに手を加えて使っています
スタンドの脚は曲げ加工し 取り付け部は知恵を絞った部分で
ナットにタップを建てたり溶接したりの加工を施し
5mm のボルトを緩める事でスタンドの脱着が出来ます
自転車を正立させ腰の高さで 整備が出来るメンテ台ですが
ここに工具類を整理出来る様に考えます
整備台の足元に 2本のアングルバーを据えていますが
組み立て棚を作る為の 市販品を用意しそれを
切断して使っています取り外しも可能です
アングルの切断面は面取りをし 錆止めをスプレーします
今日のメインの仕事、工具置き場を作ります 12mm の
構造用コンパネです 倉庫にこれが有ったので使います
必要な大きさにカットします
このコンパネは表面の手触りが荒いので オービタルサンダーで
表面を良く研磨します
15mm 角の紐を用意しました これを使います
先程用意したコンパネの周囲に 寸法切りした紐を
木工ボンドとコーススレッドで取り付けます
用意出来た木製棚を 整備台の足元に置きます
特に固定はしていません
棚の周囲の紐はこんな感じです 小さな部品を置いた際の
落下防止程度に付けています
私が用意している遠征用の工具ボックスを置いてみました
製作依頼者の工具箱の大きさを聞いてそれに合せています
これで完成です
ロードレーサーを試しに置いてみましたが大丈夫でした
これにも使えます
このタイプの整備台は特に前ギアを交換する時に腰の負担が少なくて良いと言っています
完成後直ぐに引き渡しましたが、聞いていた希望は全てクリアしていた様で良かったです
また何処かの試合会場で見て頂けるかも分りません 製作時間は三日でした
画像が届きました
メンテ台を引渡し後 早速トラック競技大会の会場で使っている画像を送ってくれました
1台用の後部型スタンドを使うのが難しい Cervélo が乗っています これが使えれば大丈夫
前回の作業 【 自転車整備台 製作 前輪振れ止 】 - Kinoの自転車日記


また、倉庫の奥行きもたっぷりで整頓も行き届きうらやましい限りです。
家族のママチャリの両足スタンドの交換に躊躇する身の上では中々…
アイデアは湧くのですが丁寧な施工が出来ず、雑な性格がそのまま出てしまいます
ガレージの確保、その為に他の事を犠牲にしてでも自分自身がやる気にならないと出来ない事ですね
自転車が全てと言う訳ではないですが、本職の仕事以外は自転車の為に使っています